The best gels and creams for dry, problem, oily, sensitive, combination, normal skin
Facial skin needs regular cleansing. But to preserve youth and beauty, it is important to pay attention to the components...
As a rule, at the age of about one year, children develop their first interest in creativity. They begin to scribble with a pencil with pleasure, they become interested in pinching off pieces of plasticine, and if you introduce your baby to glue, he will be completely delighted. Any endeavors and talents in a child need to be developed, so now is the time to offer your child the first lessons in and applications.
The basic rule for creative activities with a child at this age is give only those tasks that are feasible for the baby . Your task is to instill interest in creativity, and not discourage it. If you offer your child crafts that are too difficult and inappropriate for his age, this will most likely lead to the fact that the child will not succeed in anything, and he will simply watch as you do everything for him. Classes should be held in such a way that the main part of the work is done by the child, and not by the mother.
It is important to remember that creative activities with a child of this age should not last more than 5-10 minutes. Always focus on the child's mood. If a child loses interest in work, this most likely means that it is too simple or, conversely, too difficult for him. Or you delayed the lesson, and the baby is simply tired.
I divided all applications and crafts for children 1-2 years old into several groups in order of increasing difficulty:
Before making any crafts and compositions, first you just need to introduce your child to glue. The child must grasp the very essence of the application and remember the basic scheme of actions: first we smear a piece of paper with glue, then turn it over, apply it to another piece of paper and smooth everything thoroughly with the palm of our hand so that it holds tighter.
At first, you can simply glue pieces of colored paper onto the base sheet. Most likely, your baby will really like this activity. At this age, children are still more attracted to the process itself than the result. We will work on artistic paintings later.
Your entire focus should now be on teaching your child correct appliqué technique . And it is very important to do this right now, so that you don’t have to relearn it later. What is the correct technique?
Firstly, show your child how to hold a glue stick correctly. As a rule, children tilt the glue stick, which only complicates the spreading process. Teach your child to place the glue strictly perpendicular to the leaf!
Secondly, explain to the child that when he smears a piece of paper with glue, he must hold it with the palm of his left hand (if the child is right-handed). Most likely, at first the piece of paper will jump out from under the baby’s finger, so lightly fix his palm with your hand. Just don’t do everything completely for the child, he must participate!
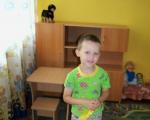
My daughter Taisiya became acquainted with glue at about 1 year 3 months. At first we just haphazardly glued small pieces of paper into the album. My daughter absolutely loved this activity. A little later, the idea struck me that I could combine business with pleasure and glue geometric shapes, voicing their names while gluing. At that time, Taya already knew all the flat geometric shapes, even such as the trapezoid and parallelogram (we studied them with the help of ), so when doing appliqué, we simply memorized them.
After the child has become a little more comfortable with the appliqué technique itself, you can begin to create your first crafts. I would like to bring to your attention a few simple ideas for applique crafts. All of them imply the free arrangement of parts on the sheet. Those. the child will not need to go to any specific place, but simply stick it wherever his heart desires.
Important! Give your child the opportunity to decide for himself exactly where on your Christmas tree the ball will hang or where in the aquarium the fish will swim. I noticed that I always wanted to improve my daughter’s creativity, to make everything look nice and even. But if you think about it, why do this? We don’t want to exhibit our works for exhibition. It’s better to let the child be sure that he glued it the way he wanted, and no one interfered. Sometimes you can just give a hint and explain why the way you suggest will turn out more beautiful.
I think that based on the ideas presented, you can easily come up with many of your own options. Also in the article there is an opportunity to download the simplest b/w templates for the presented crafts. If you wish, you can pre-color them.
Mom will need to prepare all the necessary elements for the applique in advance.


Vitamins in a jar for girls

Berries in a basket


Now the baby faces a more difficult task; he needs not only to glue the appliqué element, but also to get to a specific place. In my experience, you need to move on to such crafts no earlier than 1.5 years. But everything, of course, is individual.
First, on the base sheet, draw the outlines of the objects that you will glue. This will make it easier for the child to understand what should happen. Then you can gradually move on to gluing without contours.
So, here are some slightly more complex crafts with children 1-2 years old:


Dandelions from cotton pads


House made of blocks

Christmas tree made of triangles . Glue the triangles one above the other.


Cut up pictures from magazines . You can cut out pictures from magazines, cut them into large pieces that your baby can understand, and then glue them together with your child. For example, you can cut out a car, a face or a person's entire figure.


 By the way, ideas for crafts on New Year's and winter themes can be found.
You can also use various aids in your creative activities. They have a lot of ready-made ideas; before the lesson you will only need to cut out all the necessary parts or use ready-made stickers. For example, we used the following publications:


And in conclusion, I would like to say one more very important point. One of the main principles of the world-famous school is to provide the child with as much freedom and independence as possible. And this does not mean at all that you need to leave the child to his own devices: “Go, play as you want!” This means that the baby needs to be taught to play so that he can subsequently do it on his own. So that he could prepare for the game himself, he could handle the materials himself, and he could clean up after himself. That's why, When you engage in creativity with your child, be sure to immediately accustom him to certain rules .
For example, we have this order: first, together we go to lay a special tablecloth on the table (it can be a modeling board), then we take out all the necessary supplies (glue, album, colored paper) from our “creative” cabinet. After working in the reverse order, we put everything in its place. We apply these rules from 1 year 3 months. Now, a year later, I can say that my daughter knows all the rules well (although she already mastered them a month later) and performs them without any resistance. There are times when she cleans up after herself without a reminder, but mostly with a reminder, of course.
I wish you and your baby creative success! I hope you find our craft ideas useful. I will be glad to make friends with you on social networks, come in
If when you hear the word applique you imagine a picture glued together from paper, then you don’t know much about this fun and beautiful view creativity. We offer you a large selection of ideas for making applique for children. Broaden your horizons and delight your child with a useful and interesting activity.
The application appeared quite a long time ago. Nomadic peoples of various countries created stories using pieces of leather. They decorated their tents with images of wild animals, which is why, in the light of the hearth, they seemed to come to life and turn into a fairy-tale kingdom. From Latin the word application is translated as application. The technique consists of attaching details to the main background. There are many different types applications. Depending on the structure of the selected material, flat and three-dimensional crafts are distinguished. Volume can be achieved by using waste material, felt, cereals.


Depending on the image, applications are divided into plot, decorative and subject. Scene pictures depict action, subject pictures show static objects, and decorative pictures show an ornament. The colors are divided into monochrome, black and white and color.
Almost any material can be used to create an applique - paper, cardboard, beads, fabric, natural materials, cereals, waste materials.


Moreover, not only children work in this technique; take a look at what applications are created by adult craftsmen.


This technique allows you to glue or sew details onto clothing, making it unique.

Children of any age will benefit from creating applications.
Prepare thoroughly for the lesson. Kids will need ready-made pieces made of colored paper or cardboard and your instructions for placing them.
Speak out each action, name the color and shape of the part to be glued. If this is a subject application depicting an animal, then name the parts of its body.

Children are greatly delighted with the cut-out applique. Let the baby pick up colorful scraps and stick them on the giraffe’s body. You can make leaves on a tree and lay out various figures.


If your child still doesn't know how to use scissors, it's time to teach them using a fun lesson. Start by cutting strips, they will be suitable for making the needles of such a wonderful hedgehog.


Preschoolers should already be able to use scissors, but they find it difficult to draw even details. Therefore, you need to prepare templates that the child can trace on colored paper and cut out independently. Invite the fidget to create an unusual composition. Let him draw a picture and decorate it with various materials. Create an applique from cereals, pasta, buttons.


It is not so easy to attract younger schoolchildren to classes. Use a little trick by offering to create a craft from any unnecessary thing in his room. Rest assured, he will bring you a mountain of precious “junk” that you can give a second life to.
This rule also applies to girls. With your daughter, collect unnecessary hairpins, buttons and beads and let the little one imagine what she can do with them. Here are some useful ideas:


For 1st grade, both plot and thematic applications using various materials are suitable, geometric shapes.


For grade 4, you can cut strips from colored paper and make a picture with quilling elements.

Work with your children to create applications depicting the seasons, come up with beautiful and unusual names for them, for example, “Zimushka-Winter” or “Golden Autumn”.


If there are holidays ahead, time your activity to coincide with them. Below you will see examples of thematic applications that can be created for any holiday.
New Year and Christmas crafts:


For the best dad on Defender of the Fatherland Day:


For Victory Day:


For Russia Day:


In this section of the article you will find video tutorials from which you can get ideas for conducting a fun appliqué lesson with your child.
What to do with children 3-4 years old that would be interesting and useful for their development? Of all the variety of activities that develop the creative thinking of a boy and a girl, appliqué made from paper or other suitable material will be very useful and interesting. And regardless of the result of the work (it turned out beautifully or not so well), the child is happy that he did it himself. Applique with children 3-4 years old is a creative activity that shapes the child’s aesthetic taste.
At 3-4 years old, the baby already speaks well, he has heard many fairy tales, been to the zoo or seen animals in the village, is familiar with many types of transport, and has observed the creative or labor process. His range of knowledge is quite wide. Everything that 3-4 year old children see, hear about, and play with can be used as a starting point for creativity. This can be used in developmental appliqué activities.
You can start appliquéing from the age of 2. Then by the age of 4 this activity will become a favorite. And you can decorate a child’s room with ready-made applications or give them as a gift to grandparents.
Light cutouts for preschool children 3-4 years old can be classified according to the method of work and type of materials.
It is very simple so that the child can perform maximum actions with minimal assistance from an adult.
. This is a suitable type of cutting for children 3 years old. The details of the composition are cut out of colored paper along the outlined contour and glued onto the base cardboard. The main thing in this type of application is accuracy. Strawberry applique is easy to make. Cut out a strawberry from red paper along the contour outlined by the adult and glue it onto the cardboard. Then cut out a tail from green paper or use an already cut one and also glue it to the cardboard.
For 3-year-old children, everything turns out awkwardly, but the good thing is that they learn to work with scissors, train their arms and fingers. It develops fine motor skills, which is associated with mental development. And the seeds on the strawberries can be painted with yellow paint using a brush.
Details for paper applique for children 3-4 years old should be made large. It should be comfortable for the child to pick them up and stick them on.
You can print the picture in detail, cut it out and assemble it, gluing it onto a blank sheet of paper. All actions with scissors and glue must be performed by the baby. The main evaluation criterion is not the level of skill, but the participation itself in creating the work.
 Volume applique. You need a cardboard base; the outline of the future drawing is applied to it. The details of the composition are created from paper, but first they give it volume. You can slightly crumple pieces of colored paper, or you can fill the outline with spirals, accordions, and napkin balls.
Using geometric elements. In it, images and compositions are made up of geometric shapes. The same strawberry can be a simple red triangle with a green tail in the form of an even rectangular stick. In a rectangular aquarium, fish triangles or quadrangles can swim, which are easy for kids to cut out, round pebbles can lie, and long rectangular algae can grow.
Torn applique. The outline of the design is first drawn onto colored cardboard. You can print out the contours of the applique for children, or you can ask your child to draw it himself. The peculiarity of this method is that the parts from colored paper are not cut out, but torn into small pieces, which fill the outline. This is again a great exercise for developing your child's fingers.
For children 4 years old, the degree of difficulty increases. And also the materials for work are not limited to paper.
 Application of grains and cereals. The outline of the drawing is covered with a thin layer of glue and filled with cereals, coffee beans, dry beans, and peas. Such compositions are very loved by children because of their unusual performance.
Using cardboard and plasticine. The basis is colored cardboard. The outline of the picture is filled with plasticine balls, sausages, or the details of the picture are sculpted entirely and stuck to cardboard. This is also an interesting exercise that helps develop the fingers of a 3-4 year old child.
Leaves applique. Both green and colored leaves will work in the fall. The leaves must first be dried. You can use the traditional method of drying the leaves between the pages of books, but this will take some time. And the leaves dried by this method will lose their color: they will be brown. It is better and faster to dry the leaves with a hot iron, placing them between the pages of a newspaper. The color of the leaf is preserved, the material dries quickly, and you can start working on the applique.
Fabric applique. Using the finished template, the details of the design, for example, a bus, are cut out. This will be a blank. It is recommended to pre-soak it with a liquid gelatin solution and dry it. Since the material is fabric, a four-year-old child will not always be able to cut out a bus blank himself; he will need the help of an adult. Then the part is smeared with glue and glued to colored cardboard. This work already looks like a real painting.


 . This is something like a craquelure technique and looks very similar to a mosaic. Therefore it requires patience. Pieces of painted or white shells are laid out along the outlined contour of the design and glued, filling the entire contour, like a mosaic. It is better to choose dark cardboard for the background, so the drawing will look more impressive.
Tear-off applique is well suited for young and middle-aged children, and will also promote the development of motor skills and imagination. Learning the technique of tear applique is not difficult, but you need to use colored paper, glue and the child’s hands.
Teacher: Guys, today we will look at interesting works and try to repeat them.
Shows ready-made cut-out appliqués.
Teacher: Do you know what such work is called? That's right, applique. This word is translated from Latin as “attachment.” This type of art has been known since ancient times; appliqués were made from pieces of leather, paper and fabric, which were glued to a base. The applique was used to decorate clothing, household items and home interiors. Take a close look at the pictures. What material is the applique made of? What gives it such edges? Yes, you can use your hands instead of scissors.
Teacher: Let's also learn how to make cut-out appliqué. Let's make a birch tree. To do this you need:
Torn paper may end up smooth or with fluffy edges. Try tearing the paper in different ways - lengthwise and crosswise, you will notice a certain pattern.
Teacher: I suggest you get ready for work.
Teacher: Let's quickly review the safety precautions together.

Teacher: Now it remains to check whether all the material for work is available.

Children's independent work on making cut-out appliqué.
Teacher: Your works turned out to be wonderful, I hung them in my office. Now continue the sentence:
Cleaning workplaces. The trash is thrown into the bin, the glue is closed, and the remaining paper is folded into a pile.
Teacher: Guys, you did a good job today. Thank you, you are great!

Learn appliqué using a simple paper tearing technique, develop attention, creativity, and fine motor skills.


Mushroom
Material: 
Progress:

Ladybug
Material:
Progress:

Bullfinch
Material: 
Progress:

Winter
Material:
Progress:

Material:
Progress:
When making an application it will be easier to use a template. If you are good at drawing, you can draw the base on paper. When working with children, do not forget to remind them about safety precautions when working with scissors and glue.
Application on the theme: Winter for elementary school
Tear applique made of colored paper “Snowman”. Master class with step by step photos
Natalya Viktorovna Suslova, primary school teacher, Municipal Educational Institution Secondary School No. 7 named after. Admiral F.F. Ushakov, Tutaev, Yaroslavl region.A hand reaches out to the snow -
I'm building a snowman
But while I put my eyes on it,
Everyone's sides melted. L. Golubchikova
He has a carrot nose
And he got used to the snowstorm.
Loves winter and frost.
This is a white snowman. N. Sergiyanskaya
He is neither small nor great,
Snowy white snowman.
His nose is like a carrot
He loves frost very much
In cold weather, it does not freeze.
And spring comes and melts.
What to do, how to be?
How can we preserve it?
Maybe a white refrigerator,
Should I buy it for a snowman? V. Savonchik
From fluffy snow
I'm making a snowman:
In a thick fur coat so as not to freeze,
Even though it’s a carrot nose,
Eyes - coals from the stove,
Two grasping hands.
Here's a shovel and a broom -
Eh, things are about to get busy!
Only the snowy friend is not simple -
He holds a worthy post -
Saves our winter! V. Pavlenyuk
What kind of snowman is this?
The nose is a carrot, the body is snow,
Grew up in the middle of the yard
Where do the kids walk?
Dressed up in a down jacket
Snow-white... . (snowman)
Red nose, a broom in hand.
Lives next to the Christmas tree.
I've been used to the cold for a long time
Our cheerful... (snowman)
With a broom in hand,
With a bucket on his head
I'm standing in the yard in winter. (snowman)
The main children's entertainment in the winter months is sculpting a snow woman or a snowman. The procedure for creating a snowman includes the main points: rolling snowballs that will form the basis of the body and head of the future sculpture, finding a decent hat or cap for the creature’s head (most often an old bucket or jar is suitable for this role), choosing a nose (ideally a carrot , but pebbles or twigs will also do), searching and installing eyes, ears and mouth on the snowman’s face from suitable materials (again, branches, stones, straws, leaves, embers, etc. will be relevant), attaching hands to the snowman and legs You can do all this indoors with your children by creating a wonderful sculpture on a piece of paper.
Dear colleagues, today I would like to present a master class on making a “Snowman” applique from paper using the “tearing” technique.
Materials:
colored paper,
colored cardboard,
simple pencil,
glue, ruler,
markers,
figured hole punch.


Facial skin needs regular cleansing. But to preserve youth and beauty, it is important to pay attention to the components...
KenzoKi Belle de Jour Dream Night Mask Night care from the main cosmetic sybarites The Japanese KenzoKi entered the market with...
I'll start with the basic rule: you don't have to take sports nutrition, but the right supplements will help you faster...

Essentially, there is nothing wrong with any emotion, but some of them can cause problems if not controlled...

It would seem that something new can be invented in the field of tableware production: here is a kettle, here is a frying pan, here is a bicycle...

At least once in their life, every person begins to think about why they have a lot of money, while others, working day and night,...

CONSULTATION FOR PARENTS “FUN EXPERIENCES IN THE KITCHEN.” Prepared and conducted by: MDOBU teacher...

State budgetary educational institution of the city of Moscow Secondary school with...

Crafts from sponges for washing dishes are easy to make, since the material is soft, has a smooth surface, good...
Hello, mother country! I want to talk about something that is very close and dear to me, to share my experience, so...
Modeling is a useful and exciting activity not only for kids, but also for parents. This is an opportunity to spend...

MOSCOW, February 20 - RIA Novosti, Irina Ovchinnikova. Summer camp is a traditional format for children's recreation:...
"TROPICAL RAIN". Participants stand in a circle. The presenter stands in the center: “Now we will all call a warm...

Homeschooling (homeschooling, from the English homeschooling - home education) is popular in the USA and Canada, has...

KenzoKi Belle de Jour Dream Night Mask Night care from the main cosmetic sybarites The Japanese KenzoKi came out...
I'll start with the basic rule: you don't have to take sports nutrition, but the right supplements will help you...