The best gels and creams for dry, problem, oily, sensitive, combination, normal skin
Facial skin needs regular cleansing. But to preserve youth and beauty, it is important to pay attention to the components...
CONSULTATION FOR PARENTS
«
FUN EXPERIENCES IN THE KITCHEN.”Prepared and conducted:
teacher of MDOBU "Kindergarten "Borovichok" Koltubanovsky village,
Dilmukhametova. A.M
Educator
2016
Almost scientific experiments in the kitchen!
Surely your baby, like all children, loves everything mysterious and enigmatic, studies the world in all possible ways and asks many questions about the objects and phenomena around him.
Often, completely simple and ordinary things for adults evoke the sincere admiration of a child.
But there are a lot of simple experiments that can be carried out right in the kitchen. They do not require any preparation or special equipment; the young experimenter can do most of them himself, guided by his mother’s instructions, but, of course, under her supervision.
This will not only help keep your baby occupied for a while, but such almost scientific experiments are not just entertainment. Research activities develop the child’s thinking, memory and observation skills in the best possible way, give the first ideas about the physical and chemical phenomena around us, and help to understand some of the laws of nature.
Especially if the mother is not in a hurry to draw conclusions for the baby, but gives him the opportunity to try to find the answer himself. And even if the answers are not always correct, that is not what matters. The most important thing is not experience, but the question and the search for an answer to it. This issue should never be neglected, especially if we are talking about a curious and nimble baby.
Safety precautions.
Skipping the topic of safety in the kitchen in general, I would like to say a few words about the “instruction” of the child himself before starting experiments. This must be done even when all components of your experiments are completely safe.
It is with safety instructions that work in any laboratory begins, and for a while your kitchen turns into a real laboratory. Be sure to tell your baby about this. Please note that working in the laboratory requires special clothing.
To confirm your words, give the baby a kitchen apron. All substances should be handled very carefully, because some of them may be poisonous. And of course, you shouldn’t taste everything, especially if you don’t know what kind of substance it is.
All our experiments today are completely harmless and do not contain dangerous substances (the only exception is iodine). But from the very beginning of his research activities, the child must clearly know the rules of working with them. Not intimidation, but reasonable precaution should be the basis of your conversation. When the preparatory work has been completed, you can proceed directly to the experiments.
Experimental water.
The simplest and most accessible physical experiments can be done with ordinary water. Before you begin the experiments, talk to your child about water as a natural substance. Remember where you can find water (rivers and seas, rain and droplets of fog, snow and ice, dew and plant sap), why it is needed and how life on the planet would be possible if water suddenly disappeared. Ask your child if water has a color, what it smells like, what it tastes like. Don’t answer for him, let him make a small discovery himself, determining that the water is clear and has no taste or smell. If the baby is not yet familiar with the states of aggregation of water, conduct this simple experiment.
First experience.
Pour some water into an ice cube tray and let your little one place it in the freezer with her own hands. After a couple of hours, take out the mold and make sure that ice appears in it instead of water. What a miracle, where did it come from? Will the baby be able to figure this out on his own? Is solid ice really the same as water? Or maybe mom came up with some kind of clever trick and changed the molds in the freezer? Okay, let's check it out! In the warmth of the kitchen, the ice will quickly melt and turn into ordinary water. Here's an amazing discovery: in the cold, liquid water freezes and turns into solid ice. But water can turn into more than just ice. Pour the melted water into a saucepan, put it on the fire and let the baby watch it carefully while you go about your business. When the water boils, draw your baby's attention to the rising steam. Carefully bring a mirror to the saucepan and show the baby the droplets of water that have formed on it. This means that steam is also water! Yes, these are tiny droplets of water. If the saucepan simmers long enough, all the water will disappear from it. Where did she go? It turned into steam and scattered throughout the kitchen. When the water boils, draw your baby's attention to the rising steam. Carefully bring a mirror to the saucepan and show the baby the droplets of water that have formed on it. So steam iswater too! Yes, these are tiny droplets of water. If the saucepan simmers long enough, all the water will disappear from it. Where did she go? It turned into steam and scattered throughout the kitchen.
Experience two.
Fill a plate with some water, mark its level on the wall of the plate with a marker and leave it, say, on the windowsill for several days. Looking into the plate every day, the baby will be able to observe the miraculous disappearance of water. Where does the water go? In the same way as in the previous experiment, it turns into water vapor - evaporates. But why in the first case the water disappeared in a matter of minutes, and in the second - in a few days, let the baby think for himself. If he finds a connection between evaporation and temperature, you can be rightfully proud of your little physicist. Now, relying on the little one’s new knowledge, you can explain to him what fog is, and why steam comes out of his mouth in the cold, and where the rain comes from, and what happens in the jungle when the hot sun comes out after a tropical downpour, and many, many other amazing things. interesting phenomena.
Experience three. Now talk to your child about some of the properties of water. He is familiar with one of them and encounters it almost daily. It's about dissolution. Ask your little one what happens to sugar when he puts it in tea and stirs it with a spoon. Sugar disappears. Does it disappear completely? But the tea was unsweetened, but it became sweet. Sugar does not disappear, it dissolves, breaks up into tiny particles invisible to the eye and is distributed throughout the entire glass. But will all substances dissolve in water in the same way? Wait for the child to answer, and then offer to check your answer experimentally. Pour warm water into jars or cups, give your baby all sorts of safe substances (sugar, salt, baking soda, cereals, vegetable oil, “chicken” cubes, flour, starch, sand, a little soil from a flower pot, chalk, etc.) , and let him put them in glasses, stir them and draw the appropriate conclusions. This will captivate the young researcher for a long time. In the meantime, you can calmly do kitchen chores, looking after your baby and, if necessary, helping with advice. In order for the child to be convinced that the dissolved substance really does not disappear anywhere, conduct the following experiment with him.
Experience four. Take a tablespoon of liquid from the glass where the baby previously poured salt. Hold the spoon over the fire until the water evaporates. Show your baby the white powder remaining in the spoon and ask what it is. Cool the spoon and invite your child to taste the powder. He will easily determine that it is salt.
Experience five. Now let's do the following. Take two glasses, pour the same amount of water into each, only cold into one glass and hot into the other (not boiling water, so that the baby doesn’t accidentally get burned). Put a tablespoon of salt in each glass and start stirring. In order for the baby to draw the right conclusions, it is very important to maintain absolutely the same conditions for both glasses, with the exception of the water temperature. It’s not for nothing that I draw your attention to this. This applies not only to this experiment, but to all others. Children's logic is an interesting and unpredictable thing; children think completely differently than adults. And what is obvious to us may look completely different to them. So let them mix it themselves in both glasses. Then it will be much easier to see the dependence of the dissolution rate on temperature...

Experiments with chicken eggs!
If you are preparing scrambled eggs for breakfast, and the ubiquitous little one is hovering under your feet, give him two chicken eggs, one raw, the other boiled, and ask him, without breaking them, to determine which is which. Tell me that the eggs need to be rotated on the table. While your baby is busy with this exciting activity, you will have time to finish preparing breakfast. And then explain to the baby why a boiled egg rotates easily and quickly, while a raw egg makes one or two clumsy turns and freezes. You shouldn’t talk about the center of gravity; the baby is unlikely to understand it. Just say that inside a raw egg, the yolk and white are hanging around, preventing the egg from unwinding. But the hard contents of a boiled egg allow it to rotate easily.
Give your baby a half-liter jar of water and a raw chicken egg. Let him put it in water and see what happens. The egg will sink to the bottom of the jar. Now you need to take it out, add 2 tablespoons of salt to the water and stir well. We lower the egg into the water again and observe an interesting picture: now the egg does not sink, but floats on the surface. You and I know that the problem is the density of water. The higher it is (in this case due to salt), the more difficult it is to drown in it. Invite your child to express his version explaining this phenomenon. Remind him that swimming in the sea is much easier than in the river. Salt water helps to stay on the surface. Now take a liter jar, fill it a third with fresh water, and put an egg in the jar. Fill a separate container with warm water and let your baby dissolve the salt there to create a concentrated saline solution. Now give your child the following task: you need to ensure that the egg does not sink or float, but “hangs” in the water column, like a submarine. To do this, you need to add saline solution into the jar in small portions until the desired effect is achieved. If your baby pours too much solution and the egg surfaces, ask him to think about how to correct the situation (add the required amount of fresh water to the jar, thereby reducing its density).

Ordinary extraordinary taste!
First experience. If today you decide to bake a cake, then it’s time to demonstrate to your baby the fascinating reaction between soda and vinegar. If you remember your school chemistry course, it is called a neutralization reaction, because in its process the acid and alkali neutralize each other. Pour 2-3 tablespoons of vinegar into a bowl, add a teaspoon of soda. The violent hissing and foam will not leave any little one indifferent. You can tell your child that the bubbles that appear are carbon dioxide, the same one that we exhale and which is necessary for plants to breathe. It is thanks to carbon dioxide that our cake or pie turns out so fluffy and airy: the bubbles pass through the dough and loosen it. We also drink carbon dioxide along with carbonated water; it turns ordinary water into “prickly” water.
Experience two. An experiment with soda and vinegar can be turned into a super spectacular show by making a model of a volcano with their help. But first you need to sculpt the volcano itself from plasticine. Plasticine, already used once, left over from children's creative research, is quite suitable for these purposes. Divide the plasticine into 2 parts. Flatten one half (this will be the base), and from the other we mold a hollow cone the size of a glass with a hole at the top (the slopes and mouth of the volcano). Let's connect both parts, carefully fastening the joints so that our volcano turns out airtight. We transfer the “volcano” to a plate, which we place on a large tray. Now let's prepare the “lava”. Pour a tablespoon of baking soda, a little red food coloring (beetroot juice will do), and a teaspoon of dishwashing liquid into the volcano. The final touch: the baby pours a quarter glass of vinegar into the “mouth”. The volcano immediately wakes up, a hiss is heard, and brightly colored foam begins to pour out of the “mouth”. A spectacular and unforgettable spectacle! If you don’t feel like making a volcano out of plasticine, you can build a volcanic cone out of paper or cardboard and place a glass bottle inside. Such experiments make an indelible impression on children.
Experience three. The little one will surely enjoy this experience, which can be shown to friends or grandparents as a real trick. It is based on the same reaction between soda and vinegar. Prepare a small inflatable balloon. It is desirable that it inflates easily (check this in advance). Keep the ball ready. Dissolve 2 teaspoons of baking soda in 3 tablespoons of water and pour the solution into a glass bottle. Pour a quarter cup of vinegar into the same bottle. Now quickly put the ball on the neck and secure with a strip of tape (everything should be at hand). The carbon dioxide released during the reaction will inflate the balloon.
Experience four. And the next experience can have not only cognitive, but also educational significance for the baby. Take a raw chicken egg, put it in a half-liter jar and fill it with table vinegar. Close the jar with a lid and leave for a day. Then take it out and try to squeeze it in your hands. The shell will become soft and flexible. Tell your child that vinegar dissolves the minerals contained in the eggshell (which is what gives the shell its strength). If you keep a chicken bone in vinegar for 3-4 days, it will also become soft. The acid released by bacteria in the oral cavity affects the enamel of our teeth in much the same way. So for little stubborn people who don’t want to brush their teeth, this experience will be very revealing.
Experience five. If in the summer the child did not draw all the crayons on the asphalt and one piece was preserved, it will be useful to us for a spectacular experience. Dip it into a glass of vinegar and watch what happens. The chalk in the glass will begin to hiss, bubble, decrease in size and soon disappear completely. The main thing is that this fantastic disappearance does not end in the tears of the little experimenter. Often babies are tenderly attached to all sorts of little things, like stubs of pencils, crayons, all kinds of rags and boxes. Unfortunately, once dissolved chalk cannot be returned. So it is better to discuss this point with your baby before the experiment begins.

The wizard is a lemon!
First experience. Now let's look in the refrigerator and see if there is anything suitable for our experiments. If you find an apple and a lemon there, do the following with them. Cut the apple in half, place it cut side up on a saucer and invite your child to squeeze a little lemon juice onto one of the halves. The baby will probably be surprised by the fact that after a few hours the “clean” half of the apple will darken, and the one that was “protected” by lemon juice will remain the same white. We adults know that darkening occurs due to the oxidation of iron contained in the apple by atmospheric oxygen. And ascorbic acid, contained in lemon juice, is a natural antioxidant that slows down oxidation processes. Tell your child that apples contain many very useful substances, including iron. Of course, no matter how much you chew apples, you won’t find pieces of the iron we are used to there, but iron is still there in the form of very small particles, invisible to the eye. When these tiny particles of iron come into contact with air, or more precisely, with oxygen in the air, they begin to darken. To make it clear to your baby what is happening, compare the darkening of the apple with rust.
Experience two. Keep your baby busy with another fun activity with lemon. Squeeze a little lemon juice into a bowl, give your child a white sheet of paper and a cotton swab and offer to write a letter for dad or draw something. Let the manuscript dry. Now it has become impossible to read what is written or see what is drawn. Heat a sheet of paper thoroughly over a table lamp or steam. The inscription will not take long to beg and will become noticeable. You can also write a “secret” letter with ordinary milk. Dry the paper with milky “ink” and then iron it properly with a hot iron. Brown letters will appear on the paper. Sometimes it happens that the “lemon” letter does not develop well when steamed. Then it also makes sense to iron it. If your child likes the idea, you can write secret messages to each other indefinitely.

Wonderful iodine!
By the way, have you already shown your baby the color reaction between ordinary potato starch and iodine?
We take a white starch suspension or starch paste, drop a drop of brown iodine and get a wonderful dark blue color. Well, isn't it a miracle? Here's another way to write a “secret” letter.
Together with your baby, prepare a starch paste: dilute a teaspoon of starch with a small amount of cold water and, stirring vigorously, pour boiling water from a kettle. The mixture will thicken and become clear. Dip a cotton swab, toothpick or brush into the paste and write on paper. The developer in this case will be iodine, which is already familiar to us.
Add half a teaspoon of iodine to 4-5 teaspoons of water and lightly moisten the paper with this mixture using a foam sponge. The iodine will react with the starch, and our invisible inscription will turn blue.

Miracle crystals!
Probably, crystals were grown in childhood, if not all, then many. Let's now do this beautiful and interesting experience with our baby. It doesn’t require much time to prepare, but it will occupy the baby’s attention for quite a long time. Very beautiful crystals are obtained from copper sulfate. But, due to the special toxicity of this substance, it is not suitable for children’s experiments. First, try growing a crystal from ordinary salt.
We will need a liter jar, two-thirds filled with hot water. Prepare a supersaturated saline solution by dissolving the salt until it can no longer dissolve. Now let's build the basis for our future crystal. Select the largest one among the salt crystals and tie it to a nylon thread. This work is delicate, so the mother does it, and the baby watches with bated breath. Attach the other end of the thread to a pencil, place it on the neck of the jar, and lower the thread with the grain into the solution. Place the jar in a place where the baby can easily observe it, and explain to him that the solution cannot be disturbed, you can only watch. Otherwise nothing will work. Crystal growth is not a fast process.
Gradually, salt crystals will settle on our salt grain, and it will increase. In two weeks the spectacle will be quite impressive. If you didn’t succeed in tying a salt crystal onto a thread, try dipping a metal paper clip or nail into the solution. They are attached in the same way. You can try growing sugar crystals. The entire preparation procedure is absolutely the same, only now sweet crystals will appear on the paper clip and thread, which you can even try.
If these and similar very first, simplest experiments capture the baby, you can go further.
There is literature on this topic for sale, as well as sets of devices and reagents for young physicists and chemists.
Research interest, if it arises, must certainly be supported and developed. It will serve the baby well in the future. And maybe a small home laboratory in the kitchen, in the nursery, on the balcony, in the country house will become the beginning of large and serious experiments of your wonderful scientist.

Nadezhda Anufrieva
Experiments in the kitchen
1. Boiled or raw egg
Bring the child to the kitchen table on which there are two eggs. One is raw, the other is cooked. Ask your child how this can be determined?
After the experiment, explain to the child that in a boiled egg the center of gravity is constant and therefore it spins, but in a raw egg the internal liquid mass is like a brake, so a raw egg cannot spin.
2. Sushi, bagels, bagels
We are in a package of one hundred zeros
We notice with poppy seeds.
Grandma, pour some tea,
We'll gnaw them down over tea.
(Baranki)
Buy dryers, bagels, bagels. Lay them out in front of the child, consider their shape, size, appearance. Offer to taste it. Ask your child how they differ and what similarities they have? Do they taste different? Why do they have such a smooth, glossy surface and which of the three is the easiest to bite into?
Tell the children that sushi, bagels, bagels are very similar, they all have a ring shape and are made from wheat dough. But unlike pies, these products are first brewed in hot water and only then baked. It is thanks to scalding that the drying, public, bagels acquire a beautiful, smooth, glossy crust. And the crust is the paste released from the dough, scalded with boiling water. Ask your children which of these products lasts the longest? Listen to their reasoning. Tell us that dryers last the longest - as much as 90 days, bagels - 25 days, and bagels only 16 hours (in packaging - 72 hours).
Explain that after the shelf life expires, products lose their taste. Therefore, the bagel must be eaten quickly, you don’t have to rush with the bagels, and the dryers can wait for your appetite for almost three months.
3. Cheerful rainbow made of water
Offer your child a vibrant and exciting experience that does not require large financial investments. All you need is sugar, 5 glass glasses, food coloring of different colors, a syringe or a simple tablespoon.
To carry out the experiment: add 1 tbsp to the first glass. a spoonful of sugar, 2 spoons of sugar in the second glass, 3 in the third, 4 in the fourth. Put them in order and remember how much sugar is in which glass. Now add 3 tbsp to each glass. spoons of water. Stir. Add a few drops of red paint to the first glass, a few drops of yellow paint to the second, green to the third, and blue paint to the fourth. Stir again.
In the first 2 glasses the sugar will dissolve completely, but in the second two glasses it will not completely dissolve.
Now take a syringe or just a tablespoon to carefully pour the colored water into the glass.
Add colored water from a syringe into a clean glass. The first bottom layer will be blue, then green, yellow and red. If you pour a new portion of colored water on top of the previous one very carefully, the water will not mix, but will separate into layers due to the different sugar content in the water, that is, due to the different density of the water.
What's the secret? The concentration of sugar in each colored liquid was different. The more sugar, the higher the density of the water and the lower this layer will be in the glass. The red liquid with the least sugar content, and therefore the least density, will be at the very top.
4. Drown and eat
He looks like a red ball
Only he doesn’t rush at a gallop.
It contains a useful vitamin -
This is ripe...
(orange)
Offer your child an experiment with oranges. Take two oranges. Peel one of them and place both fruits in a bowl of cold water. The peeled orange sank, but the unpeeled orange remained on the surface of the water. Let your child express his opinions about why this happened?
Explain to your child the secret of the experiment. There are a lot of air bubbles in the orange peel. They are the ones who push the orange out of the water. Without the peel, an orange will sink because it is heavier than water.
5. Clay refrigerator
Take two cups of ice cream. Place one of them on saucers and leave it on the table. And cover the second ice cream with a wet clay flower pot. After half an hour, ask your child what he thinks happened to the ice cream under the pot.
Let your child open the pot and see that the ice cream in the clay refrigerator has not melted. Why?
Explain to your child that water evaporates from a wet pot and carries away heat. Therefore, the ice cream under the pot will remain cold.
6. Changing the color of cabbage
Here's a new riddle in the garden:
A hundred sheets of paper, not a notebook at all.
(Cabbage)
Invite your child to prepare a red cabbage salad together. Grind the cabbage with salt, and pour vinegar and sugar over it. Watch the cabbage turn from purple to bright red. This is the effect of acetic acid. Explain to your child that after some time the lettuce may turn purple again or even turn blue. This happens because acetic acid is gradually diluted with cabbage juice, its concentration decreases and the color of the red cabbage dye changes. These are the transformations
7. Boiled egg experiment
To conduct this experiment you will need:
Hard-boiled chicken egg;
A deep cup or glass (any container that can hold a whole egg);
The essence of the experiment is to place a hard-boiled chicken egg in vinegar. The vinegar will dissolve the eggshell, and the egg itself will turn into a kind of rubber.
Place the egg in a container and fill it completely with vinegar.
Watch the egg. You will see tiny bubbles on its surface. This acetic acid attacks the calcium carbonate contained in the eggshell. After some time, the eggshell will change color. After 3 days, remove the egg and rinse it gently with tap water. Look what happened. Try pressing on the egg. Check how it bounces off a hard surface.
For comparison, you can try soaking a raw egg in vinegar for 3-4 days. The egg shell will become soft and elastic. You can lightly squeeze the egg. But we do not recommend that you try to hit it on the floor or other hard surfaces.
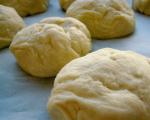
8. Where does the pie get its blush?
Show the children how pies are made: kneading and shaping. After you shape the pies, brush it with egg, tea, milk and butter, and for the sake of experiment, leave a couple of pies ungreased. Tell the children why the pie is greased. Ask your child, will an ungreased pie have a blush? Let him express his opinion and explain it.
After the pies are baked, show your child that they have all turned red (darkened). The shades of blush are different, depending on what it was smeared with.
Explain that in the oven the surface of the pie heats up quickly. Some of the moisture (milk or water used for dough) quickly evaporates from the surface of the cake. Therefore, its top layer dehydrates (loses water, the temperature rises higher (the pie becomes hotter). In this case, the caramelization of sugar, already familiar to children, occurs and a ruddy brownish crust forms on the pie.
9. Why did the sausage burst?
To conduct this experiment, prepare a pan of hot water and two sausages. Remove the cellophane cover from them. Pierce one of the sausages with a fork in several places, and leave the second one whole. Release the sausages into the water, and after the required time, place them on a plate. Ask your child if both sausages burst or if the pierced one remains intact? Explain to your child why sausages burst and tell them that sausages contain not only meat and spices, but also starch. Check purchased sausages for starch. Have the child drop the iodine solution onto the product being tested. If the sausage turns blue, it means there is starch in it. Explain to your child that the starch grains swelled when heated in water, they became cramped in the shell, and they tore it. Now the child can understand why the sausage burst.
10. Sweet potatoes
Buried in the ground in May
And they didn’t take it out for a hundred days,
And they started digging in the fall
Not just one was found, but ten.
(potato)
Tell the children that potatoes are boiled in salt water. But it turns out that potatoes can be sweet.
Let's check.
Take 2 potato tubers, put them in a plastic bag and place it in the freezer for 1 hour.
After an hour, remove the potatoes from the refrigerator and cook them along with regular potatoes. When the potatoes are cooked, try them with your child.
I wonder if potatoes taste different? Do frozen potatoes really taste sweet? Why has the taste of potatoes changed so much? What happened to the potatoes?
These changes are associated with starch, which is already familiar to children. Explain to children that when starch freezes, it turns into sugar, so the taste of potatoes changes and becomes sweeter. We try to protect the potatoes from freezing so that they do not acquire a sweetish taste.
Demonstration of experiments is a good opportunity to interest a child in natural sciences. To do this, you only need desire, basic knowledge of physics, simple reagents and equipment (which you have in your kitchen).
Rule one (the most important). First a demonstration of experience, then an explanation and application of the law! It is this sequence that attracts maximum attention and raises the main question of the researcher - “Why?”
Rule two. The child must see, touch, smell, participate in the manufacture of samples, reagents and equipment, and independently do again what you demonstrated to him! This will indicate that physics and chemistry are the reality surrounding us, subject to him. This will tell him that the laws of nature are in his hands! He is a creator who influences the world around him!
Rule three. Your explanation of the perfect experience should be simple, concise and clear. It must go back to a specific physical or chemical law and demonstrate its operation. The explanation should not complicate understanding, but simplify it. The key word in this part of the lesson should be “Because...”.
Rule four. Preface and accompany the experience with an atmosphere of mystery, create intrigue! Imagine the demonstration as a magical act, a miracle, an amazing discovery! But after its completion, be sure to explain that the magic and mystery are clarified by scientific knowledge. That behind all these miracles are not fairies and gnomes, but the laws of nature.
Rule five. Please pay attention to safety during the demonstration! Even if you work with ordinary water, take care not to spill it on the parquet or damage furniture or electrical appliances.
Making cottage cheese
Grandmothers who are over 50 years old remember well how they made cottage cheese for their children. You can show this process to your child. Heat the milk by pouring a little lemon juice into it (calcium chloride can also be used). Show the children how the milk immediately curdles into large flakes with whey on top.
Drain the resulting mass through several layers of gauze and leave for 2-3 hours. You made a wonderful cottage cheese. Pour syrup over it and offer it to your child for dinner. We are sure that even those children who do not like this dairy product will not be able to refuse a delicacy prepared with their own participation.
How to make ice cream?
For ice cream you will need: cocoa, sugar, milk, sour cream. You can add grated chocolate, wafer crumbs or small pieces of cookies to it. Stir two tablespoons of cocoa, one tablespoon of sugar, four tablespoons of milk and two tablespoons of sour cream in a bowl. Add cookie and chocolate crumbs. The ice cream is ready. Now it needs to be cooled. Take a larger bowl, put ice in it, sprinkle it with salt, stir. Place a bowl of ice cream on the ice and cover with a towel on top to prevent heat from penetrating into it. Stir the ice cream every 3-5 minutes. If you have enough patience, then after about 30 minutes the ice cream will thicken and you can taste it. Tasty?
How does our homemade refrigerator work? It is known that ice melts at a temperature of zero degrees. Salt retains the cold and prevents ice from melting quickly. Therefore, salted ice stays cold longer. Moreover, the towel prevents warm air from penetrating to the ice cream. And the result? Ice cream is beyond praise!
Let's beat the butter
If you live in the country in the summer, you probably take natural milk from a thrush. Do experiments with milk with your children. Prepare a liter jar. Fill it with milk and put it in the refrigerator for 2-3 days. Show children how the milk separates into lighter cream and heavier skim milk. Collect the cream in a jar with an airtight lid. And if you have patience and free time, then shake the jar for half an hour, taking turns with the children, until the fat balls merge together and form oily lumps. Believe me, children have never eaten such delicious butter.
Homemade lollipops
Cooking is a fun activity. Now we’ll make homemade lollipops. To do this, you need to prepare a glass of warm water in which to dissolve as much granulated sugar as can be dissolved. Then take a cocktail straw, tie a clean string to it, and attach a small piece of pasta to the end (small pasta is best). Now all that remains is to place the straw on top of the glass, across it, and dip the end of the thread with the pasta into the sugar solution. And be patient.
When the water from the glass begins to evaporate, the sugar molecules will begin to move closer together and sweet crystals will begin to settle on the thread and on the pasta, taking on bizarre shapes. Let your little one try the lollipop. Tasty? The same candies will be much tastier if you add jam syrup to the sugar solution. Then you will get lollipops with different flavors: cherry, blackcurrant and others, whatever he wants.
"Roasted" sugar
Take two pieces of refined sugar. Moisten them with a few drops of water to make it moist, place in a stainless steel spoon and heat it over gas for a few minutes until the sugar has melted and turned yellow. Don't let it burn. As soon as the sugar turns into a yellowish liquid, pour the contents of the spoon onto the saucer in small drops. Taste your candies with your children. Liked? Then open a confectionery factory!
Changing the color of cabbage
Together with your child, prepare a salad of finely shredded red cabbage, grated with salt, and pour vinegar and sugar over it. Watch the cabbage turn from purple to bright red. This is the effect of acetic acid. However, as it is stored, the lettuce may again turn purple or even turn blue. This happens because acetic acid is gradually diluted with cabbage juice, its concentration decreases and the color of the red cabbage dye changes. These are the transformations.
Why are unripe apples sour?
Unripe apples contain a lot of starch and no sugar. Starch is an unsweetened substance. Let your child lick the starch and he will be convinced of it. How can you tell if a product contains starch? Make a weak iodine solution. Drop it on a handful of flour, starch, on a piece of raw potato, on a slice of unripe apple. The blue color that appears proves that all these products contain starch. Repeat the experiment with the apple when it is fully ripe. And you will probably be surprised that you will no longer find starch in an apple. But now there is sugar in it. This means that fruit ripening is a chemical process of converting starch into sugar.
Edible glue
Your child needed glue for a craft project, but the bottle of glue turned out to be empty? Don't rush to the store to buy. Cook it yourself. What is familiar to you is unusual to a child.
Cook him a small portion of thick jelly, showing him each stage of the process. For those who don’t know: into boiling juice (or into water with jam), you need to pour, stirring thoroughly, a solution of starch diluted in a small amount of cold water and bring to a boil. I think the child will be surprised that this glue-jelly can be eaten with a spoon, or you can glue crafts with it.
Homemade sparkling water
Remind your child that they breathe air. Air is made up of different gases, but many are invisible and odorless, making them difficult to detect. Carbon dioxide is one of the gases that makes up air and... carbonated water. But it can be isolated at home.
Take two cocktail straws, but of different diameters, so that the narrow one fits tightly into the wider one a few millimeters. The result was a long straw made up of two. Make a through vertical hole in the stopper of a plastic bottle with a sharp object and insert either end of the straw into it. If there are no straws of different diameters, then you can make a small vertical cut in one and stick it into another straw. The main thing is to get a tight connection.
Pour water diluted with any jam into a glass, and pour half a tablespoon of soda into the bottle through a funnel. Then pour vinegar into the bottle - about one hundred milliliters. Now you need to act very quickly: stick the cork with a straw into the bottle, and lower the other end of the straw into a glass of sweet water. What's going on in the glass? Explain to your child that vinegar and baking soda have actively begun to interact with each other, releasing bubbles of carbon dioxide. It rises up and passes through the straw into a glass of drink, where it bubbles to the surface of the water. Now the sparkling water is ready.
Drown and eat
Wash two oranges thoroughly. Place one of them in a bowl of water. He will float. And even if you try very hard, you won’t be able to drown him. Peel the second orange and place it in water. Well? Don't believe your eyes? The orange drowned. How so? Two identical oranges, but one drowns and the other floats? Explain to your child: “There are a lot of air bubbles in an orange peel. They push the orange to the surface of the water. Without the peel, the orange will sink because it is heavier than the water it displaces.”
About the benefits of milk
Oddly enough, the best way to find out why you need to drink milk is to do an experiment with bones. Take the eaten chicken bones, wash them properly, and let them dry. Then pour vinegar in a bowl so that it completely covers the seeds, close the lid and leave for a week. After seven days, drain the vinegar, carefully examine and touch the bones. They have become flexible. Why? It turns out that calcium gives strength to bones. Calcium dissolves in acetic acid, and the bones lose their hardness.
Do you want to ask: “What does milk have to do with it?” It is known that milk contains a lot of calcium. Milk is healthy because it replenishes our body with calcium, which means it makes our bones hard and strong.
How to get drinking water from salt water?
Pour water into a deep basin with your child, add two tablespoons of salt there, stir until the salt dissolves. Place washed pebbles at the bottom of an empty plastic glass so that it does not float, but its edges should be higher than the water level in the basin. Pull the film over the top, tying it around the pelvis. Squeeze the film in the center above the cup and place another pebble in the recess. Place the basin in the sun. After a few hours, unsalted, clean drinking water will accumulate in the glass. This is explained simply: water begins to evaporate in the sun, condensation settles on the film and flows into an empty glass. The salt does not evaporate and remains in the basin. Now that you know how to get fresh water, you can safely go to the sea and not be afraid of thirst. There is a lot of water in the sea, and you can always get the purest drinking water from it.
Live yeast
A famous Russian proverb says: “A hut is red not in its corners, but in its pies.” However, we won’t bake pies. Although, why not? Moreover, we always have yeast in our kitchen. But first we’ll show you our experience, and then we can get down to pies. Tell children that yeast is made up of tiny living organisms called microbes (which means that microbes can be beneficial as well as harmful). As they feed, they emit carbon dioxide, which, when mixed with flour, sugar and water, “raises” the dough, making it fluffy and tasty.
Dry yeast looks like small lifeless balls. But this is only until millions of tiny microbes that lie dormant in a cold and dry state come to life. Let's revive them. Pour two tablespoons of warm water into a jug, add two teaspoons of yeast, then one teaspoon of sugar and stir. Pour the yeast mixture into the bottle, placing a balloon over the neck of the bottle. Place the bottle in a bowl of warm water. Ask the guys what will happen? That's right, when the yeast comes to life and begins to eat sugar, the mixture will be filled with bubbles of carbon dioxide, which is already familiar to children, which they begin to emit. The bubbles burst and the gas inflates the balloon.
Is the fur coat warm?
Children should really enjoy this experience. Buy two cups of paper-wrapped ice cream. Unfold one of them and place it on a plate. And wrap the second one right in the wrapper in a clean towel and wrap it well in a fur coat. After 30 minutes, unwrap the wrapped ice cream and place it without wrapper on a saucer. Unwrap the second ice cream too. Compare both portions. Surprised? What about your children?
It turns out that the ice cream under the fur coat, unlike the one on the plate, almost did not melt. So what? Maybe the fur coat is not a fur coat at all, but a refrigerator? Why then do we wear it in winter if it does not warm, but cools? Everything is explained simply. The fur coat no longer allowed room heat to reach the ice cream. And because of this, the ice cream in the fur coat became cold, so the ice cream did not melt.
Now the question is logical: “Why does a person put on a fur coat in the cold?” Answer: "So as not to freeze." When a person puts on a fur coat at home, he is warm, but the fur coat does not release heat to the street, so the person does not freeze.
Ask your child if he knows that there are “fur coats” made of glass? This is a thermos. It has double walls, and between them there is emptiness. Heat does not pass through emptiness very well. Therefore, when we pour hot tea into a thermos, it remains hot for a long time. And if you pour cold water into it, what happens to it? The child can now answer this question himself. If he still finds it difficult to answer, let him do one more experiment: pour cold water into the thermos and check it after 30 minutes.
Dancing cereal
Some cereals can make a lot of noise. Now we will find out whether it is possible to teach rice cereal to also jump and dance.
We will need:
Preparation.
Let's begin the scientific magic!
Result. The flakes will bounce and be attracted to the ball.
Explanation. Static electricity helps you in this experiment. Electricity is called static when there is no current, that is, movement of charge. It is formed due to the friction of objects, in this case a ball and a sweater. All objects are made of atoms, and each atom contains equal numbers of protons and electrons. Protons have a positive charge, and electrons have a negative charge. When these charges are equal, the object is called neutral, or uncharged. But there are objects, such as hair or wool, that lose their electrons very easily. If you rub a ball against a woolen item, some electrons will transfer from the wool to the ball, and it will acquire a negative static charge.
When you bring a negatively charged ball closer to the flakes, the electrons in them begin to be repelled from it and move to the opposite side. Thus, the upper side of the flakes, facing the ball, becomes positively charged, and the ball attracts them towards itself.
If you wait longer, electrons will begin to transfer from the ball to the flakes. Gradually the ball will become neutral again and will no longer attract flakes. They will fall back onto the table.
Sorting
Do you think it is possible to separate the mixed pepper and salt? If you master this experiment, you will definitely cope with this difficult task!
We will need:
Preparation:
Let's begin the scientific magic!
Result. The pepper will stick to the ball, and the salt will remain on the table.
Explanation. This is another example of the effects of static electricity. When you rub the ball with a woolen cloth, it becomes negatively charged. If you bring the ball to a mixture of pepper and salt, the pepper will begin to be attracted to it. This happens because the electrons in the pepper dust tend to move as far away from the ball as possible. Consequently, the part of the peppercorns closest to the ball acquires a positive charge and is attracted by the negative charge of the ball. The pepper sticks to the ball.
The salt is not attracted to the ball, since electrons do not move well in this substance. When you bring a charged ball to salt, its electrons still remain in their places. The salt on the side of the ball does not acquire a charge - it remains uncharged or neutral. Therefore, the salt does not stick to the negatively charged ball.
Experiments in the kitchen for children and parents.
Workshop for parents "I'm not a wizard, I'm just learning."
Planned result:
Showing children and parents curiosity and interest in joint research activities and experimentation.
The ability to independently analyze and find a solution to a problem situation, the ability to reason.
Ability to work well in a team.
Visual and handout material:
Trays, glasses or mugs with water, sheets of drawing or drawing paper, napkins, paper towels, water containers, water containers, balloons, saucers, wax crayons, markers, food coloring, thin threads, tape, oilcloths, toys for dramatization fairy tales, transparent containers with lids, balloons, soap bubbles, toothpicks, dishwashing liquid, soap bars, paper divers, spoons and forks.
"Teremok"
Progress:One very important tip: Don’t rush to give your child ready-made answers; let him think about the reasons for this or that phenomenon. Of course, not every child will be able to answer the question, give him time. Take your time, ask leading questions, lead him to make the “discovery” himself.
I invite you to a fairy tale-action.
And this fairy tale...
"Teremok"

Experience: “Musical Bottles.”


Thank you! Come live with me.
So they began to live together.
A gnawing mouse came running and asked:
- Whose house-teremok? Who lives in the mansion?
- I, a grief fly.
- I, a squeaking mosquito. And who are you?
- I, a chewing mouse. Let me live with you.
- What can you do?
- I can glue two sheets of paper together without glue.
Experience: “Is it possible to glue paper with water?”


Fine. Come live with us.
The three of them began to live together.
A frog-frog jumped up and asked:
- Whose house-teremok? Who lives in the mansion?
- I, a grief fly.
- I, a squeaking mosquito.
- I'm a chewing mouse. And who are you?
- I, frog-frog. I love cleanliness very much and know a lot of tricks with soap. Do you want me to show you?
Experience: “Magic Soap.”


Experience: "Diver".


Experience: “Static electricity.”


Experience: "Magic Ball".

Experience: “Soap Bubbles”.
For ice cream you will need: cocoa, sugar, milk, sour cream. You can add grated chocolate, wafer crumbs or small pieces of cookies to it. Stir two tablespoons of cocoa, one tablespoon of sugar, four tablespoons of milk and two tablespoons of sour cream in a bowl. Add cookie and chocolate crumbs. The ice cream is ready. Now it needs to be cooled. Take a larger bowl, put ice in it, sprinkle it with salt, stir. Place a bowl of ice cream on the ice and cover with a towel on top to prevent heat from penetrating into it. Stir the ice cream every 3-5 minutes. If you have enough patience, then after about 30 minutes the ice cream will thicken and you can taste it. Tasty?
How does our homemade refrigerator work? It is known that ice melts at a temperature of zero degrees. Salt retains the cold and prevents ice from melting quickly. Therefore, salted ice stays cold longer. Moreover, the towel prevents warm air from penetrating to the ice cream. And the result? Ice cream is beyond praise!
If you live in the country in the summer, you probably take natural milk from a thrush. Do experiments with milk with your children. Prepare a liter jar. Fill it with milk and put it in the refrigerator for 2-3 days. Show children how the milk separates into lighter cream and heavier skim milk. Collect the cream in a jar with an airtight lid. And if you have patience and free time, then shake the jar for half an hour, taking turns with the children, until the fat balls merge together and form oily lumps. Believe me, children have never eaten such delicious butter.
Cooking is a fun activity. Now we’ll make homemade lollipops. To do this, you need to prepare a glass of warm water in which to dissolve as much granulated sugar as can be dissolved. Then take a cocktail straw, tie a clean string to it, and attach a small piece of pasta to the end (small pasta is best). Now all that remains is to place the straw on top of the glass, across it, and dip the end of the thread with the pasta into the sugar solution. And be patient.
When the water from the glass begins to evaporate, the sugar molecules will begin to move closer together and sweet crystals will begin to settle on the thread and on the pasta, taking on bizarre shapes. Let your little one try the lollipop. Tasty? The same candies will be much tastier if you add jam syrup to the sugar solution. Then you will get lollipops with different flavors: cherry, blackcurrant and others, whatever he wants.
Take two pieces of refined sugar. Moisten them with a few drops of water to make it moist, place in a stainless steel spoon and heat it over gas for a few minutes until the sugar has melted and turned yellow. Don't let it burn. As soon as the sugar turns into a yellowish liquid, pour the contents of the spoon onto the saucer in small drops. Taste your candies with your children. Liked? Then open a confectionery factory!
Together with your child, prepare a salad of finely shredded red cabbage, grated with salt, and pour vinegar and sugar over it. Watch the cabbage turn from purple to bright red. This is the effect of acetic acid. However, as it is stored, the lettuce may again turn purple or even turn blue. This happens because acetic acid is gradually diluted with cabbage juice, its concentration decreases and the color of the red cabbage dye changes. These are the transformations.
Unripe apples contain a lot of starch and no sugar. Starch is an unsweetened substance. Let your child lick the starch and he will be convinced of it. How can you tell if a product contains starch? Make a weak iodine solution. Drop it on a handful of flour, starch, on a piece of raw potato, on a slice of unripe apple. The blue color that appears proves that all these products contain starch. Repeat the experiment with the apple when it is fully ripe. And you will probably be surprised that you will no longer find starch in an apple. But now there is sugar in it. This means that fruit ripening is a chemical process of converting starch into sugar.
Your child needed glue for a craft project, but the bottle of glue turned out to be empty? Don't rush to the store to buy. Cook it yourself. What is familiar to you is unusual to a child.
Cook him a small portion of thick jelly, showing him each stage of the process. For those who don’t know: into boiling juice (or into water with jam), you need to pour, stirring thoroughly, a solution of starch diluted in a small amount of cold water and bring to a boil. I think the child will be surprised that this glue-jelly can be eaten with a spoon, or you can glue crafts with it.
Remind your child that they breathe air. Air is made up of different gases, but many are invisible and odorless, making them difficult to detect. Carbon dioxide is one of the gases that makes up air and... carbonated water. But it can be isolated at home.
Take two cocktail straws, but of different diameters, so that the narrow one fits tightly into the wider one a few millimeters. The result was a long straw made up of two. Make a through vertical hole in the stopper of a plastic bottle with a sharp object and insert either end of the straw into it. If there are no straws of different diameters, then you can make a small vertical cut in one and stick it into another straw. The main thing is to get a tight connection.
Pour water diluted with any jam into a glass, and pour half a tablespoon of soda into the bottle through a funnel. Then pour vinegar into the bottle - about one hundred milliliters. Now you need to act very quickly: stick the cork with a straw into the bottle, and lower the other end of the straw into a glass of sweet water. What's going on in the glass? Explain to your child that vinegar and baking soda have actively begun to interact with each other, releasing bubbles of carbon dioxide. It rises up and passes through the straw into a glass of drink, where it bubbles to the surface of the water. Now the sparkling water is ready.
Wash two oranges thoroughly. Place one of them in a bowl of water. He will float. And even if you try very hard, you won’t be able to drown him. Peel the second orange and place it in water. Well? Don't believe your eyes? The orange drowned. How so? Two identical oranges, but one drowns and the other floats? Explain to your child: “There are a lot of air bubbles in an orange peel. They push the orange to the surface of the water. Without the peel, the orange will sink because it is heavier than the water it displaces.”
Oddly enough, the best way to find out why you need to drink milk is to do an experiment with bones. Take the eaten chicken bones, wash them properly, and let them dry. Then pour vinegar in a bowl so that it completely covers the seeds, close the lid and leave for a week. After seven days, drain the vinegar, carefully examine and touch the bones. They have become flexible. Why? It turns out that calcium gives strength to bones. Calcium dissolves in acetic acid, and the bones lose their hardness.
Do you want to ask: “What does milk have to do with it?” It is known that milk contains a lot of calcium. Milk is healthy because it replenishes our body with calcium, which means it makes our bones hard and strong.
Pour water into a deep basin with your child, add two tablespoons of salt there, stir until the salt dissolves. Place washed pebbles at the bottom of an empty plastic glass so that it does not float, but its edges should be higher than the water level in the basin. Pull the film over the top, tying it around the pelvis. Squeeze the film in the center above the cup and place another pebble in the recess. Place the basin in the sun. After a few hours, unsalted, clean drinking water will accumulate in the glass. This is explained simply: water begins to evaporate in the sun, condensation settles on the film and flows into an empty glass. The salt does not evaporate and remains in the basin. Now that you know how to get fresh water, you can safely go to the sea and not be afraid of thirst. There is a lot of water in the sea, and you can always get the purest drinking water from it.
A famous Russian proverb says: “A hut is red not in its corners, but in its pies.” However, we won’t bake pies. Although, why not? Moreover, we always have yeast in our kitchen. But first we’ll show you our experience, and then we can get down to pies. Tell children that yeast is made up of tiny living organisms called microbes (which means that microbes can be beneficial as well as harmful). As they feed, they emit carbon dioxide, which, when mixed with flour, sugar and water, “raises” the dough, making it fluffy and tasty.
Dry yeast looks like small lifeless balls. But this is only until millions of tiny microbes that lie dormant in a cold and dry state come to life. Let's revive them. Pour two tablespoons of warm water into a jug, add two teaspoons of yeast, then one teaspoon of sugar and stir. Pour the yeast mixture into the bottle, placing a balloon over the neck of the bottle. Place the bottle in a bowl of warm water. Ask the guys what will happen? That's right, when the yeast comes to life and begins to eat sugar, the mixture will be filled with bubbles of carbon dioxide, which is already familiar to children, which they begin to emit. The bubbles burst and the gas inflates the balloon.
Children should really enjoy this experience. Buy two cups of paper-wrapped ice cream. Unfold one of them and place it on a plate. And wrap the second one right in the wrapper in a clean towel and wrap it well in a fur coat. After 30 minutes, unwrap the wrapped ice cream and place it without wrapper on a saucer. Unwrap the second ice cream too. Compare both portions. Surprised? What about your children?
It turns out that the ice cream under the fur coat, unlike the one on the plate, almost did not melt. So what? Maybe the fur coat is not a fur coat at all, but a refrigerator? Why then do we wear it in winter if it does not warm, but cools? Everything is explained simply. The fur coat no longer allowed room heat to reach the ice cream. And because of this, the ice cream in the fur coat became cold, so the ice cream did not melt.
Now the question is logical: “Why does a person put on a fur coat in the cold?” Answer: "So as not to freeze." When a person puts on a fur coat at home, he is warm, but the fur coat does not release heat to the street, so the person does not freeze.
Ask your child if he knows that there are “fur coats” made of glass? This is a thermos. It has double walls, and between them there is emptiness. Heat does not pass through emptiness very well. Therefore, when we pour hot tea into a thermos, it remains hot for a long time. And if you pour cold water into it, what happens to it? The child can now answer this question himself. If he still finds it difficult to answer, let him do one more experiment: pour cold water into the thermos and check it after 30 minutes.
Can a funnel “refuse” to let water into a bottle? Let's check! We will need: 2 funnels, two identical clean dry plastic bottles of 1 liter each, plasticine, a jug of water.
Preparation:
Let's begin the scientific magic!
Announce to the audience: “I have a magic funnel that keeps water out of the bottle.”
Take a bottle without plasticine and pour some water into it through a funnel. Explain to the audience: “This is how most funnels behave.”
Place a bottle of plasticine on the table. Fill the funnel with water to the top. See what happens.
Result. A little water will flow from the funnel into the bottle, and then it will stop flowing completely.
Explanation:
Water flows freely into the first bottle. Water flowing through the funnel into the bottle replaces the air in it, which escapes through the gaps between the neck and the funnel. A bottle sealed with plasticine also contains air, which has its own pressure. The water in the funnel also has pressure, which arises due to the force of gravity pulling the water down. However, the force of air pressure in the bottle exceeds the force of gravity acting on the water. Therefore, water cannot enter the bottle.
If there is even a small hole in the bottle or plasticine, air can escape through it. This will cause its pressure inside the bottle to drop, allowing water to flow into it.
Some cereals can make a lot of noise. Now we will find out whether it is possible to teach rice cereal to also jump and dance.
We will need:
Preparation.
Let's begin the scientific magic!
Result. The flakes will bounce and be attracted to the ball.
Explanation. Static electricity helps you in this experiment. Electricity is called static when there is no current, that is, movement of charge. It is formed due to the friction of objects, in this case a ball and a sweater. All objects are made of atoms, and each atom contains equal numbers of protons and electrons. Protons have a positive charge, and electrons have a negative charge. When these charges are equal, the object is called neutral, or uncharged. But there are objects, such as hair or wool, that lose their electrons very easily. If you rub a ball against a woolen item, some electrons will transfer from the wool to the ball, and it will acquire a negative static charge.
When you bring a negatively charged ball closer to the flakes, the electrons in them begin to be repelled from it and move to the opposite side. Thus, the upper side of the flakes, facing the ball, becomes positively charged, and the ball attracts them towards itself.
If you wait longer, electrons will begin to transfer from the ball to the flakes. Gradually the ball will become neutral again and will no longer attract flakes. They will fall back onto the table.
Do you think it is possible to separate the mixed pepper and salt? If you master this experiment, you will definitely cope with this difficult task!
We will need:
Preparation:
Let's begin the scientific magic!
Result. The pepper will stick to the ball, and the salt will remain on the table.
Explanation. This is another example of the effects of static electricity. When you rub the ball with a woolen cloth, it becomes negatively charged. If you bring the ball to a mixture of pepper and salt, the pepper will begin to be attracted to it. This happens because the electrons in the pepper dust tend to move as far away from the ball as possible. Consequently, the part of the peppercorns closest to the ball acquires a positive charge and is attracted by the negative charge of the ball. The pepper sticks to the ball.
The salt is not attracted to the ball, since electrons do not move well in this substance. When you bring a charged ball to salt, its electrons still remain in their places. The salt on the side of the ball does not acquire a charge - it remains uncharged or neutral. Therefore, the salt does not stick to the negatively charged ball.
In previous experiments, you used static electricity to make flakes dance and separate pepper from salt. From this experiment you will learn how static electricity affects ordinary water.
We will need:
Preparation:
To conduct the experiment, choose a location where you have access to running water. The kitchen would be perfect.
Let's begin the scientific magic!
Result. The stream of water will deflect towards the ball.
Explanation. When rubbed, electrons from the sweater transfer to the ball and give it a negative charge. This charge repels the electrons in the water, and they move to the part of the stream that is furthest from the ball. Closer to the ball, a positive charge arises in the stream of water, and the negatively charged ball pulls it towards itself.
For the movement of the jet to be visible, it must be small. The static electricity accumulated on the ball is relatively small, and it cannot move a large amount of water. If a stream of water touches the ball, it will lose its charge. The extra electrons will go into the water; both the ball and the water will become electrically neutral, so the stream will flow smoothly again.

Facial skin needs regular cleansing. But to preserve youth and beauty, it is important to pay attention to the components...

KenzoKi Belle de Jour Dream Night Mask Night care from the main cosmetic sybarites The Japanese KenzoKi entered the market with...
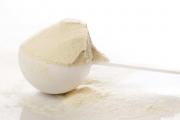
I'll start with the basic rule: you don't have to take sports nutrition, but the right supplements will help you faster...

Essentially, there is nothing wrong with any emotion, but some of them can cause problems if not controlled...
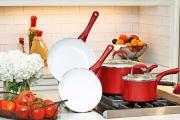
It would seem that something new can be invented in the field of tableware production: here is a kettle, here is a frying pan, here is a bicycle...

At least once in their life, every person begins to think about why they have a lot of money, while others, working day and night,...

CONSULTATION FOR PARENTS “FUN EXPERIENCES IN THE KITCHEN.” Prepared and conducted by: MDOBU teacher...

State budgetary educational institution of the city of Moscow Secondary school with...

Crafts from sponges for washing dishes are easy to make, since the material is soft, has a smooth surface, good...
Hello, mother country! I want to talk about something that is very close and dear to me, to share my experience, so...
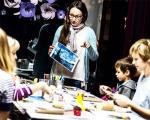
Modeling is a useful and exciting activity not only for kids, but also for parents. This is an opportunity to spend...

MOSCOW, February 20 - RIA Novosti, Irina Ovchinnikova. Summer camp is a traditional format for children's recreation:...

"TROPICAL RAIN". Participants stand in a circle. The presenter stands in the center: “Now we will all call a warm...

Homeschooling (homeschooling, from the English homeschooling - home education) is popular in the USA and Canada, has...
KenzoKi Belle de Jour Dream Night Mask Night care from the main cosmetic sybarites The Japanese KenzoKi came out...
I'll start with the basic rule: you don't have to take sports nutrition, but the right supplements will help you...