The best gels and creams for dry, problem, oily, sensitive, combination, normal skin
Facial skin needs regular cleansing. But to preserve youth and beauty, it is important to pay attention to the components...
I invite you to a creative workshop where I will show you how to sew a pencil case for school with your own hands.
For a craft to be beautiful and practical, it needs to meet certain criteria:
I will give examples.
You can decorate your pencil case with a bow. Watch the video to see how to make it.
An incredibly simple pencil case made of felt - even a first-grader can sew or glue it together.
Also a simple, quick and very funny pencil case.
It turns out to be a canvas.
The advantage of this device is that it can be opened anywhere, and not even just in one place. And if you take zippers of different colors, it will turn out very beautiful.
From cardboard - the most easy option. It turns out to be of any shape and more voluminous than a regular pen case. It can be used for art supplies, such as brushes, or even made into a large pencil case that can hold rulers, pens and a notepad.

Instructions:


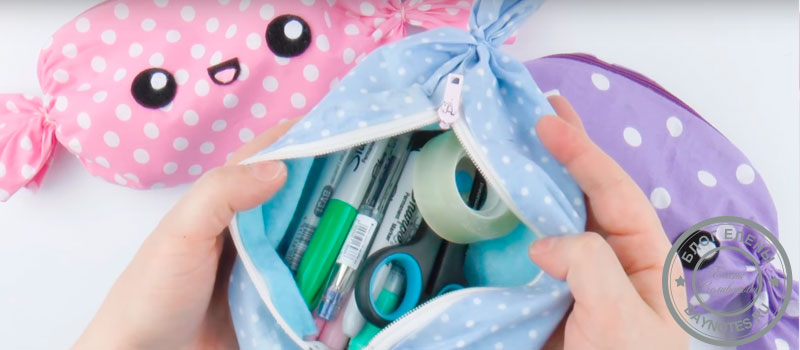

This pencil case looks like candy.
The same principle applies to cardboard. You just need to take a paper towel tube. Cut it lengthwise or crosswise, depending on how you plan to open the pencil case. Then everything follows the instructions. True, the dimensions of such a case will be small.
You can also use leather and suede, felt, a plastic container, etc.
This technique can be used if:
And furoshiki has many advantages:
I only needed a scarf. I specifically chose one with a simple ornament so that everything I do would be more noticeable. You can choose fabric with a brighter design. What and how I made from it:

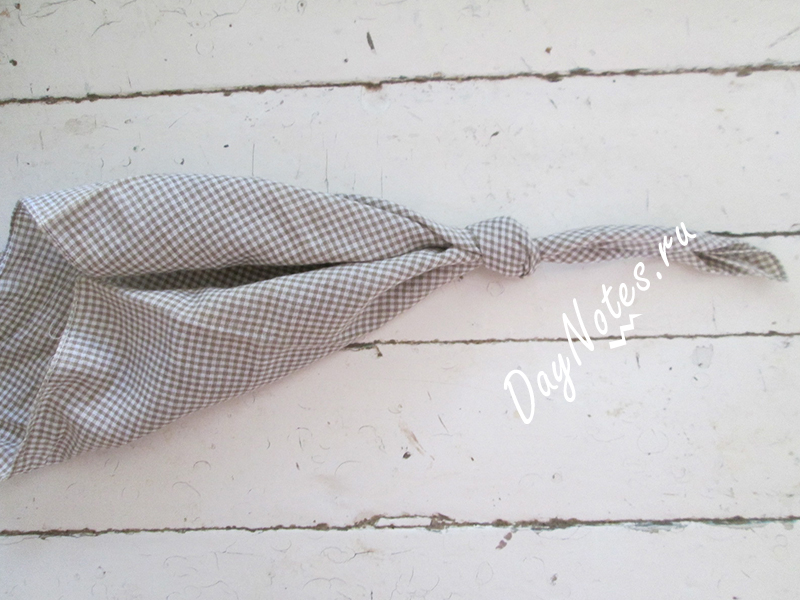
Such furoshiki can even be cut out of jeans. You just can't tie the corners. But putting elastic bands on the edges, in places where there are knots, is quite possible. You can't tie your hands either. They will need to be sewn. This fashionable stationery handbag looks very cool!
Tell us what you can make with your children. Share what you learn with your friends. And don't forget about subscribing. You have the opportunity not to miss a single topic!
To accustom your baby to order and make the drawing process more fun, sew a bright pencil case for your little artist. It is convenient because while drawing, the baby does not need to pour out all the supplies from the box: just unroll the scroll and all the pencils will be in front of the baby’s eyes. A pocket with dividers will help your child group pencils or markers by color, and a flap will prevent them from falling out during storage or transportation. Materials. From the materials you will need two pieces of cotton companion fabrics (in this case yellow and green), interlining, padding polyester, satin or grosgrain ribbon, a pendant, wooden buttons and threads to match the color of the fabric.
Preparing parts. According to the diagram, cut out one rectangle measuring 25x32 cm from yellow fabric and polka dot fabric.

The yellow rectangle will serve as the cover, and the green one will serve as the basis for the flap and pocket.

To make the latter, cut out a rectangle measuring 30x34 cm from green fabric and bend it lengthwise along the front side. The result will be a blank for a pocket measuring 15x34 cm. For the flap, cut out a rectangle 16x32 cm, which you then fold lengthwise, but along the wrong side and, stepping back 1.5 cm from each edge, cut off the corners.

The result is an equilateral trapezoid with bases 32 and 29 cm long and 8 cm high. Assembly of parts. Take a 32 cm long ribbon and sew it to the cover piece.

Reinforce the pocket part from the inside with interlining, fold it along the fold line and lay a longitudinal decorative seam.

Take the valve piece and sew a straight stitch (a) along the sides and along the short base of the trapezoid.

Then turn the part inside out, iron it and again lay a stitch along the same sides, but this time decorative (b). The upper base does not need to be closed, since at the final stage of assembly two fixing seams will pass along it. Using tailor's pins, pin the pocket piece to the base piece (green rectangle).

According to the diagram, the length of the pocket detail was 34 cm, and the base was 32 cm. A difference of 2 cm is necessary to create volume for the sections for pencils. Therefore, when attaching the pocket to the base, first align the edges of both parts, and then distribute the fabric evenly. Now make the pencil slots. To do this, lay straight seams along the width of the pocket at intervals of 1-1.6 cm. Be sure to make bartacks at the beginning and end of the stitches (a seam 0.7-0.9 cm long in the reverse mode of the sewing machine). Pin the valve piece to the base.

Make ties from fabric. To do this, cut out a rectangle 55 cm long and 4 cm wide. Fold it in the middle and bend it to the fold line of the edge. Sew a straight stitch or decorative stitch along the edge. You can also use cord, ribbon or a knitted chain as ties.
Sew the ties to one of the short sides of the base.

Reinforce the cover from the inside with non-woven fabric or ironed padding polyester. Cover the pocket and flap piece with the cover piece, matching the edges of all pieces. Make sure that the front sides of both blanks are on the inside. Place a straight stitch around the perimeter of the scroll pencil case, leaving a hole on one of the short sides for turning inside out.
Many people believe that a pencil case for pens and other stationery is an accessory for schoolchildren and students. In fact, it is needed in any apartment. Storing pens and pencils in a specially designated place for them is comfortable and practical.
The stores offer a wide selection of accessories, but you can sew the product yourself. Moreover, there are models that do not require the use of needles and threads during production.
After about the first year, children begin to acquire stationery and art supplies: multi-colored pens, felt-tip pens and paint brushes. Moms have more housework, so they will be especially interested in learning how to make a pencil case with their own hands.
 Parents of children will find a pencil case very useful. Firstly, the child will enjoy putting items in bright containers. Secondly, this is a great chance for mommy to practice and improve her creativity.
No need to start with complex models. It will be enough to sew a regular drawstring bag. The work will take a little of your time. A fabric bag can be decorated with braid, buttons, rhinestones or beads. Such pencil cases for children will be a real find, because they can be bright and interesting.
Before moving on to creation, it is worth considering the model of your pencil case, calculating its dimensions, capacity and stability. All these points must be taken into account before you start sewing the product, because it will be sad if the supplies for work or drawing do not fit into the bag.
One of the light models is a one-division cover with a zipper. When working correctly, such a handbag can be modified. Then the internal space will be divided into two or three auxiliary sections, each of which can be closed with a zipper.
Bags differ in shape and size. They can be in the shape of a cylinder, a parallelepiped, or an animal, such as a cat. Experienced needlewomen can knit a fancy pencil case with knitting needles, but for beginners it is better to choose simple models and the following fabrics:
An original handbag in the shape of a shark will create good mood you and the child. To make it you need:

Step-by-step creation of a shark pencil case


 Felt pencil cases are considered very original and easy to make.
This material is malleable and requires processing, because its sections will not fray, the internal and front seams only need to be overcast by hand, and to make the elements more beautiful, they are cut out with special scissors with serrated blades.
This method is also applicable for natural and artificial leather, suede.
All you need for such a pencil case is a rectangular piece of material, a ruler, a pencil or chalk and sharp scissors.
You need to create small notches in a piece of fabric that will serve as loops for brushes, pencils and pens. The holders are made along almost the entire length of the workpiece, with the exception of the front side, into which the colored roll will be wrapped. To prevent the bag from opening, on the side where there are no slits, it is necessary to attach a braid or ribbon of sufficient length. Wrapped around the item, it will perfectly secure everything that is laid out inside and decorate the item.
Attention, TODAY only!
, you can create a large number of different pencil cases for pencils, markers, pens and other office supplies.Here you will find the most interesting pencil cases that you can take with you to school, on the road or use at home, where the pencils will be neatly folded in one place.
You will need:
A suitable container with a lid (this can be either a food container, a juice/water container or a liquid soap container)
PVA glue
Decorative paper (or thick construction/wrapping paper).

1. Cut the required piece from colored paper.
2. Using a brush, apply PVA glue to the container.
3. Glue a piece of colored paper and, while the glue is still wet, adjust it so that everything is even.
The pencil case is ready, but you can decorate it with glitter, stickers and other details.

You will need:
A piece of felt of the desired size (its width should be greater than the length of the pencil)
Stationery knife
Pen or marker
Ruler
Photo instructions:


Video instruction:

You will need:
Colored tape or some washi tape
Any case or container in which pencils are placed (a ziplock bag, a case for swimming glasses or regular goggles).

With various rolls of colored tape and scissors, you can decorate any container or bag.
Use your imagination to create a beautiful pattern.

You will need:
A piece of genuine leather, large enough to fit several pencils or pens
* If you do not have genuine leather, you can use artificial leather, thick felt, or any other suitable material.
Awl or hole punch
Scissors
Ruler

1. Make the necessary markings and cut out the required piece from the leather.

2. Using a hole punch or awl, make holes as shown in the image.
3. Insert a string through the holes and tie a knot.


You will need:
Notebook with thick cover
Pocket from an old shirt or T-shirt
Thread and needle
Button
PVA glue
Scissors.

1. Cut a pocket from an old shirt or T-shirt. You only need the top of the pocket.
2. Trim the corners as shown in the image.
3. You can use red thread to decorate your pocket.
4. Sew a button to the pocket.
5. Bend the pocket - the left and right sides need to be bent, as shown in the image - and connect the bent parts with a thread and a needle. However, if you want to maintain the width of the pocket, then you can skip this point.
6. Sew the pocket to the notebook. You can use PVA glue to make the pocket stick better.

You will need:
Sheet foam (porous elastic) - in this example, 2 sheets were used measuring 12 x 17 cm and 7 x 17 cm respectively
Colored tape (colored adhesive tape)
Velcro
Hole punch or utility knife
Ribbon (braid).
1. Lay out several sheets of foam rubber (sheet foam) on the table. The large leaf will fold over the small leaf.
2. Use colored tape to secure the ends of the sheets. Trim off the excess.

3. Using a hole punch or utility knife, make several holes in the top of the large sheet (which you folded) and thread the ribbon through the holes.
4. Attach Velcro - you can use PVA glue, superglue or double-sided tape.


You will need:
DVD case
Cardboard (thicker or regular)
Scissors or utility knife
PVA glue
Super glue
A special mat or board on which you can cut without damaging the table or other surface.
1. First you need to cut off the part of the case that holds the disc. To do this, you need to open the case and place it on a special mat or board. Use a utility knife to cut out a circle.

2. Cut out a rectangle from thick cardboard that will fit inside the case.

3. Take the fabric, cut the desired piece to wrap the cardboard with. Use glue to secure the fabric to a piece of cardboard.

4. Cut another piece of fabric (preferably thick) to make a pocket for pencils. Measure so that the fabric can be folded in half and its height is at least as high as the cardboard.
You can iron the fabric folded for the pocket.

5. Place the wrapped cardstock on the table, pattern side up, place some pencils on top of it, and place pocket fabric on top.
Wrap the pocket fabric around the pencils and secure the ends behind the cardboard with glue. You can also use duct tape.


6. Glue the cardboard with the pocket to the case as shown in the image.


7. You can print out a colored cover for the case so that by inserting it you can cover the hole in the case.

You can also create several compartments in your pencil case by stitching the pocket fabric.


It has already become an established tradition to purchase school supplies at stationery stores. But it is quite possible to make the most necessary attributes of a schoolchild - for example, a simple pencil case for pens and pencils - with your own hands. Such a product will compare favorably with the accessories of other children.
And every time the child takes it in his hands, he will be able to feel the warmth of the care of his mother’s, grandmother’s or sister’s hands. There are different ways to make pencil cases from various types material.
Let's get started!
The simplest but most interesting school pencil case can be made with your own hands from an ordinary box. It is enough to place a velvet or leather lining on its bottom and cover the walls beautiful paper. A box made of unpainted cardboard looks no less original and very stylish.

You can make a pencil case from a cardboard cylinder and fabric. For this you will need:

If we use one cylinder, then cut it into two parts of unequal height - one should be shorter, the other longer.

If we use two cylinders, then cut off half from one, which we use together with the second whole cylinder.
We outline the bottom of the cylinder in advance on thick cardboard and fabric. We make two cardboard and two fabric circles.

Take a piece of fabric, the width of which should be enough to wrap the cylinder, leaving a little material at the edge. Along the height of the short part of the cylinder, mark the distance from the edge of the prepared piece of fabric and make a cut. We sew a zipper between the resulting narrow and wide pieces of material.

We fold the resulting piece of fabric along the right side inward, stitch along the edge.

We insert long and short cardboard cylinders into the resulting case, matching them with a zipper. (The side seam of the cover remains outside).
We place pre-cut cardboard and fabric circles on the bottom and top. Along the edge we sew a fabric circle to the cover placed on the cylinder.

You can place a cotton pad between the cardboard and the fabric for volume and softness.

Having sewn it on, remove the cover and turn it right side out. We put it on the cylinders again. We glue it.

Look at the video on how to make a simple pencil case from cardboard:
A simpler option for making a pencil case for school with your own hands is to use a rectangular piece of bright leather to create it. Using a stationery knife, along a ruler, in a checkerboard pattern, we make parallel cuts on it.

Pencils or pens will be inserted into each of these cuts, like rods in a basket.

Having rolled the pencil case into a tube, we wrap it with a beautiful ribbon, the edges of which can be sewn to a leather flap.

A charming, soft pencil case for markers or felt-tip pens can be made from felt.

To make such a pencil case we need:

We cut a rectangular blank from a piece. We can estimate the size by placing markers on it. Apply glue between the markers, as shown in the photo. The gap between markers will be 2.5 - 3 cm.

We fold the bottom of the fabric, gluing it between the markers.

We take out markers. Apply strips of glue for the ribbons.

Glue the ribbons. Cut off the excess part.

We turn the pencil case over and apply glue for the ribbon with which we will wrap the pencil case. The glue strip should not be more than 5-6 cm on the right or left side of the pencil case.

Glue the tape. Please note that the tape is not glued along its entire length.


We wrap it in a tube along with markers.


Look at the video on how to make a beautiful felt pencil case:
A very gentle and very thoughtful pencil case for girls.
When I was looking for felt pencil cases on the Internet, I really liked this gray cat. Let's try to make it. We cut out two parts of the craft from gray felt according to the model in the photo.

We cut one of the blanks into two parts. We sew a zipper into it.

We sew a mustache, nose and beady eyes onto the front part.

We sew two blanks from the inside.

Turn the craft inside out. We sew the paws with a thick thread, making them look like cat claws. The cat pencil case is ready!

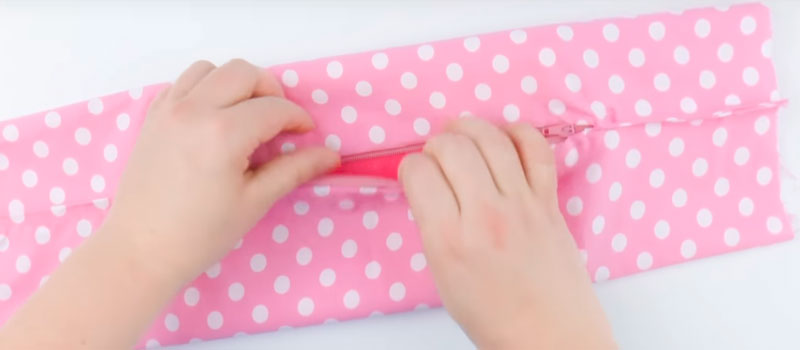
This simple version of a pencil case can be made either from ordinary thick fabric or from oilcloth on a fabric basis. To make a pencil case we will need the material itself, a zipper, scissors and pins.

It will be most convenient to make a pencil case based on the size of the zipper. We cut out two identical rectangles from our material with a length equal to the size of the zipper.

We position the material in relation to the zipper as shown in the photo.

We sew the material to the zipper with threads. This is a temporary stitch. After we make the seam on the machine, we will remove the temporary seam.

We make a stitch on a sewing machine.

We manually stitch the second part of the material with a temporary seam in a mirror image.


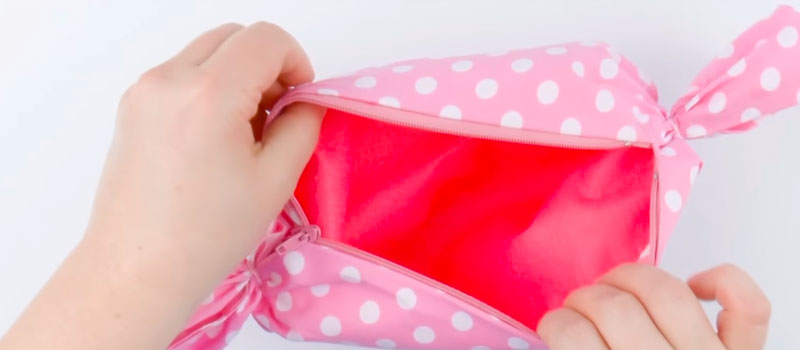
Turn the pencil case right side in and sew the remaining sides together.

We turn the pencil case inside out and remove the zipper inside.

Our pencil case is ready!

The pencil case turned out to be very light and convenient.

See how to sew a simple and inexpensive pencil case:
Look on our website “how to sew a pencil case in the shape of a funny cat?”

We make blanks according to the sample from paper.

Using paper blanks, we cut out fabric patterns. We leave a small margin on them around the edges.

We sew a zipper between the parts.

This is the kind of charming cat we should get.

High school girls can also make such a pencil case, thereby demonstrating their extraordinary abilities.
Look at what a wonderful pencil case you can make in the shape of a shark:
A pencil case can even be made from plastic bottles. To do this, we need to cut off the lower parts of two identical bottles. Glue a zipper between them. The pencil case will turn out to be very unusual. Perhaps this idea will be relevant at the competition original crafts for school.


Facial skin needs regular cleansing. But to preserve youth and beauty, it is important to pay attention to the components...
KenzoKi Belle de Jour Dream Night Mask Night care from the main cosmetic sybarites The Japanese KenzoKi entered the market with...
I'll start with the basic rule: you don't have to take sports nutrition, but the right supplements will help you faster...

Essentially, there is nothing wrong with any emotion, but some of them can cause problems if not controlled...

It would seem that something new can be invented in the field of tableware production: here is a kettle, here is a frying pan, here is a bicycle...

At least once in their life, every person begins to think about why they have a lot of money, while others, working day and night,...

CONSULTATION FOR PARENTS “FUN EXPERIENCES IN THE KITCHEN.” Prepared and conducted by: MDOBU teacher...

State budgetary educational institution of the city of Moscow Secondary school with...

Crafts from sponges for washing dishes are easy to make, since the material is soft, has a smooth surface, good...

Hello, mother country! I want to talk about something that is very close and dear to me, to share my experience, so...
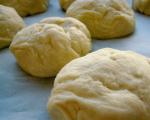
Modeling is a useful and exciting activity not only for kids, but also for parents. This is an opportunity to spend...

MOSCOW, February 20 - RIA Novosti, Irina Ovchinnikova. Summer camp is a traditional format for children's recreation:...

"TROPICAL RAIN". Participants stand in a circle. The presenter stands in the center: “Now we will all call a warm...

Homeschooling (homeschooling, from the English homeschooling - home education) is popular in the USA and Canada, has...
KenzoKi Belle de Jour Dream Night Mask Night care from the main cosmetic sybarites The Japanese KenzoKi came out...
I'll start with the basic rule: you don't have to take sports nutrition, but the right supplements will help you...