Kigurumi pajamas pattern
Children love big, funny little animals, which we often see in parks and children's entertainment centers. They With...
How to weave rubber band bracelets? If you are asking this question, it means that you have already purchased a wonderful set for creativity - Rainbow Loom or Loom Bands. Typically, such a standard set includes: a special machine and a slingshot for weaving, a hook, clips for connecting bracelets and a certain number of small elastic bands in several colors - from standard to bright neon.
The weaving of rubber band bracelets itself originated in America and has already spread throughout the world. This new type of needlework has conquered the world with its availability of materials and simplicity of execution technique. The passion for weaving from rubber bands is typical of girls, who in this way can enjoy not only the process, but also the result obtained in the form of new bright accessories. After all, every girl dreams of a large number of unique and original accessories that can be woven into each outfit in suitable colors. In this regard, this hobby will bring true pleasure to fashionistas - they will receive a lot of beautiful, unique, bright bracelets, necklaces, rings, earrings, pendants and even mobile phone cases.
Detailed instructions with pictures on the Maximum of Ideas website will tell you how to weave bracelets from rubber bands. It’s definitely worth starting with simple weaving patterns in order to gain experience in weaving and not discourage you from pursuing this hobby once and for all. It should also be noted that the manufacturer recommends weaving accessories from rubber bands from the age of 8 years.
Read in this article:
One of the simplest, most basic weavings is weaving a bracelet using the fishtail technique. For this pattern, you can use various devices - a weaving machine, a slingshot (which is included in some kits), a dinner fork, or you can simply weave a fishtail bracelet on two fingers.
For your first bracelet, take elastic bands of the same color so as not to get confused and understand the technique. In the future, when you understand the concept of weaving, you will be able to confidently create color compositions and unique models of bracelets and other jewelry.
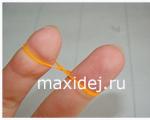
Take three rubber bands. Place the first one on your index and middle fingers in a figure eight pattern, as shown in the photo.

Put on the next two rubber bands without twisting them.


Thus, the bottom elastic band should hang on the other two, forming a kind of loop.

The next step is to put on the fourth elastic band (all elastic bands, except the first, are put on without twisting). Each time, take the bottom elastic band by the edges and pull it through your fingers.

Repeat these steps until you get a bracelet of the required length.

To finish the bracelet, secure the ends of the outer elastic bands with a clip.
 To do this, hook the clip onto the last rubber band.

On the other side, hook it onto a full loop (it was the second one when you started weaving), and cut and remove the first one (which was a “figure eight”).
A bracelet made of rubber bands, woven on the fingers in a fishtail pattern, is ready!
Some Rainbow sets come with a special device for making bracelets - a slingshot. It looks something like this:

You can weave on a slingshot in the same way as weave on your fingers. You will need the same materials: about 25 rubber bands in yellow and 25 in pink (this time try using two contrasting colors to get a nicer bracelet), an S-shaped clip and a slingshot for braiding.
Take a yellow rubber band and put it on the slingshot like a figure eight.


Grab the bottom elastic band with your fingers (you can also do this using the hook from the set) and lift it up.

Do the same on the second side.

Put on the elastic band in a contrasting color again and repeat the previous steps.

We continue to weave until we get a bracelet of suitable length.

Connect the ends of the bracelet using an S-shaped clip, as described in the previous diagram.

Similar bracelets can be woven using a special machine. This machine looks like this:

The rows of posts are removable and can be repositioned for different weaving techniques.
To weave a simple bracelet from fishtail elastic bands, you need to do the same steps, but instead of fingers and a slingshot, use the two outer posts from the loom. This is what it looks like:

And this photo shows ready-made bracelets made of rubber bands, woven according to the above master classes.

Have you bought a bag of colored rubber bands and want to make a decoration out of them, but don’t know how? Weave bracelets from rubber bands without a machine quickly and easily! This article describes simple techniques using only fingers or finger substitutes.
If you decide to start weaving from rubber bands, you should immediately buy a set of materials and tools. In addition to a large number of elastic bands of different colors, there is a hook for work, as well as special devices called machines. This tool usually consists of a stand with pins that can be rearranged into cells located at equal distances from each other. There can be a different number of rows of columns.
The convenience of this device is that it allows you to create complex three-dimensional jewelry in the form of figures and weave wide bracelets that cannot be obtained in any other way. If you just want to try a new type of needlework to decide whether you like it or not, you can easily weave a simple bracelet from rubber bands without a machine. The same applies to those who do not like to spend a lot of time on making products. If you want to make a lot of bracelets quickly, use simple patterns that do not require a machine.
If you decide to try to weave a bracelet from rubber bands without a machine, you have several options:
Any of these methods allows you to get original beautiful things. Having mastered even one simple weaving pattern, you can create many different accessories by changing the color combinations in them. Weaving bracelets from rubber bands without a machine is an equally exciting and creative activity. Each method has its own characteristics, but the operating technology is similar. It is better to use a special or crochet hook as an auxiliary tool. It is more convenient to work with it, although you can do all the work only with sleight of hand.
The following photo shows the simplest method, however, the product turns out almost flat and looks like a braid or a strip of loops. To understand the principle of weaving, you can start with this option. Work like this:
The simplest bracelet is ready!

The following version shows how to weave a bracelet from rubber bands without a machine called “Fishtail”. For the first time, you can limit yourself to one color. When you master the principle of operation, take a larger number of shades and alternate them in any order.
In fact, the process is similar to the previous method. The difference is only in the beginning. You also put the first elastic band on in the form of a figure eight on two fingers, and the second one as a ring. And then you put on another one with a ring and only after that you begin to throw the bottom elastic band over the top to the middle. A small difference, but the appearance of the bracelet immediately changes. It becomes more voluminous and interesting.

You learned how to weave rubber band bracelets without a machine using your own hands. However, this is not always convenient. It's much better to have both hands free. You can use a special device that essentially imitates the two fingers on which the previous options were performed. Working on a slingshot is similar, only you can always put the unfinished product aside and finish it later.
By the way, for a new experience, you can create another bracelet model, which is shown in the next photo.

It should work like this:
All is ready!
If you decide to make a bracelet from rubber bands without a machine using the tool from the previous section, but you don’t have one, you can make something similar from ordinary pencils, markers or pens. It is enough to arrange them in the form of a corner, a tick, put a spacer between them to maintain the distance between the parts and secure the structural elements. An ordinary eraser will work as a spacer, and it’s easy to connect everything with tape or other adhesive tape. So, in a few minutes you will make yourself a comfortable device so that your fingers are free.
You have already been offered enough options on how to weave a bracelet from rubber bands without a machine, but there is another one - weaving on a regular table fork. Use one or two cutlery connected in a certain way. Using a slightly different technology, using a fork with four prongs, you can make the same “fishtail” and other, more complex patterns.

If you don't want to learn labor-intensive weaving techniques, but are just looking for a convenient tool for the job, take a plastic fork, remove the middle two cloves and use it as your fingers, a slingshot, or an alternative homemade device made from felt-tip pens. All of the above weaving methods are perfect for such a two-pronged fork. Cheap, fast, convenient.
So, you have become acquainted with several possibilities on how to make a bracelet from rubber bands without a machine. Choose your favorite weaving method and pattern. Create your own fashion accessories.
When we start weaving, we often have no idea how many things can be made from rubber bands.
Let's group them into sections; they are very conditional, but they give a general impression and awareness of the things that are woven from elastic bands.
Of course, we will analyze not just theory, but master classes with step-by-step instructions on how to create various crafts from rubber bands.
Even if you have a huge imagination, you will still be surprised. Ready to get started and choose the option that's right for you?
Let's look at what can be made from rubber bands, from the idea to the finished product.
The most famous products are bracelets. Their styles, colors and options amaze even skilled weavers. But other works or crafts are small discoveries. They are also accessible to beginners, as their sizes are sometimes smaller than bracelets.
What can be woven from rubber bands on a machine or without a machine besides bracelets? Let’s immediately make a reservation that we will not distinguish between two-dimensional and three-dimensional figures. The ball can be flat or three-dimensional; we will illuminate such objects as one.
The most exciting section for young fashionistas and fashionistas is jewelry. Weaving bracelets is a separate topic, which we will continue to cover in a series of articles, as well as about rings. This includes: rings, bracelets and necklaces.

Some bracelets are discussed in this article, dedicated to weaving bracelets on fingers, forks and a machine.
From basic skills to bracelets for more advanced crafters or crafters.
In search of beautiful crafts, we recommend that you find out that master classes will help even beginners do this. Let's figure out how to weave a French braid bracelet from rubber bands with detailed photos you will find.

You can see examples of exquisite jewelry and video instructions. I would like to remind you that any bracelet can become a necklace, you just need to weave it to the required length or lengthen it by weaving it with the simplest pattern.

They can be keychains on a bracelet or keys, a phone, an iPhone, or a backpack. It is no coincidence that they were collected in one section. Who is placed here? Panda, owl (both two-dimensional and three-dimensional amigurumi), penguin, lion, parrot, horse, lemur, octopus, hedgehog, chicken, duckling, frog, sheep, snail, pigeon, fish, koala, elephant, mouse, pig, dog, dolphin, hamster, cat, giraffe, guinea pig. Video lessons on creating animals and birds

There are several variants of this bird - these are both 2 and 3 dimensional owls, differing in wings, beaks and eyes. In the photo you see all the options. Educational video materials for each owl will be in a separate article with detailed descriptions and photos.
A voluminous hedgehog made from rubber bands or in 3D, very similar to a fairy tale. Quite adorable and with a green bow, just a cutie.
And this hedgehog is a friend of the hare, who did not want to go to Tilimiritryamdia without him and collected daisies together with the bear cub in the cartoon about clouds.

Love fauna will be able to weave such bright and familiar inhabitants. Experimenting with colors, finding more spectacular and unusual options. Bee, spider, butterfly, ladybug.

: violets, narcissus, hibiscus, flower bed.
turtle, gecko, snake.
This section turned out to be somewhat chaotic, perhaps because there are several holidays and it is difficult to choose a strict focus.
Christmas trees, gifts, Christmas tree decorations, snowmen, snowflakes, Christmas wreath, Rudolph the deer, Santa Claus, Santa Claus hat.

Ninja Turtle, Minions, adventure time series, iron man, captain America, Hulk, Sailor Moon, Pikachu, Hello Kitty, angry birds.
Lovers of sweets will love this section, and adherents of any diet will have a special affection for it, since these sweets will not cause grief due to extra pounds. A bottle of Coca-Cola, cake, a cup of coffee, an egg, a mushroom, candy. Fruits, vegetables : strawberries, cherries, grapes, pumpkin, carrots.
And this section includes everything that does not fit into the first few. It may even seem like complete chaos to you, but each of these products is woven with rubber bands, and you will see exactly how in the video.
Ballerina, cap, soccer ball, star, tooth, candle, soldier, airplane, mustache, mermaid.
: heart, bow, branch of kisses, Eiffel Tower, sun, Mercedes sign, dress.
: phone case, flash drive, lipstick. Braids for pens and pencils.
Every day the Internet is replenished with new video tutorials on weaving from rubber bands. Start weaving now what you like. Good luck with your weaving and no tearing rubber bands!
Interest in bright and unusual jewelry is always great. Especially if it is a unique thing, made in a single copy. In the summer, I really want to add some color to my look and highlight a beautiful tan. It is not at all necessary to spend huge sums in jewelry stores or empty counters with jewelry. It’s enough to learn how to weave bracelets from rubber bands - and an unusual accessory will very quickly end up on your wrist.
The color range of rubber bracelets is very diverse.
A bracelet made of rubber bands can be created for each outfit or for a specific event. There are many ways to weave, and the color range of the material is endless.
The idea of combining soft leather rings into beautiful bracelets or belts was born long before humanity knew about rubber. Most often these were women's amulets, military amulets or festive belts. Then this technique was forgotten for a long time. The children were the first to remember her. Accounting colored elastic bands for money attracted attention precisely for their non-standard properties - elasticity and the ability to keep their shape, soft fit and sufficient strength. In 2010, the world was covered by a wave of popularity of weaving from rubber bands. Everyone was carried away by this: adults and children, women and men, boys and girls. In some places, competitions were even held in this weaving to test the speed and originality of the knitting.
But elastic bands are quite difficult to tie in a knot. This was noticed by Chong Chun Ng, a Malaysian immigrant of Chinese origin who worked as an engineer at a Nissan plant in the United States. His daughters diligently tried to make jewelry from accounting rubber bands, but they were unable to make knots. The loving father figured out how to make this process easier for them. He fixed a row of nails on a wooden board and purchased a dental hook. Weaving on the machine was a delight. The whole family got involved in coming up with new schemes and methods. Gradually, the machine changed: the nails were replaced with adjustable plastic pegs, which had a special cavity for easy clinging, and convenient hooks and a “slingshot” were added. The patent was taken for the Twistz Bandz toy, but when the inventor wanted to put his invention on sale, it turned out that hair bands were produced under the same name in China. They turned out to be a more suitable material for weaving, because the range of colors they had was impressive, and the patterns were more delicate. At the family council, it was decided to give the product a new name - Rainbow Loom. It was under this name that the whole world learned about this fascinating activity.
Rainbow Loom is not just about creating playful or elegant decorations. Weaving requires perseverance, attention, and finger dexterity. All this is the development of fine motor skills, connection with the development of speech and memory. That's why Rainbow Loom has become fantastically popular among children and parents. In 3 years, over a million sets were sold. The toy has become one of the most popular in the world.
In some state schools, administrators were forced to ban the toy because children were being distracted from their studies. There have been cases of injuries to the eyes from broken rubber bands; children sometimes overtightened their fingers to the point of risking necrosis. But nothing could stop the victorious march of multi-colored wicker rubber crafts around the world.
Bracelets and rings are the first thing that comes to mind when looking at bright toy boxes. But the ingenuity of enthusiasts knows no limits. They weave little animals, handbags, keychains, cases for smartphones, necklaces. The range depends on experience and flight of fancy.
You shouldn’t limit yourself to just rubber bands. There will probably be large beads, decorative rings, bright ribbons, elegant lace, sparkling sequins. On a large loom with a fishnet pattern, craftsmen weave full-fledged elements of clothing - high openwork cuffs that catch flying sleeves of chiffon and silk. The brutal outfits of bikers look unusual, complemented by woven bands on caps or bracelets with metal inserts.
Children prefer to weave cute animals, create fruits or berries, and give their favorite doll a fashionable handbag. Teenagers go crazy for “baubles” made from rubber bands, and color combinations are important to them.
Bracelets remain the most popular products made from rubber bands. Girlfriends exchange them, they weave them for gifts, and they organize real weaving marathons. There are many video instructions on the Internet showing how to make a bracelet from rubber bands. You can create them on a machine, use a slingshot or a fork, or just use your own fingers.
On a note! The final result depends on the chosen weaving pattern, additional decorative elements, width and color scheme.
Young fashionistas not only flaunt mischievous baubles. They are given as a sign of special friendship and are collected. There is even a special language of “baubles”, which communicates the mood and status of the owner in a certain youth company. But more often than not, it's a wonderful way to have fun and enjoy creating a new piece of jewelry.
The easiest way is to use only your fingers and the clasp included in the kit. The bracelet is narrow, just right for a child's hand. Available patterns include fishtail, rain, sidewalk and some others.
 Bracelet made of rubber bands - “rain” weaving
 The technique of weaving “on fingers” is quite simple:
A well-chosen color combination or weaving method will help create a decoration that adequately emphasizes the image. You can put cute pendants on some rubber bands, turning the bracelet into a gift with a hint.
Each kit contains a simple device for weaving a bracelet on a slingshot. This is really a slingshot in which 3 plastic pegs are connected in the center, 2 parallel in one direction and 1 in the diametrically opposite direction. Rubber bands are placed on parallel pegs according to the diagrams. They are intertwined with each other using a hook, stretching the loops. Gradually adding new elastic bands, weave a bracelet. This type of jewelry will have a clearer faceted edge, and well-matched color details will make the owner of the bracelet stand out.
 Each kit contains a simple device for weaving a bracelet on a slingshot
 If the slingshot is lost, it can be successfully replaced with a plastic fork. There are 4-prong weaving patterns. The difficulty is that the tines of the fork often have rather sharp edges and can cut the elastic band at the most crucial moment.
The most complex and colorful bracelets are created on a machine. Pegs allow you to free your hands and easily weave pendants, ribbons and beads into your jewelry. Such bracelets are worthy even of an evening outing. The most popular patterns are “sidewalk”, “caterpillar”, “snowflake”, “rain”, “French braid”. Particularly experienced ones master the “spider” and “stars”. Wide bracelets (cuffs) are woven from multi-colored elastic bands according to the “scales” pattern. This is a fairly large-mesh pattern, so this bracelet does not require additional decoration. It is good on its own, especially if you choose elastic bands in the color of a real rainbow. The width directly depends on the width of the machine itself. You can make decoration up to 10 cm wide.
 Rubber band bracelet - dragon scale weaving
 The main difficulty of weaving on a machine lies in exact compliance with the pattern. A video instruction will come to the rescue, where the sequence of actions is scrupulously explained and advice is given on the selection of materials. If you plan to add beads or pendants, it is better to use transparent elastic bands so as not to distort the color of the decor.
Each kit includes a pack of clear plastic mounts. They are necessary to create a reliable fastener. Usually this is a small hook and the second part is a figure-eight clip. Despite their apparent fragility, they provide a fairly strong fixation of the bracelet on the wrist. It is very important to know how to securely tie an elastic band on a bracelet using a clip.
The clip is used on the simplest bracelets, which are made on the fingers or on a slingshot. To do this, the elastic is simply placed on the clip, stretched to be pulled through a narrow slot in the fastener. In this case, no node is formed.
 Each kit includes a pack of clear plastic mounts
 Complex bracelets are fastened with a clasp. To do this, one part is woven into the bracelet already on the first elastic band. The last rubber bands are removed according to the scheme until only one rubber band remains. It is pulled tight and threaded into the second part. After this, the tension is released, and the elastic band is tightly fixed in the fastener. This method is perfect for finishing work on a slingshot and machine.
Sometimes a clasp is not required if a ribbon is woven into the bracelet. It is she who will play the role of a fastener. A spectacular bow looks great with a festive outfit. The last elastic bands must be passed through each other until a loop of 1-2 elastic bands remains. The tape is pulled through it and a fixing knot is formed.
On a note! If there is no fastener or clip at hand, the coils of elastic bands are secured with a simple thread or a torn elastic band.
Cute jewelry does not lose its popularity. Opponents have only one counterargument left - ecology. Indeed, rubber bands do not decompose at all. But who said that a boring bracelet needs to be thrown away? Just unravel it, arm yourself with new decorative elements, show your imagination - and you will get a new original decoration. This is especially important for joint creativity with children.
Such a popular type of needlework as weaving bracelets from small plastic rubber bands has not lost its relevance for many years in a row. The reason for the demand for this art lies in the simplicity and colorful charm of the weaves. Children as young as 8 years old are allowed to weave rainbow bracelets, baubles, toys and figurines, but often this type of handmade is also enjoyed by adult handicraftsmen, both women and men.
There are many ways to weave jewelry from rubber bands; we will look at them all in this article using the example of knitting the most popular models of bracelets, from the simplest to the most unusual patterns. Also, using the example of detailed photo and video tutorials, we will learn how to weave the most interesting models of bracelets from rubber bands, even if you have very little experience in this art.


There are several ways to create bracelets from rubber bands, each of which offers a variety of possibilities, depending on the skill level of the needlewoman and the desired result.
You can knit elastic bracelets using:
The specifics of knitting on certain items vary slightly, so you should start by learning the basics of knitting with elastic bands, and gradually get better at more complex patterns. Will help you understand this type of needlework Step-by-step lessons on weaving bracelets from rubber bands are presented below.
Often in art stores, shops and salons, children's departments and specialized boutiques with goods for creativity, you can purchase a special set for knitting from elastic bands, which is called Rainbow Loom or Loom Bands. Most often, a kit for knitting bracelets from rubber bands includes multi-colored or single-color rubber bands, a rainbow loom and a slingshot for weaving, a hook for knitting from rubber bands and a connecting clip for bracelets. All this will definitely come in handy when creating beautiful accessories.
Among the dozens of proposed patterns on different sites, you should pay attention to the simplest and lightest bracelets made from elastic bands, because they are so popular among beginner knitters in this style. This includes weaving bracelets on fingers and working with a slingshot.
For example, on your fingers you can easily and surprisingly quickly master a model of a bracelet made of rubber bands, such as the Fishtail. Then knitting this pattern on a slingshot will be more interesting and faster. Another popular type of bracelets among beginners is the Dragon Scale. This is a fairly universal pattern that can be knitted using all tools for working with elastic bands. The choice is yours!


At first, when getting acquainted with the art of weaving from elastic bands, they usually work with the Fishtail pattern. It is quite easy to perform, and also does not require the use of additional tools. All you need is elastic bands, a connecting clip and the hardworking hands of a knitter. Let's take a closer look at how to weave a Fishtail bracelet from rubber bands in the simplest way.
Materials for work:
Progress:
The first rubber band is put on the index and middle fingers in a figure eight. Next, the two elastic bands are put on without twisting.
The bottom elastic band is removed from both fingers separately at each edge, after which it forms a kind of double loop, as shown in the photographs.
Then another - the fourth - elastic band is put on the fingers, also without twisting (this bracelet model involves twisting only the first elastic band in the entire work). Then the lowest elastic band is removed from the fingers in the same way as the previous lower one. This is the main work on the bracelet: adding one elastic band at a time, and forming a double loop with the very last elastic band in the row.
These steps are repeated until the required length. Finally, the ends of the product are secured with an S-shaped clip-fastener.


The Dragon Scales bracelet made from elastic bands is also very popular among beginner knitters. It looks interesting, especially due to its openwork structure and impressive width. Depending on the choice of knitting method and the number of stitches on which the bracelet is knitted, Dragon Scales will have its characteristic width and delicacy. Let's consider a way to knit this bracelet from elastic bands using two ordinary forks.
Progress:
We take two ordinary forks in our hand with the tines facing us, and in the very middle of the legs we tie them with tape or the same rubber bands. It is important that they do not move to the sides and do not fall apart.
Each fork has four tines, which means we have four pairs of tines 1-2, 3-4, 5-6, 7-8. The first row must be twisted in figures of eight: on each pair of cloves you must put a ring, twisting it in a figure of eight, as shown in the photo.
For the next row you will only need three rings of the same color, this time you don’t need to twist them, just put them on the teeth, connecting them in pairs 2-3, 4-5, 6-7.
When putting on each new ring of the next row, you need to remove the loops of the previous row so that they overlap the new elastic bands. When removing the loops of the first row, you need to leave them on the first and last clove, since we did not put new rings on them.

Thus, to get bright bracelets made of elastic bands without a Dragon Scales machine, just follow a simple algorithm: alternate rows, connecting in pairs 1-2, 3-4, 5-6, 7-8 and for the next row 2-3, 4-5 , 6-7. When creating a new row, do not forget to throw off the loops of the previous one. In this case, the two forks should form a line, not overlap each other, so that the product turns out neat.

You can make 4-5 rows of each color so that the mesh looks bright and beautiful, you can alternate only two colors or make the bracelet rainbow.
You need to adjust the desired length of the bracelet as you work. It is necessary to take into account that the elastic bands in this weave stretch very well, and you need to control the process all the time so that the finished bauble does not fall off your wrist.


A very important point in the process of creating a bracelet from rubber bands is the final connection, because this will determine whether the loops will unravel. The last row of the mesh will be different from the rest: you need to put one rubber band on one fork over all its teeth, twisting it several times, as shown in the photo of the master class. We remove the lower loops and do the same with the second fork. Now there is only one line left on each, you need to drop it from 1 tooth to 2, from 4 to 3. Hook the fasteners onto the remaining loops.
Step-by-step lessons in weaving bracelets from rubber bands can be mastered by both children and adults, and the result will not take long to arrive and will certainly please the needlewomen and their loved ones. From the many ways of knitting bracelets, you can choose the most simple and convenient one, and knit interesting accessories that cannot be bought anywhere.
The technique of knitting a bracelet from elastic bands, although it differs depending on the chosen weaving method, but the essence remains the same: interlacing elastic bands on two or more columns allows you to get the most unusual shapes and patterns.
A slingshot is a great tool for knitting elastic bracelets. It is compact, lightweight, but at the same time allows you to knit beautiful and complex products. With its help, you can effortlessly knit such popular bracelet models as French Braid, Sidewalk, Spikelet, Fusilli, and many others. Let's take a closer look at how to weave bracelets from rubber bands on a slingshot using the example of the popular models "Angel Heart".

Materials for work:
Progress:
We take an elastic band of a secondary color, in this case white, and begin weaving: we twist it and put it on the slingshot, as shown in the photo. In the entire bracelet, only the first rubber band needs to be twisted.
The second rubber band should be pink.
Use a crochet hook to hook the white elastic band on the left and carefully throw it into the middle of the pink elastic band.
Now we transfer the pink elastic band from the right column to the left column.
Then you should put the pink elastic band on the slingshot.
We throw the white elastic band up from the right column so that it catches the top pink one.
Add a white elastic band on top without twisting.
We throw the top pink elastic bands into the middle of the slingshot onto the white elastic band.
This is the beginning of weaving an Angel Heart bracelet from rubber bands. The following steps must be repeated until the bracelet is the desired length. You do this stage, and when you come to the end, start again.


We put another pink elastic band on top.
We hook the bottom pink elastic band on the left and move it to the top, throwing it into the middle of the slingshot.
Move the top pink elastic band on the right to the left.
We put on another pink elastic band.
We move the bottom pink elastic band on the right to the top.
We transfer the upper elastic band on the left to the right side of the slingshot.
We put a white elastic band on top.
We remove the top pink rubber bands from both columns of the slingshot and move them to the middle so that they rest on the white elastic band.
Now carefully: we place the hook under the pink elastic band, which is located in the middle of the column, and then we hook the white lower elastic band with the hook. We drag it up and send it to the middle of the slingshot. We repeat the same on the other side.


Now we go back to the beginning of the stage and continue to carefully weave until the bracelet is the desired length.
After the bracelet has been braided, move the pink elastic bands to the middle so that only white ones remain on the slingshot. We transfer both white elastic bands to one post of the slingshot and attach a clip to them. Then the other end of the clasp needs to be fastened to the beginning of the bracelet.


Weaving rubber band bracelets on your fingers is also very interesting, but it is better to choose simple models that are woven quickly. How to use this skill and how to make a bracelet from rubber bands on your fingers - we’ll tell you right now using the example of a well-known model of a double-weave bracelet - Double braid.


Progress:
We twist the elastic band in a figure eight and put it on the index and middle fingers. In the same way, we put another one on the middle and nameless ones.


We begin weaving using the following technique: we put two more elastic bands on top of the same fingers and in the same sequence. Only this time we don't twist them.
Remove the side loops from the twisted first rubber bands.


You should still have a double loop of the first rubber bands on your middle finger. We are also filming it.
This is the result you will get. This is the first finished loop.


At the very end we make a knot to secure it. Remove the right and left loops on the middle finger. We separate them using the double loop that was on the middle finger. And then remove the double loop, tightening the knot. We fix it with a hook.

Weaving bracelets on forks is a very original and budget-friendly way to give yourself and your loved ones a beautiful, bright accessory. Let's look at a simple diagram of how to weave bracelets from rubber bands on a fork and delight everyone with unusual gifts. We are talking about a wide bracelet with dense weaving.


Materials for work:
Progress:
We put a folded lilac elastic band on the middle tines of a fork and twist it in a figure eight. We also twist the next two elastic bands into a figure eight and put them on the two teeth on the left and right.
Now we put on the elastic bands on the right and left without twisting. Raise the bottom loops up.

We repeat all manipulations in the following sequence: 1 elastic band in the center and 2 along the edges. There are two rows of each color, after which we change to another.

We weave in this manner until we reach the desired length. We complete the bracelet like this: we remove the loops from the outer teeth to the middle ones, and from the lower ones to the top. We put the last elastic band on the middle teeth and remove all the loops.


Finally, secure the edges with an S-shaped hook. A thick bracelet made of rubber bands on a fork is ready.

The most popular type of creating jewelry in this style is weaving a bracelet from rubber bands on a machine. It is this device that allows you to create the most complex patterns and large wide knitting. At the same time, craftsmen have the opportunity to use a number of additional elements of the so-called rainbow machine. Let's look at this interesting way of weaving bracelets using the example of a model Star.


Materials for work:
Progress:
Place the machine on a level surface in front of you with the arrows and U-shaped pins pointing away from you.
First we place the black frame of the future bracelet. Place the black elastic band diagonally on the first pegs of the center and left row.
Place the second black elastic band on top of the first pin and on the second pin of the left row.
Continue in the same way until you reach the second to last peg of the row.
Pull the elastic band from the penultimate pin diagonally to the last pin of the central row of the machine.


Now you need to return to the front of the machine and do the same with the right row. After this, all the black elastic bands should be lowered to the bottom of the peg.
Now let’s start filling out the frame of the bracelet from rubber bands in the “star” style. Choose 6 rubber bands of the same color. Place the first elastic band on the second pin of the central row and on the second pin of the right row. In the same way, from the second peg of the middle row, put on 5 more elastic bands clockwise, forming an “asterisk”. Lower the elastic bands to the bottom of the pins.
The second “star” of the bracelet must be started from the fourth peg of the central row of the machine. All six rubber bands of a different color are placed in the same way as the first “star”.


Make 4 more “stars” in the same way, remembering to lower the elastic bands to the bottom of the peg.
After this, put a black elastic band folded in half on the first peg of the middle row and the central peg of each star.


Now a very important point - weaving the bracelet. The machine must be positioned so that the arrows on the machine “look” at you. After this, in the middle row in the first pin, hook a colored elastic band, pull it up and put it on the second pin of the middle row (aka the center of the star). This way there will be two loops of the same elastic band on the peg.


We do the same with the remaining elements of the star. In this case, you should hook the loop from the center of the star onto the peg, moving counterclockwise in a circle. We do the same with the rest of the stars on the machine. Be careful not to release the loop and thereby break the weave.
Then you should start weaving the bracelet frame. We start with the first peg of the central row. Using a hook, we hook the edge of the elastic, which is hooked between the first peg of the middle row and the first peg of the left row. We stretch it up and put it on the first peg of the left row so that both edges of the elastic are on the same pin.


Continue weaving the left row in this manner, stopping at the last peg of the middle row.
Weave the right side of the bracelet frame in the same way.

On the last peg of the middle row, hook all the elastic bands through which you then need to pull a new black elastic band. Both edges of the elastic are put on the hook.
After this, you need to carefully remove the bracelet from the machine. We hold the hook and loop in our hand.


To lengthen the bracelet, we put 5 black elastic bands on the empty loom.
Then, with a hook, you need to hook the edge of the elastic from the first pin to the second, and from the second to the third, and so on.
Now the first extension loop needs to be connected to the bracelet loop, which is on the hook.
Finally, the ends of the bracelet are connected with a clasp.

How to learn to weave a beautiful French braid bracelet from elastic bands? Watch a master class on making this beautiful accessory! You can weave this lush bracelet, so similar to a woman’s hairstyle, using all possible tools: fingers, a machine, a slingshot, two columns in the form of pencils, and even a fork. The pattern for knitting a French braid from elastic bands is not at all complicated; it can be repeated without much effort even by someone who has never woven products of this kind before. Let's consider the method of knitting on a rainbow loom.
To avoid getting tired of weaving bracelets, you need to constantly look for new ideas for inspiration and interesting work patterns. Our article will help with this with step-by-step video instructions on how to create beautiful and unusual bracelets.
Beautiful pattern with voluminous flowers:
Interesting 3D weaving:
Children love big, funny little animals, which we often see in parks and children's entertainment centers. They With...

If a doctor orders a pregnant woman to undergo such a serious examination as fluorography, she immediately has many problems...

The most impressive carnivals in the world can be found in several cities, which will be discussed in our today's...

The ex-husband of TV presenter, designer, and since 2017 singer Olga Buzova, midfielder of the leading Russian championship...

There are many different kinds of paper crafts. It’s not surprising, because this material is very convenient - you can...

Good afternoon dear friends! The first gift for a teacher is so exciting. Do you agree? We figured out what bouquet...

We knit 3 lifting stitches and 13 double crochet stitches into the amigurumi ring. Then we close it into a ring, fastening...
You can make slippers with your own hands. For this we need: natural or faux fur,...
How to weave bracelets from rubber bands? If you are asking this question, it means that you have already purchased...

The long-awaited spring is approaching, and with it our favorite holiday - March 8th. This is the International Women's...
Cones are a beautiful and durable natural material for creativity. They are often used to make children's and New Year's...

For different materials there are usually different care instructions. Here you will find, for each material, 3...

When assigning old-age benefits, the full time of work is taken into account. If such a period...
Its design, as a rule, differs little from a round or square napkin. Only inside there is room for...

If a doctor orders a pregnant woman to undergo such a serious examination as fluorography, she will immediately...

The most impressive carnivals in the world can be found in several cities, which will be discussed in our...