Crochet yoke for a children's dress: patterns with photos and videos
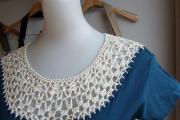
Its design, as a rule, differs little from a round or square napkin. Only space is left inside for an armhole...
Its design, as a rule, differs little from a round or square napkin. Only space is left inside for an armhole so that the product can be put on later. Working on yokes also does not require a special level of skill. Even a beginner knitter can handle it.
Many sources describe a yoke for its designs, which can be both very simple and quite complex. Sometimes you look at such a description and wonder whether it’s worth bothering with.
Definitely worth it. The fact is that this part of the clothing organizes the entire product well. She shifts the emphasis from its lower levels to the very top. Quite often this presents almost any female figure in a favorable light. Even if the young lady has quite wide shoulders, a yoke with a vertical pattern visually reduces them.
Most often, a round yoke is made (crocheted). Its pattern involves knitting in the round, which provides simply gorgeous decorative effects. Therefore, yokes are not just practical, but also very beautiful.
For craftswomen who have not yet fully mastered such needlework, this children's crocheted yoke will be perfect for training. Its diagram is extremely simple, so you don’t even need to create a graphical version of it.
We start work from the top from a chain of air loops. The width of the initial ring is equal to the width of the neck. The entire yoke is knitted with double crochets. For those who do not know how this is done, let us remind you. The hook catches the working thread. Then the tool is threaded into the loop of the previous row and pulls another loop formed from the working thread onto the front side. There are 3 loops on the hook. We knit them two at a time.
This yoke of a crochet dress, the pattern of which is suitable for beginner craftswomen, provides for a gradual expansion of the fabric so that it turns out in one plane. Therefore, in every second or third row we knit 2 loops in one base at an equal interval.
It is not necessary to make the yoke for a dress (crocheted), the patterns of which we are considering, the basis for a knitted product. You can also decorate textile clothes with it. This option is ideal for remaking old items that have lost their appearance a little.

In the proposed version, the work is performed from the bottom up. First, the product is tied in a circle at regular intervals using arches of air loops. Their number depends on the yarn and hook number. The second row is performed similarly in a checkerboard pattern.
The next rows already have some simple pattern of groups of single crochet stitches. To make it more interesting, the author of this particular option in one of the rows increased the number of air loops in the intermediate arch.
An important feature that a crochet yoke represents, the pattern of which will be different for different craftswomen - we do not increase the number of loops, but decrease them, tightening the product.
The next pattern is not a finished product for an adult, but rather an option for how to use crochet in everyday life. The yoke, the diagram of which is presented here, was designed for a doll. But it can be easily transformed into a full-fledged piece of clothing.

It is knitted with fans. You need to start with a chain of air loops, closed into a ring, which forms the neck of the dress. The diagram clearly shows how the work is done. For a complete product it is worth making some adjustments.
Firstly, the number of rows is made much larger so that the width of the canvas is about 15 cm, depending on the size. Secondly, by adding loops in each row, the resulting product will be a very wavy product that bears little resemblance to a yoke. Therefore, the addition should be done after 2-3 rows. Experienced craftswomen know how to control this process.
Here is another diagram which is built in the direction of the neck. It starts with the line, which is located near the number 1 in the figure. This is the edge of the finished lower part of the product. Do not forget that here it is very important to ensure that the number of loops is reduced so that the yoke is pulled upward.

The pattern uses double crochets, indicated by vertical lines, and chain loops, indicated by rings.
When the last row is completed, it is recommended to make 1-2 more, which will form a beautiful edge. Such bindings are made, as a rule, with single crochets, so as not to increase the length. Thus, you will get a crochet yoke, the diagram of which is readable even by beginners.
But in any case, you should always leave room for improvisation. At least change the number of air loops between the columns and see what happens. But this must be done with yarns that do not lose their appearance after unraveling the product.
The technique of weaving pineapples, which actively uses crochet, is very popular. The yoke, the diagram of which is presented here, turns out to be openwork and simply luxurious. But its implementation will require considerable attention, since it is necessary to monitor the pattern all the time. The slightest mistake will be very visible and ruin the entire appearance.

The pattern uses double and single crochet stitches and air loops. Knitting begins with three rows of air loop arches. Their number must be calculated in advance, based on the multiplicity of the report.
The entire yoke is 32 rows of two rows of pineapple pattern. It is worth noting that the length of this product can be impressive. Therefore, before starting work, do a test knitting with your yarn and crochet using double crochets. This will make it possible to roughly calculate how wide 1 row is and estimate how long the yoke itself will be.
Round motifs always make a beautiful crochet yoke. Every craftswoman has a diagram of such a motif. Besides, you can always come up with something new by experimenting with round patterns.

The width of the future yoke depends on several factors: the size of the individual motifs and the number of rows made from them. These parameters can always be adjusted.
Since we are knitting a product from motifs, it is better not to sew them together, but to tie them to each other. This happens if in the last row you knit the same element from a ready-made motif into a connecting chain of air loops. This allows you to design the product more accurately.
Don't be afraid to create yokes for dresses and blouses. This makes your clothes individual and special.
 It is very difficult to knit a yoke, especially for beginners and especially if there is no detailed plan for completing the element.
Here are the most beautiful yokes that a hook can make.
The most accessible diagrams and the clearest description can be found in this article.
 The yarn for the yoke is selected depending on the model of the dress or blouse.
No one will take thick and warm fiber for a summer product. For the winter model, on the contrary, no one will pay attention to the thin iris yarn.
The hook is selected according to the size of the thread - this is its main rule. But its models can be very different, depending on the master.
When calculating the yoke, you should pay attention to the model. But it is very important that the child’s head fits through the neck.
 Therefore, we add the required number of cm to the neck circumference. Next, look at the dimensions of the shoulders and shoulders. Since with expansion the shoulder and shelves will increase.

The first set usually has the following proportions: the sleeves are the same, and the fronts are twice as large as the sleeves. Knowing the rules, you can knit women's or children's models.


You can simply measure your neck circumference using a measuring tape or look at the approximate dimensions depending on all the measurements.
 It is better to use the first method in your work. Another option is to define it by things.
 What to do if the armhole turns out to be small when knitting?
What makes a knitted product different is that if you make the slightest mistake, you can always unravel the product and re-knit it.
 In the case of a small armhole, it is better to use this method.
 Because if the threads break, the product will simply unravel and can no longer be resuscitated.
 Options for crocheting a square yoke for a children's dress
The square armhole for a crocheted girl's dress looks very beautiful. This is a very comfortable raglan knit. Then several beautiful and fairly simple models that can be performed by both a very experienced master and a beginner.
 Beautiful square yoke with mesh
This yoke is crocheted using the raglan technique. A very interesting mesh pattern with small inserts in orderly rows.
 The work will require:
Stage: sample
You will need to knit a sample and calculate the knitting density from it. Next, determine the neck circumference (along the neck circumference with appropriate allowances).
Stage: coquette
Cast on chain stitches to your size and knit the first row according to the pattern of the diagram. It is better not to immediately connect the air loops into a ring, since the chain can easily turn over and the row will then turn out to be a wave.
It is better to connect into a ring after the first row. Then knit in circular rows. But there may be exceptions for dresses with fastenings on the side, front or back of the dress. In this case, knit the fabric according to the pattern, but not in circular rows.
Important! It is better to rely on the size of the head when creating a square yoke. Next, divide the entire circle into 6 parts. For sleeves, take one sixth, and for shelves, 2 sixths. Since the sleeves are usually half the size of the front shelf.
Knit the required width of the shoulders and width of the shelves. Then leave the sleeves aside and continue knitting only the fronts and, depending on the models, in circular or straight rows.
 Double crochet yoke
A very dense yoke is made with single crochets. One of the raglan crochet yoke patterns is also used for it.
 The work will require:
Stage: measurements
Measure your neck circumference and add extra weight. Assess how far the shelf fits the size of your head. Then knit a small sample using double crochet stitches and evaluate how many stitches you should count.
Stage: coquette
Cast on the appropriate number of stitches. Make several stitches less for the sleeves than for the armholes. Since the sleeves are always smaller in size than the loops themselves than the shelves themselves. Measure the width of the sleeve and knit according to the raglan pattern to that width. Increases are made by using four dots with two chain stitches and paired double crochets in chain stitches.
 The result of this pattern is this neat square yoke. If the width of the shelves is not as wide as required according to the model, then after making the yoke you can cast on additional loops and make the shelves wider.
Stage: border
Very The border looks beautiful on plain yokes. It is better to do it using contrasting yarn.
 These simple patterns help you create elegant and very even yokes for a dress. The most beautiful crochet dresses are dresses with smooth and elegant yokes. No less attractive to the designer is that these yokes can be decorated with many things. Therefore, we try to make such beautiful and neat yokes and create favorite dress models for our children.
Knitting a beautiful dress for your little princess is not that difficult, especially if you have basic crochet skills. A beautiful yoke and a fluffy skirt are what you need. In this article we’ll talk specifically about a crochet yoke for a children’s dress.
Before you begin to analyze the basic patterns, it is worth familiarizing yourself with several basic rules for crocheting a yoke.
There are three types of yoke knitting: round, square and classic.


Let's consider all these options in more detail.
From the name itself it is already clear that this type of yoke is knitted in the round. This type is most suitable for beginner knitters, as it is one of the simplest knitting methods. With all this, such a yoke looks very beautiful.


It can consist of regular double crochets or, for more experienced ones, with a pattern.
You need to start such a yoke with a set of air loops closed into a ring, and then knit according to the pattern you have chosen. Detailed diagrams are shown in the photo below.


Based on the diagrams above, we can observe how our yoke expands with each row.
There are also yoke patterns that are knitted from the bottom up.

The beginning of knitting in this pattern is indicated by number 1 and, as we see, during the knitting process the loops are reduced, thereby “pulling” the yoke.


This type of yoke is also called raglan crochet. To correctly calculate the loops, you still need to take measurements.
The only rule for this type is that the number of loops must be divisible by 4.
Having dialed the required number of air loops, you can start knitting according to the pattern. The patterns for this yoke are also varied, from the simplest and most understandable even for a beginning knitter to more complex openwork ones.


We knit this yoke to the armhole line, but if it turns out that the armhole hole is too small, then in this case the knitting is broken and we separately knit several rows on the back and on the front part to the desired size.
A classic yoke is most often knitted from the bottom up; to calculate the stitches correctly, you need to draw up a pattern.

The pattern is necessary so that during the knitting process you do not make mistakes with additions and decreases of loops.


If it’s difficult for you to create a pattern, then you can take any of your child’s T-shirts as a basis and use it as a guide.
You can take a closer look at all these three types of yokes in the videos below.
In this post I want to look at some aspects of crocheting a yoke. This cut element contains the potential for creating a huge variety of beautiful dress styles.
Here I describe how to knit a yoke in a children's dress; for the adult version, in most models you need to create patterns and knit according to them!
What are the main types of yoke in knitted products?
1. Square yoke.
2. Round yoke.
3. Classic yoke.
The most frequently asked questions: 1 how many loops to cast on for knitting a neckline; 2 how to determine the height of the yoke; 3 why when knitting a yoke the sleeves are wide; 4. how to separate the loops to create a “beveled” shoulder in a square yoke; 5 how to knit a classic yoke without a pattern.
I will try to answer these questions. There are a lot of patterns and descriptions of various dresses on the Internet, and when we first learn to knit, it’s not always clear “where what comes from”)
It seems to me that it is much more important to give a fishing rod and teach how to fish than to treat this fish once)
You can knit the yokes from top to bottom and then start knitting the skirt of the dress. Or, on the contrary, the hem is knitted first, and then the yoke is tied up.
From top to bottom, square yokes with raglan sleeves and round yokes are most often knitted.
Let's take a closer look at the example of a square yoke with raglan sleeves.
Knitting any item begins with taking measurements, selecting patterns and calculating the knitting density.
To knit a yoke from top to bottom, you need to take measurements of neck girth (Gb) and chest girth (CG).
The knitting density was determined: 3dc = 1 cm.
We collect a chain of air loops (ch).
If you are planning a yoke with a neckline almost to the very neck, then the length of the cast-on row of the chain of air loops is equal to ObW+2(1) cm. Since in this version the neck circumference is smaller than the head circumference, in order to easily put on the dress, a cutout for the fastener is made on the back (or shelf, depending on the idea, I will describe the back).
If you decide to make a yoke without a fastener, then the length of the cast-on row is equal to the circumference of the head plus 2-3 cm.
Neck circumference =25 cm+2 cm=27 cm
27cm*3dc = 81 loops.
We knit dc in turning rows, and at the beginning of the row, the first dc will always replace the 3 ch of the rise.
After the cast-on row is knitted, it is necessary to calculate the number of loops for the back, front and sleeves.
Classic version: subtract 4 loops for raglan lines from the total number of loops. Divide the remaining number of loops by 3.
1/3-on the shelf;
1/3-on the back;
1/3 for both sleeves.
Since we will have a fastener on the back, the number of loops on the back should be a multiple of 2.
81-4=77 loops
77/3=25.66 loops fractional number
What will we do?
Leave 27 loops on the shelf;
There are 26 loops on the back;
And 24 loops for the sleeves, each with 12 loops.
Let's check: 27+26+12+12=77 loops
There are a lot of knitting patterns for square yokes on the Internet, so here I explain only the principle.
If the loops are divided in this way, you get a square yoke with a “beveled” shoulder (Fig. 1.1.
The second division option for a yoke with straight shoulders, Fig. 2.1.
From the total number of loops we subtract 4 loops for raglan lines.
Divide the remaining number of loops by 4.
1/4 on the back;
1/4 per shelf;
1/4 for sleeves.
81-4=77 loops
77/4 = 19.25 loops
Taking into account that there is a fastener on the back, the number of loops is a multiple of 2.
20 loops for the back;
19 loops right sleeve;
19 shelf loops;
19 loops left sleeve;
When calculating and distributing loops, it is always necessary to take into account the pattern repeat if the yoke is knitted with it.
Also in this version, I left 4 loops on the raglan line (1 for each line), but based on the idea, this line can be knitted with a pattern, and then this factor should be taken into account.
The next question that beginners have is: how long should the yoke be knitted?
This refers to the height along the armhole line.
For knitting products with raglan sleeves, I highlighted the average lengths of raglan lines (in Figures 2.1, 2.2, 2.3) in gray.
Size (height in cm) Up to 80 86-92 98-104 110 116 122
Raglan line length (cm) 13 14 15 16 17 18
These measurements are average and also depend on the dress model.
A more accurate value of the armhole height can be calculated using the formula:
Where is POG - half chest girth.
I gain 5-6 cm up to a year (up to a height of 80 cm).
In our example
LOG=52:2=26 cm
26:4+5= 11.5 cm
In this figure, the armhole line is highlighted in red.
We considered 2 options:
Or we focus on the length of the raglan line;
Or we calculate the height of the armhole.
Having knitted this part of the yoke to the desired height, we close the knitting in a circle, and,
Very often newbies have a question:
“I knit to the right height, but the sleeves are too wide.”
We proceed as follows:
We knit to the required sleeve width, then we divide the knitting and continue to knit the yoke in turning rows.

Then we divide the knitting and knit the front separately, making increases along the raglan line at the beginning and at the end of the row. And, in the same way, we knit the back.
We no longer knit sleeves.
Having knitted the yoke to the desired height, we close the knitting in a circle.

Don't forget that we close the yoke in a circle along the chest line. Accordingly, the total number of loops at this stage should be the length of the chest circumference plus 2-3 cm.
In our example
52cm+3cm=55cm
55cm*3dc = 165 loops.
At this point we add the missing loops under the armholes.
For example, we have 66 loops on the shelf, 70 loops on the back
67+70= 137 loops
155-137= 18 loops
This means that under each armhole we will need to complete a chain of 9 ch (18:2).
These numbers are arbitrary for me.
The round yoke is knitted in the same way.
On aspen it is very well and clearly explained how to knit it
We calculate the neck length in the same way as in a square yoke.
We make increases evenly, in each row or in accordance with the pattern design.
The classic yoke is most often knitted from the bottom up, from the hips, waist or chest line.
This diagram shows conventional numbers; they depend on the size (i.e., on the values of the measurements taken).
To knit a classic yoke, you need to create a pattern.
A pattern is necessary to know how much and in what manner to make decreases along the armhole line, at what height to start making necklines, etc.
If you don’t know how to do this (make patterns), then you can focus on a sleeveless knitted T-shirt, which now fits the child well.
Beginner knitters are given a step-by-step description of a knitted yoke for a children's dress. Two main options will be considered: round and square - your choice. The presented diagrams are simplified and clearly described, but, despite the simple description, they are original in execution.
If you thought we were talking about a round top, that's not entirely true. Both patterns are simply knitted in the round without a seam. But both the square and the round yoke - both of them are performed continuously. This method greatly simplifies the knitting process, but does not impair the appearance and originality. The highlight lies in the chosen pattern and its combination with the color and structure of the yarn.
Knitting a one-piece round yoke
Let's start with a round model and delve into the meaning of the task set before us. The main goal is to start working from the neckline and smoothly move on to making the sleeves and front with the back. This transition is called a yoke, is located in the shoulder area, and looks advantageous on almost any dress model. Now we will learn how to crochet a round yoke for a children's dress.
 Yarn option for crochet
 For children's clothing, it is better to take “iris” or “snowflake” cotton yarn because they have medium thickness and a glossy texture, which is necessary for making a light, delicate dress. Synthetic or wool blend non-thick yarn of the “children’s whim” type is also suitable, but it is more suitable for the winter or spring-autumn season.
So, knitting pattern is as follows:
Tip: in order not to lose the beginning of the work, we pin a pin to mark it;
 An example of a knitting pattern for a round yoke. The point is an air loop. Cross line - double crochet.
 When we have a crochet yoke for a children's dress ready, we can move on to making the sleeves and fronts. First the sleeves are knitted, and then the front and back. Some knitters, to avoid seams, knit them together in the round if the pattern allows. It seems that the mating progresses faster this way.
However, given the difference in size, our upper part can be increased by continuing to add to the desired parameters. If the size turns out to be larger than necessary, then you can undo one or two rows. The yoke pattern is designed for gradual expansion, which allows you to knit it until you reach the desired size.
The patterns offered here are not designed for your individual knitting density., hook number and yarn thickness. Therefore, starting knitting from the first chain, be sure to try to thread the head into the future neck. Or take measurements of your head volume so that you can easily put on a ready-made dress.
The square yoke is firmly rooted in modeling and looks great on children's products. It is knitted in the round with the only difference that the increase in stitches is not done along the entire row, but only in four designated places. The furrows formed as a result of the increase start from the neckline and end in the armpits. There they connect, and the line of sleeves and front with back begins.
 Crocheted square yoke
 Let's describe it step by step Scheme for making a yoke for a children's combined dress:
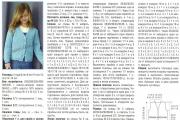
 Knitting pattern for a square yoke for a children's dress
 In the video you can see an example of calculation for a square yoke, loin and continuous knitting:
To determine the size of the yoke, just put it on the model’s shoulders and try to connect the places where the loops are added in the armpits. If tension occurs, it means you need to knit an extra few centimeters. Conversely, if the grooves are much lower than the armpits, it is worth loosening a few centimeters. Don’t be sorry to dissolve unnecessary things; the further outcome of the matter directly depends on this. The dress should fit beautifully and fit your figure. Otherwise, the main drawing will either corrode or shrink and its structure and beauty will not be shown.
As you noticed, we are talking about a combined dress. The combination can consist of both the texture of the yarn and the combination of different colors. For example: the upper shoulder part and cuffs with a collar can be made in the same color scheme, but the main color of the dress can be a different color. Or the top, waistband and bottom edging are connected with one pattern, and the sleeves, back and front with another, more restrained pattern.
There is a wonderful option for a combined model: a knitted top and a bottom sewn from lightweight material. The top is a yoke, and the lower part of the dress is cut out from any material that matches the color. The sewn fabric can consist of fabrics such as:
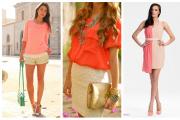
Options for various combinations can be found on our website. You will be pleasantly surprised by the dresses offered and will definitely find a response from future owners of the models. If you pay tribute to fashion, it is better to choose yarn in bright colors, but do not overdo it with a set of colors. Two or maximum three bright colors are quite enough. Summer options include yellow, sky blue, green, orange, white and pastel colors. These are classic variations that are exceptionally compatible with each other.
The drawing schemes will delight you with their variety and originality. From simple satin stitch and fillet knitting to complex openwork in the form of pineapples or geometric shapes - all these unusually beautiful ideas will inspire you to create your own masterpiece. But if you are just starting your creative journey in the field of crochet, then these two simple details will help you master such a seemingly difficult subject. At first it will be a crochet yoke for a children's dress (patterns are presented below), and then you will gradually move on to complex patterns.
Some knitters come up with their own life hacks for knitting a yoke. For example, alternating double crochets in one row and single crochets in the opposite direction in the next row, which gives some rigidity to the product. Also creating stiffeners by knitting a row or two in single crochets.
You can watch all the knitting life hacks from one user in the video below.
Its design, as a rule, differs little from a round or square napkin. Only space is left inside for an armhole...
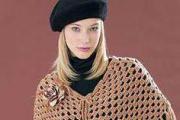
Hats are worn for protection from the cold or sun and for beauty. Universal headdress - beret. In different...
A knitted jacket is one of the irreplaceable things in a child’s wardrobe. The ideal children's jacket - well-fitted...
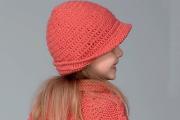
Coral color is one of the shades of red, but it is usually perceived by fashionistas as independent and completely...
Size: for 6 (8) years. Head circumference: 50 (56) cm. You will need: 500 (600) g peach yarn (50% wool,...
With crochet techniques, many craftswomen note the obvious advantage of the latter. Knowing how to crochet simplifies many...

Everyone treats freckles differently. Some call them “angel kisses” and love them dearly, considering them a highlight...
Concealer is indispensable, because it hides many skin imperfections: wrinkles, circles and bags under the eyes, pigmentation...

The body of the thief in law, covered with tattoos, is, first of all, oddly enough, a linguistic object. The tattoo is...

What is a football section? We are often contacted by parents whose children want to play football, but are not ready...
Online shopping is becoming an increasingly popular form of shopping. One of the famous foreign trade...
Remember the most IMPORTANT rule during chemical experiments - never lick the spoon... :). And now...

“I really am the mother of two daughters (Diana 7.5 years old and Milana 3.5 years old), a happy wife and...

What is it like to be a legend during your lifetime, and with a very happy fate? French actress Catherine Deneuve knows...
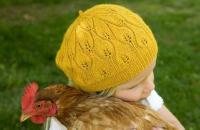
Hats are worn for protection from the cold or sun and for beauty. Universal headdress - beret. IN...
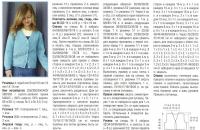
A knitted jacket is one of the irreplaceable things in a child’s wardrobe. The ideal children's jacket - well-fitted...