Do-it-yourself bouquet of money: photo, step-by-step instructions for making, interesting ways to give money
Everyone knows this situation when you go to a birthday party and give money in an envelope? Do you want your gift...
Prepared by Kolycheva E.A. MBOU secondary school p. Yuzhny Bagrationovsky district Kaliningrad region How to make an egg from gypsum
At Easter, it is customary to paint eggs with different colors, but among the colorful eggs, bright red eggs occupy a central place. Why? History has preserved this tradition for us. After the resurrection of Jesus Christ, his disciples and followers dispersed different countries everywhere proclaiming the good news that death is no longer to be feared. She was defeated by Christ, the Savior of the world. He resurrected Himself and will resurrect everyone who will believe Him and will love people just as He loved. Mary Magdalene dared to come with this message to the Roman Emperor Tiberius himself. Since it was not customary to come to the emperor without gifts, and Mary had nothing, she came with a simple chicken egg. Of course, she chose the egg for a reason. The egg has always been a symbol of life: in a strong shell there is life hidden from the eyes, which in due time will break out of lime captivity in the form of a small yellow chicken. But when Mary began to tell Tiberius that Jesus Christ had also escaped from the mortal shackles and resurrected, the emperor only laughed: “It is just as impossible as your white egg turns red.” And before Tiberius had time to finish the phrase, the egg in the hands of Mary Magdalene turned completely red. Since then, in memory of this event, which symbolizes our faith in the Risen Lord, we have been painting eggs. How did the tradition of painting Easter eggs begin?
To create a festive Easter composition, we will need eggs that are stored for a long time and do not beat. Let's try to make them out of plaster.
Materials and tools: 1. building gypsum (powder), 2. water, egg shells, 3. cups from baby cottage cheese, 4. knife, 5. container for mixing gypsum, 6. hairpin or awl, 7. adhesive tape or adhesive tape; 8. for coloring - acrylic paints, brushes, beads, glue. How to make a gypsum egg?
1. First you need empty eggshells. How to get them? 2. Take a raw egg, make two holes from the ends. Let one of them be small, and the other about 1 cm in diameter, no less, because plaster will have to be poured through it. 3. After you have pierced the holes in the egg, stick a hairpin into it and stir inside to break the yolk. Then the egg will flow out easily (you can blow into it). 4. Rinse and let dry. Progress:
5. Seal the small hole with a piece of tape or adhesive tape. 6. Place the shells in empty baby curd or yogurt cups.
7. Now you need to fill them with plaster. To do this, dilute the gypsum powder with water until a mass is obtained that resembles pancake dough in consistency. That is, the mass should drain from the spoon, but not be very liquid. Attention! Gypsum quickly hardens, hurry up. Do not dilute a lot of gypsum at once, about 3 eggs at a time.
8. Now let your blanks dry thoroughly, it will take about a day. 9. Then carefully peel the shell. If the shape of the eggs is not quite correct, correct it by diluting a small amount of gypsum and covering the dimples and voids. You can also go over fine sandpaper to remove roughness. Your blanks are ready, but the plaster eggs are still damp, they need a few more days to dry completely. Put them in the sun or on a battery.
10. And now the best part - coloring! It is carried out in two or three stages: first paint the egg on one side, then on the other. Use acrylic paints, they are not afraid of water after drying. Again, small cups will come in handy.
Eggs can also be decorated with beads and sequins by planting them on glue. That's it!
flight of fancy
We make a sketch of the painting on paper
Internet resources Encyclopedia of skill http://igrushka.kz/ http://pochemu4ka.ru http://marrietta.ru/
I present to your attention an interesting way to create an Easter egg from a plaster bandage. An idea is offered to us by a craftswoman from the Land of Masters Kateryna. You can learn more about the author in her blog at http://stranamasterov.ru/node/553021. Well, here we can watch a master class from the author and get inspired for creativity for the approaching Easter

For work we need:
-gypsum bandage (sold in a pharmacy, it is cheap);
-balloon;
- two containers;
-scissors;
- water at room temperature.
Gypsum dries pretty quickly, within 40 minutes the surface is no longer wet, but the inside of the workpiece is damp. The shell is not fragile, but for reliability, you can apply 2-3 layers of a plaster bandage and dry longer. In my case, there was only one layer and I made a rather embossed surface. It seems to me that you need to work more carefully with the surface to create a smoother texture. I decided not to decoupage for this very reason.
Inflate the balloon so that it resembles an egg in shape. Place it in one of the containers. In the second, pour warm water.
Plaster bandage should be cut into equal squares. Let's get started. You need to act carefully, but quickly :)
We lower each square of the bandage into the water for a few seconds, wring it out slightly and apply plaster to our poor fellow-ball.
Square cuts of the bandage must be applied in such a way that there are no holes.
With palms, already on the surface of the ball, stroking in different directions, we create a "shell".

Here it is, our "gypsum" ball. Leave the tail like that. After drying, we will take out the ball through this hole.

In the meantime, No. 1 dries, from the remnants of the bandage we "gypsum" No. 2 ... Please note that the gypsum has dried up and slightly separated from the ball. About 40 minutes have passed, and you can already gently deflate the balloon by pulling the tail and making a small incision. And then we create a beautiful "shell" top with the help of scissors.

This is how it turned out for me. Filmed against the background of napkins, which I will decorate later.

During the night, the workpiece completely dried up and you can proceed to further actions.

With the help of a sponge, I decorated the entire surface of the egg with metallic gouache paint. I used three colors, superimposing one on top of the other.

After painting finally matured in my thoughts the idea of how everything will be. I chose white lace, raffia, a ribbon and a bird's nest pendant.

I attached the ribbon to double-sided tape. I formed a bow from its remnants and added a pendant.

Very nice, in my opinion looks with dry herbs. Here's another idea for you: you can put a container with such a bouquet inside the eggshell and decorate the room with this composition.

What to give dear people for the bright holiday of Easter? Of course - a souvenir made by one's own hands. Products self made most suitable for a gift. They are filled with kindness and warmth.
By Easter, a souvenir in the form of Easter egg which can be made from gypsum.


An original way to decorate a gypsum blank is with gypsum carving and a three-dimensional putty pattern.
Today I want to introduce you to this interesting technique using an egg-shaped blank as an example.

Make a blank - a gypsum egg - you can do it at home if you have suitable shape. It can be a form for soap, gypsum, or home-made - packaging from sweets and children's toys. Even if you only have a half-egg mold in your hands, you can make a voluminous blank. It is very convenient to use Kinder Surprise packaging - in this line there is an egg not wrapped in foil, but from two plastic halves, inside is not a chocolate egg, but a chocolate mass in one half and a toy in the other.
Buy a small package of gypsum (alabaster) from a hardware store. Familiarize yourself with the method of application - some types of gypsum harden very quickly "grab". Be guided by the time indicated by the manufacturer.
Measure the amount of plaster required for one casting. Pour into a small container with a slide, measure out a small amount of cold water and fill in with gypsum. Gradually, the water will soak the gypsum slide. Stir the mixture and quickly pour into prepared molds greased with soap or oil.
Forms should be left for 10-20 minutes until the plaster hardens. Take care that they do not turn over - put on small glasses, secure with a piece of plasticine or put in a tray with sand.
Water will gradually evaporate from the gypsum, then it will begin to warm up. Leave it in shape for half an hour. Then carefully remove the casting from the mold and set aside to dry on paper. Gypsum dries for 2-3 days.
Throw the rest of the plaster in the trash. Carefully pour the water with gypsum into a separate unnecessary container and gradually drain the clean one, leaving the suspension at the bottom. Then throw away the bucket along with the rest. Do not pour the gypsum down the sink or into the toilet - it must not fall into the sewer in any case! Of course, if you do not want to take revenge on yourself and your neighbors, having lost the benefits of civilization for a couple of days, while they clean the drain and pipes.
Dried blanks will become white and light. Take two halves of the egg and putty - any, but oil-based is the least suitable. And smear them with putty like a butter sandwich. Connect the workpieces, press and coat the joint with excess putty. If the putty is thick, then the moisture from it can quickly soak into the plaster and you will not be able to connect the halves. Carefully scrape with a knife, wet the plaster and repeat already on a damp surface.
You can make the joint completely invisible by smoothing it with putty and sanding it with sandpaper.
In order to make a three-dimensional drawing, you need to prepare a paste-contour from putty, water and PVA glue. The calculation is approximately as follows: for a tablespoon of putty - a teaspoon of PVA, the consistency of the mixture is like thick sour cream. The contour should not be too liquid and too thick. When it dries, it should retain its volume.
So, you will need for the Easter egg:
Mark the contours of the drawing on the plaster blank.

And start working with the contour. Start with the largest elements - berries and leaves.
Mark the berries on one side of the egg and set the egg aside to dry.
Then turn the egg over and draw the largest leaf.
In the sketch, you can see that there are only three leaves, they are superimposed one on top of the other.
You need to remember about the volume, let the first sheet be the largest and overlap those in the background.
You need to create volume, so in several stages build up the contour of the first sheet, then move on to the second, and leave the smallest of the leaves for last - it should only rise slightly above the surface of the workpiece.
Try to increase the thickness of the outline for each detail of the picture on only one side. So the leaves and berries will be voluminous.
For example, at the base of the berry, the contour will be thicker and higher than at the tip. It is the same with leaflets - they are voluminous at the base, rise by 5-7 mm, or even 1 cm above the workpiece. And towards the tip, the leaves narrow and their thickness decreases to a couple of millimeters.
Then fill the contour of the berries and the largest leaf with liquid putty from the bottle.

Dry and flip the egg.
Draw the flower and the remaining berries.

With a sharp needle, scratch the stems and sepals on the berries.
It is very convenient to work with putty if you paint the egg black. So the light outline will stand out against a dark background and you will not miss small details. Also, when you sand the drawing from excess putty, you will be able to control how much material you removed.
Now draw a contour along the scratched lines, let the stems be voluminous, like the rest of the drawing.
Add some volume on small leaves. And do not forget about large leaves and berries.
How to make the drawing more embossed? Draw the outline of the border, and then distill the liquid putty from the edge to the center of the leaf or berry with the tip of the tube.
In the photo you see the course of movement and how the putty lies on the leaf. Berries also stand out noticeably.
Now that all the small details have been drawn, the berries and leaves have come out of the right size and height, it's time to carefully remove the sloppy streaks and excess putty.
To do this, take sandpaper with a medium grain and lightly touch the drawing.
For a more subtle study, you can take a piece of dry or slightly damp cotton fabric. It will carefully remove a thin layer of putty and, in terms of its qualities, natural cotton fabric can replace zero-grain sandpaper (sandpaper with the finest grain).
If you removed too much or you need to fill in irregularities, level the surface - take a putty and a flexible knife (palette knife, stack). Align the relief and leave to listen, and then sand all the flaws in the same way.
Let's move on to the details. Again, paint over the ornament with black paint. With a sharp needle we scratch the contours, as if making grooves in the darkest places of the picture. Let's draw the leaves, veins and bones on the berries.
Now let's add curls of grass and "antennae". We will also scratch them, but we will make them deeper and wider.
In the middle of the flower, we grind off the putty in the form of a small cone, with a rounded top - after all, the flower is the future berry.
After brushing off the dust and plaster chips, paint over the egg with black paint.
Let's start coloring the eggs. Black paint will serve as a base for the background and even out the surface.
Highlight the lightest areas with white paint. To do this, we collect white paint on the brush and select the desired areas with quick movements.
Try to make sure that the white paint does not fall into the recesses. After all, these will be the darkest areas. But if the paint still clogged the grooves, paint over with black again and repeat the tinting.
A very interesting effect will be obtained if you paint a surface painted over with a thin layer of paint with a metallic effect. Tint the egg in the same way as with white paint.
Let's move on to the background.
Paint the background blue red.
We dilute the blue paint with white and gradually lighten the background. We go from pure blue paint from a tube to blue. Do not paint over the background completely, apply the paint with quick tickling movements. Let there be more blue near the berries and leaves, and more blue towards the top of the egg.
Now let's move on to the leaves and stems.
Paint over the leaves with green paint. Add some leftover blue paint or white and light shade highlight the edges of the leaves and the bends of the branches. Let's not forget the middle of the flower - paint it light green.
Then we move on to yellow.
We tint the edges of the leaves. Yellow will be in the lightest areas. It enlivens the drawing, imitates the glare of the sun on the greenery.


Every year we paint eggs, but you can make them once every few years. How? Very simple plaster. It will be stored for a long time, and it is more difficult to break it.
How to make a plaster egg?
Materials and tools: Building gypsum (powder), water, egg shells, cups from baby cottage cheese, a knife, a container for mixing gypsum, a hairpin or awl, adhesive tape or adhesive tape; for coloring - acrylic paints, brushes, beads, sequins, glue.
Workflow: 1. First you will need empty egg shells. How to get them? Take a raw egg, make two holes from the ends. Let one of them be small, and the other about 1 cm in diameter, no less, because plaster will have to be poured through it. After you've poked holes in the egg, stick a hairpin into it and stir inside to break up the yolk. Then the egg will flow out easily (you can blow into it). Rinse and let dry.
2. It is better to immediately collect the required number of eggshells and pour plaster at a time. Seal the small hole with a piece of tape or adhesive tape. Place the shells in empty baby cottage cheese or yogurt cups. Now you need to fill them with plaster. To do this, dilute the gypsum powder with water until a mass is obtained that resembles pancake dough in consistency. That is, the mass should drain from the spoon, but not be very liquid. Attention! Gypsum quickly hardens, hurry up. Do not breed at once a lot, about 3 eggs at a time.

3. Now let your blanks dry thoroughly, it will take about a day. Then carefully peel the shell. If the shape of the eggs is not quite correct, correct it by diluting a small amount of gypsum and covering the dimples and voids. You can also go over fine sandpaper to remove roughness. Your blanks are ready, but the plaster eggs are still damp, they need a few more days to dry completely. Put them in the sun or on a battery.
4. And now the best part - coloring! It is carried out in two or three stages: first color the egg on one side, then on the other. Use acrylic paints, they are not afraid of water after drying. Again, small cups will come in handy. Eggs can also be decorated with beads and sequins by planting them on glue. That's it!

Artwork by Dina Nason

Everyone knows this situation when you go to a birthday party and give money in an envelope? Do you want your gift...
Currently, piercing is widespread among young people - a specific decoration of various parts of the body ....

In everyday life, there are many opinions about the age difference. Some categorically deny the possibility of "unequal" marriages, but ...

Every girl dreams of having beautiful legs. But not always nature gives every girl beautiful legs at birth. Not...

The likelihood of getting mercury poisoning is much higher than we might think. Basically, it can happen to anyone...

Question to a psychologist: I am 36. She is 34. I have been married for 14 years. They dated for 2.5 years before getting married. 12 year old son, 4 year old daughter.

Memories from deep childhood are inaccessible to people, as well as the memory of the moment of their birth. What is it with...

In order to provide themselves with competent, qualified employees, many enterprises use...
Our world is so arranged that a person must overcome many difficulties during his life, especially this ...

Every woman in her life had or will have a moment when she begins to be proud of her rounded figure, ...

A baby at the age of seven months not so long ago ate only mother's milk or formula, but some time ago in ...
Your baby is growing, becoming more and more active, which means that it's time to change his diet. Menu...

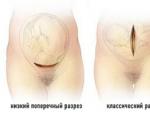
Pregnancy is a very important moment in the life of a woman, and of the family as a whole. She not only brings...

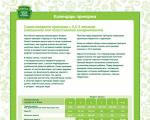
Reasons for the lack of ovulation, symptoms and signs The ovulatory function for a woman is the meaning laid down ...
Currently, piercing has become widespread among young people - a specific decoration of various ...

In everyday life, there are many opinions about the age difference. Some categorically deny the possibility of "unequal"...