“Pincushions for mom and grandma” (From an ordinary sponge for dishes)
Crafts from sponges for washing dishes are easy to make, since the material is soft, has a smooth surface, and cuts well...
A beautiful paper box is a wonderful opportunity to give our loved ones a smile and good mood. How to make a box out of paper - you will definitely find the required gift packaging master class on this page. Our whole life consists of little things. And we have the power to tell a person how dear he is to you by giving him an exclusive handmade item. Below are cutting templates and tutorials for beautiful paper packaging.
If you don’t have much time for decor, you can simply wrap the box beautifully in gift paper.
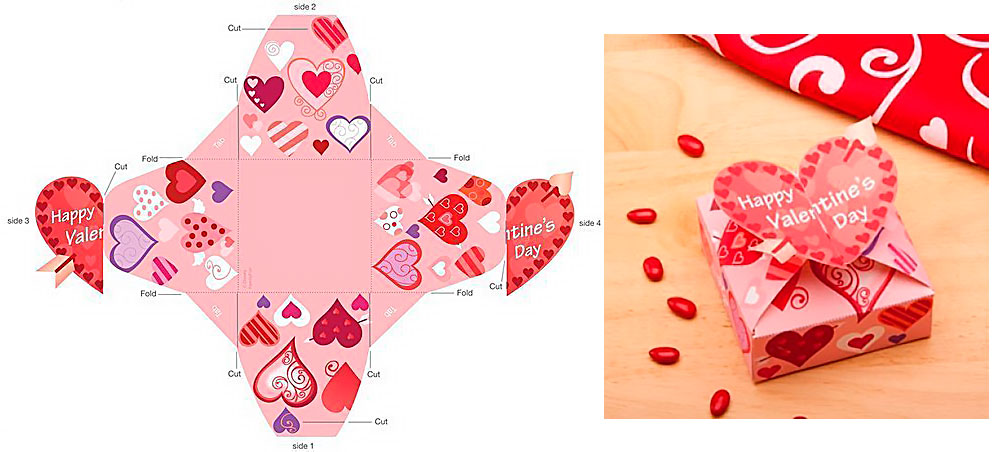
A very beautiful box for gift wrapping in the shape of a heart. Decorations for it can be completely different, it all depends on your desire. In order to decorate such a box with your own hands, you can take a sheet of colored wrapping paper or print out music paper on a printer - the drawing is attached. If you can’t buy lace, you can crochet it yourself.
To work you will need:
First we need to make two hearts out of cardboard. To keep the workpieces neat, it is better to do this with a compass and ruler. These are blanks for the bottom of the box and for the lid. The size can be whatever you need. You can make a box 15/15 cm, or you can make it smaller. You should end up with 2 larger hearts made from cardboard and 2 hearts made from colored paper to decorate the inside.


Next, bend the strips 2 cm and draw a line with your fingernail. Then, on the curved part, cut out the teeth with scissors. This is necessary so that the strip can be glued to the bottom of the box. Apply glue to a strip on the bottom, stepping back a little from the edge.

Then we apply a strip to the bottom with the teeth facing inward. Please note that we are retreating 0.5 cm from the edge. It may be convenient for someone to apply glue directly to the cloves - this is also an option.

This is how we glue the second strip of cardboard.

Then, glue 2 pieces of tape to the sides of the box. The tape will connect the box to the lid.

We also glue the tape to the lid of the box.

We cover the sides with colored paper on the outside and inside.


Colored paper for boxes and gifts can be made using a printer:


You can make an amazing box decorated with a flower made of chiffon or nylon with your own hands in a couple of hours. The box must be covered with colored paper or paper printed on a printer. The main decoration of this packaging is a handmade chiffon flower. The master class will help you understand the work.

To work you will need:
We take cardboard and draw a diagram of the box. The sides must be equal, choose the size yourself.


pay attention to details E, C, D, B and A - here the drawing increases by 1 cm, these segments must be coated with glue and a box must be formed. Draw on cardboard and cut it out. We apply this stencil to colored or printed paper. We trace and cut out too. Bend the cardboard along the lines. Glue cardboard and colored paper together. We bend our workpiece and glue it together. To avoid gluing the parts together, you can print the design directly on cardboard.

Cut the chiffon into circles of different sizes.

We singe the edges of the chiffon over a candle or lighter.

We glue the petals together, or stitch them through with thread. Sew a button or bead into the center.

Glue on glitter. You can take Christmas tree toy and scrape off the glitter with a knife.

We treat the edges of the flower with nail polish or decoupage glue.

You can also hang a tag on a cord. There is no shame in giving such a handmade box.
We hope you find the templates useful for folding gift wrapping.
Probably, many will agree that not only children, but also adults love to receive gifts, and if it is hidden in an original box, then this will leave an unforgettable surprise experience. And we are sure that the time spent creating it will pass quickly and unnoticed, because the result will definitely please you. Here you can find the most original and interesting ideas How to make a paper box with your own hands with a lid. The step-by-step instructions will help you complete it without much difficulty in a matter of minutes.
Important! Before you start creating a gift box, we advise you to practice on simpler paper, because then you will be able to take into account all the errors and inaccuracies that may arise.
So, how to make a beautiful gift box with your own hands? To do this you need the following materials:
Now there are many ideas for creating original gift boxes; we have selected the most interesting and affordable options for you.
Important! To make your box look more festive, you can use colored or printed ribbon to create beautiful bow. To do this, you need to cut the ribbon in half, glue its ends to the inside of the lid, and tie the remaining long ends into a bow on top.
And for lovers of the classics there is this option: a small box for a small gift. We will need the following materials:
Let's look at the whole process step by step on how to make such a paper box with your own hands. For the blanks you need two squares - large and small. The difference in size is 1 cm, for example 15:15 and 14:14. Let's format them:
We have a box-lid. 
We perform the same manipulations with the second square, and due to the fact that this square differed in size by one centimeter, the box comes out smaller and will fit freely under the previously made lid.
To secure the gift inside, place a napkin or light crumpled paper on the bottom. As you may have noticed, making a gift box with your own hands is quite simple. The colored braid with which we will tie our box will help to add originality and an interesting accent.
And now we invite you to make small gift boxes with a surprise. The so-called fake box: when the lid is removed, it swings open. You can see how to make a lid in the second option described above.
So, let's start making a gift box with a secret.
For this we need:
Important! If you decide to make the bottom 18x18 cm, then for the lid you need 1 cm more, that is, 19x19 cm.
Important! Don’t go overboard with the decor so that the gift remains the main focus of your surprise.
Felt is a miracle material from which you can create not only handbags, jewelry, toys, but also beautiful gift packaging.
To create it we will need:
Important! Felt boxes can later also serve as a box for various small items or decorations. It is also possible to use them during competitions for children and all kinds of holidays.
If you need a minimum of costs and time spent, then there is an option for you: a simple box without glue:
For special occasions, we can make such a delicate and romantic paper box with our own hands.
For this you need to take:

To make cardboard gift packaging we need:
Let's get started:
It sounds intriguing - it will be a wonderful and unexpected surprise where you can hide a small gift, for example, decoration, sweets, small toys.
Important! If you are thinking about what to put in such packaging, here are some ideas:
- A friend or sister can pack nail polish and lipstick in this way.
- You can put a bracelet, earrings or a chain in a “carrot” for your spouse or girlfriend.
- Gifts such as cufflinks, tie clips or money clips are suitable for a father or brother.
So, the stages of creating a carrot box:
Important! On green paper or a ready-made cardboard tag, you can create an additional leaf on which you can leave a congratulatory inscription.
To make such a simple paper box, you don't need any glue or scissors. Just a piece of paper and your skill. The paper can be either thin or thick, square or rectangular. If you want to make a large box, take a large sheet of A3, A2 or A1. If the paper is too thin, fold it in half or even 4 times.
 1. A sheet of paper must be visually divided into 3 parts. It is desirable that all 3 parts are the same. Bend the paper as shown in the figure.

 2. Bend the side parts in half, left and right.
We obtain such a part as shown in Fig. 4.


 5. Bend the corners. Please note that on one side the corner should be made of double paper, on the other side it should be made of single paper.
You should get 8 bent corners. 4 on one side and 4 corners on the other side. The process is shown in detail in Figures 5, 6, 7, 8, 9.
 10. Straighten the resulting part symmetrically relative to the center.
 12. We look into the resulting pocket and straighten it into a box shape. This is the most important stage in the work.
 13. We make folds with our hands in all corners of the box to give rigidity to the structure.

14. This is what a finished simple origami box looks like. A4 box size: 10 cm x 10.5 cm.
Depending on the original paper size, the boxes may be larger or smaller. They can also be narrow or wide. The narrower and longer the sheet of paper, the narrower the box will be. Now you know how to make a paper box with your own hands in just 5 minutes.
Having learned how to make boxes, you can move on to boxes made of thick paper and even thin cardboard. The finished box can be painted with gouache or covered with multi-colored paper. From the boxes you can make boxes for children’s “jewels”, cribs for small dolls, original vases for cookies, store buttons, or change from pockets..
If you are busy sewing, cutting paper, and you need a temporary trash can, you can very quickly, whip up, create a trash container from a sheet of paper.
The boxes can be used as disposable tableware at a picnic, in the car, they can be made from literally anything you can get your hands on, even newspaper or napkins.
Greetings to all of you, dear audience. Holidays never end in our entire life - as soon as Someone’s Birthday has passed, it’s already arrived New Year, and then there are other winter-spring holidays... And for each of them we give gifts that we want to present at least interestingly. And what if not a DIY gift box will help with this?
I myself really like to congratulate my relatives in an original way. It’s very nice to see the smiles of those you congratulate. And cute boxes always contribute to this! After all, they are the first thing that catches your eye when presenting a gift.
Gift packaging can be very diverse. But there is one rule - the cardboard or paper from which you want to make a box must be of the required quality. In this sense, classic children's cardboard is far from suitable.
Where can I get such cardboard or paper? First of all, in specialized stores for creativity or even scrapbooking separately. It’s good if there is such a store in the city, you say, but what if you don’t have one at hand or the prices are sky-high?
These leaves will be enough for you to make small souvenir boxes (for jewelry, sweets, toys, etc.). Your family will appreciate it
And now I suggest you proceed to the actual detailed photo master classes, which will also include a diagram for creating each individual box.
Small boxes
First of all, I want to give you 5 designs with very cute patterns that will make this wonderful packaging:

The first one has red roses. If you want to impress your lover, then she is definitely for you.
Principles of working with templates:


And again roses, but more delicate.

And now there are two options for Birthdays - candies with balls and lollipops.


Large rectangular
This is perfect for large gifts (for example, wall clocks). You will need specialized binding cardboard to make the box really convenient. By the way, binding cardboard can also be purchased in specialized stores or on Ali.
The incision sites are marked in orange. The lid can be made the same way, but with slightly larger dimensions (2-3 mm).

For a man
If the gift is intended for a man, then I suggest choosing one of the following options.
Simple shapes are on trend - this is proven by the following 4 templates for creating strict, classic boxes. For these you will again need thick cardboard.


If the gift is intended for a loved one, then there should be more than enough romance ^^ There are butterflies, hearts, and all kinds of declarations of love. They can be made from thick cardboard or thick paper.


Heart
Heart boxes are very popular because you can use them to express your feelings. Or admit them


Cake
Are you getting ready for a party where everyone will need to be given a little surprise? Or maybe a wedding is planned? In both cases, cardboard pieces of cake will come to the rescue.
A beautiful and clear diagram is suitable for both the bottom and the lid.

Boxes don't always need to be dense - sometimes it's enough just to create a beautiful picture. Then I suggest you use this convenient scheme of 6 different packages:

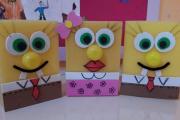
If you are going to a child’s party (or maybe you want to please your child), then make him a cute box in the shape of an animal.

Give such a boot to happy parents. Follow the traditions: pink for girls, blue for boys.

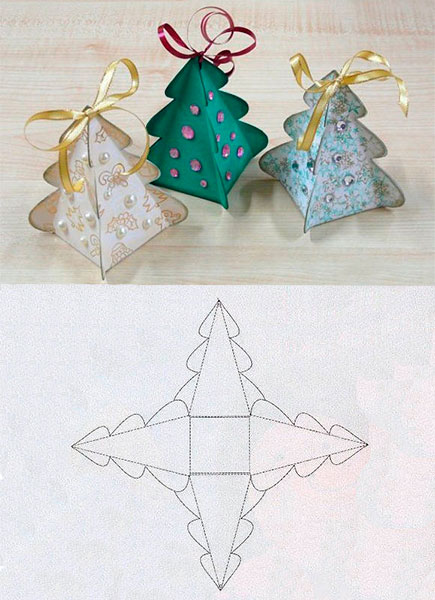
The mood can be created not only with the help of gifts) Just look at these 8 lovely boxes, each of which can also be a great New Year's decoration
This is especially necessary if for some reason there is no New Year's tree. The main thing in this packaging is to trim the edges beautifully and neatly.
Snowflake
Of course, this box itself is wonderful, but the silver paint on the tips of the snowflakes can add some zest.
Tip: Give something in this package to a girl who loves Frozen.

Bag
For giving a gift - one of the simplest options.

Box of sweets
For all lovers of beautiful New Year's favors and quick handmade items! Take a plastic cup with a smooth surface, cut the edge and cut the edge.
Fold the cut pieces inward so that they cling to each other. Place some goodies inside and cover the top with something cute.

Another option for candy packaging is a donut. It is a little more labor-intensive, but more effective.


The design of the box can be very diverse - from simple shapes in the form of birds and hearts to intricate flowers and bows. I will write more about box decor in the future - don’t miss it.
In the meantime, subscribe and comment - see you soon!
Sincerely, Anastasia Skoracheva
The article will tell you how you can make it yourself and use a cardboard box. Here you will find templates and master classes on making boxes of different shapes.
A box is the easiest way to pack or hide something. The box can serve as an excellent means of storing things: jewelry, cards, small items and cosmetics. Of course, modern stores will provide you with a lot of options for boxes: large, small, curly, square, with lids, decorated and simple cardboard.
It is much more pleasant to create something with your own hands and decorate it the way you would like it and the way the product itself will correspond to the style of the holiday, room, or occasion. You can make a craft from absolutely any cardboard. The material can be purchased at a craft store (you will find a large selection of cardboard colors and textures), or you can use one that is often packaged in household appliances(refrigerators, for example, or washing machines).
For work you will need:
Flip lid box templateIMPORTANT: There are two main types of cardboard boxes with lids. One assumes the presence of a lid that covers the top of the box, the other - a lid that folds back, but is part of the box.

 Box template with cover lid
 How to make a box with a lid step by step:
A round cardboard box is a very beautiful and practical product that will always find its use. Having decorated it to your liking, you can store jewelry and jewelry, sewing and embroidery kits, cosmetics, clippings and much more inside.
Making a round cardboard box is a little more difficult than, for example, a square one. However, it is quite possible to “figure it out” with your own hands, without spending a lot of money on materials. Use thick cardboard and follow the template provided exactly; you can only change the size, but not the shape of the parts.
How to make a round cardboard box, templates:

 Round Cardboard Box Template No. 1
 What parts does a round cardboard box consist of: template No. 2
  In what order should the parts of a round box be glued together: template No. 3
  Round cardboard box with handle: finished product
A heart-shaped box is much more difficult to make than a round or square box. However, if you follow the tips and templates, you can easily create this beautiful piece.
A heart-shaped box is not only a storage box, it is an ideal packaging for giving a gift to a loved one. Such a box can be filled with many surprises: sweets, souvenirs, trinkets, gifts, keychains, flower petals, even butterflies can fit in it.
IMPORTANT: The heart box is in many ways similar to a round box, but here everything depends on the bottom: if it is proportional, then the whole product can look neat and even. The box has two bottoms: internal and external, the walls of the box are attached according to the principle of a round box.
Different templates for making a heart-shaped cardboard box:

 Heart-shaped box template from one piece: template No. 1
 Heart-shaped box template from one piece: template No. 2
 Step-by-step work in photos:

 Prepare identical hearts: two bottoms and a lid
 Cover the bottom with the side of the box
 Fix and wait until completely dry, make a lid
Giving gifts in bags, cellophane wrappers and paper wrappers is no longer attractive and is considered a sign of “bad taste.” Your gift will look much more impressive in a paper or cardboard package that you glue and decorate yourself.
IMPORTANT: The size and shape of your box depends only on what exactly you will be giving. Heavier gifts require thick cardboard, but for small and light ones you can even glue a paper box together.
Boxes made of cardboard and paper, different templates:

 Simple Rectangular Box: Template
 Hinged Lid Box: Template
 Triangular box: template
  Simple square box: template
  Box-pouch: template
 In a modern creativity store you will find a huge selection of cardboard:
IMPORTANT: All this variety of choice allows you to create cardboard boxes of incredible beauty and use them for any purpose.
 Cardboard for creativity
If you need to make a cardboard box without a lid, you should also use a template. This product is perfect for storing personal items: pencils, cosmetic brushes, hair accessories and much more.
 Box template without lid
Boxes of chocolates don’t have to be bought in a store; you never know exactly what will be inside. It’s always nicer to make a box with your own hands, fill it with candies to your liking and give it as a gift. to a loved one. This will not only be a “delicious” gift, but also very original and special.
 Box with handles: template
  Box with a butterfly: template
 Triangle box: pattern
 It is very convenient to store jewelry, jewelry and watches in a cardboard box. You can buy it or make it yourself, decorating it to your liking. If desired, you can make one or several sections inside the box.  Template for flat box
A small square box can be used as a bomboniere or packaging for small surprises for your loved ones.
 Simple square box template
 A triangular box can exist as a separate unusual package, or it can be part of a cake-shaped package.
 Triangular box template
 Decorating a homemade box depends only on how original and great your imagination is. The box should also be decorated based on the occasion (a holiday, for example, or the decor in the room).
How and with what you can decorate any cardboard box:
Crafts from sponges for washing dishes are easy to make, since the material is soft, has a smooth surface, and cuts well...

Hello, mother country! I want to talk about something that is very close and dear to me, to share my experience, so to speak. When...
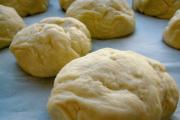
Modeling is a useful and exciting activity not only for kids, but also for parents. This is an opportunity to spend time together...

MOSCOW, February 20 - RIA Novosti, Irina Ovchinnikova. Summer camp is a traditional format for children's recreation: teenagers live on...
"TROPICAL RAIN". Participants stand in a circle. The presenter stands in the center: “Now we will all together call for a warm tropical...

Homeschooling (homeschooling, from the English homeschooling - home education) is popular in the USA and Canada, has...
The time has come to send the children to primary school. The place has already been determined, but the free time does not match...
Tennis (or simply tennis) is a sport that at the dawn of its appearance was very popular among...

Ekaterina Morozova Reading time: 8 minutes A Many mothers don’t know about children’s demonstrative tantrums...

Young people often cannot get a job because they do not have the relevant experience. But in order for him...
This game is aimed primarily at children. Little girls are unlikely to refuse...
“What do your clients and your work mean to you?” Natalya Yuzhanina: My client is a friend! Which is ready with...

A guide to easy and fast weight loss. The article contains all the ways to speed up your metabolism in...

We live in a world where every day they try to prove to us that friendship with ex-partners is not just normal, but...

Hello, mother country! I want to talk about something that is very close and dear to me, to share my experience, so...
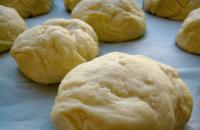
Modeling is a useful and exciting activity not only for kids, but also for parents. This is an opportunity to spend...