Efficient Wardrobe: Basic Shoes
Recently, many articles have appeared on the Internet about what it is. What is the difference between basic shoes and any other?...
Olya Likhacheva
Beauty is like a precious stone: the simpler it is, the more precious it is:)
It is difficult to find a more versatile material than clay. This “dirt” is used in construction, arts and crafts, industry, and medicine. The miracle remedy is also used in cosmetology. Clay face mask – who doesn’t know about its benefits? But what makes it good is whether its quality depends on the color.
Historians are sure that the benefits of clay were known in ancient times. But even now you won’t find a beauty salon that doesn’t make a clay mask. Her fans believe that nature has not come up with anything better. The mineral material contains silicon (makes the face cleaner, younger), aluminum (dries, refreshes the skin, destroys microbes), and other representatives of the periodic table. The magical properties of clay depend on the color and depth of “ripening”:

Cosmetic clay for the face, like any other product, has its own nuances. Before studying recipes, read this information, otherwise you will harm yourself! So:

Take blue clay - 2 tbsp. l., talc – 2 tsp. (both ingredients are in powder form), add 1 tsp. glycerin and the same amount of alcohol. Blue will get rid of acne faster if it is only an addition to complex therapy. White and green clay also helps with rashes. After washing off the treatment mask, spray your face with miramistin (the drug is sold in a bottle, there is a special dispenser) - be sure to cover your eyes, for example, with cotton pads.

Take 3 tbsp. l. clay (the recipe says that blue, but it doesn’t matter which one to take, any one is a storehouse of useful vitamins and minerals; additional ingredients direct the healing effect in one direction or another). Mix with alcohol, the same volume, add 1 tsp. lemon juice. The resulting mass is relatively liquid, spreads effortlessly over the face and does not run down. If the mixture is too thick, dilute it with warm water.
2 tbsp. Fill spoons of black clay (has a dark gray color) with infusion of calendula purchased at the pharmacy, knead “sour cream”, which then smear it over your face. Avoid the eye area! After the third use, comedones disappear, and the skin becomes prettier, clean, elastic and fresh. Apply any cream to your face.
2 tbsp. Mix spoons of clay (any kind you have at home) with 1 tsp. badyagi, known as a drug for bruises, should be in powder form, not cream, 2 tbsp. hot water. While you stir the mixture, it will cool down. Apply the unpresentable-looking but very useful mixture to your face and wash it off as soon as it dries. After the procedure, be sure to apply cream.

Take 2 tbsp. l. clay powder, decoction of linden flowers (buy dried flowers at the pharmacy if you haven’t prepared them in advance), 1 tsp. sea buckthorn or linseed oil, mix. Smear the resulting mixture over your face, avoiding the area under the eyes, and leave for 15 minutes.
Need to quickly tighten your skin? For home cosmetology it is more difficult to come up with something better. Mix clay with honey and cow (goat) milk in equal quantities, for example, 2 tbsp. l.. If you want to put on a real fight for your wrinkles, then replace the milk with a decoction (pharmaceutical chamomile, lavender and linden flowers, sage are suitable), add 5 drops of sea dew oil, as rosemary is also called.

For oily skin, an agave mask will be the best skin care product. Stir 2 tbsp. spoons of green or blue clay powder, 1 tsp. Agave juice (aloe), 7-10 drops of lavender, hazelnut or grapefruit oil. If the mixture is too thick, add warm water. Apply a malachite-colored mask to your face, rinse immediately after drying.
Pour 2 tbsp into a bowl. spoons of green clay, add three drops of tea tree oil (replaced with jojoba, lavender or hazelnut oil), 1 teaspoon each of lemon juice and honey. Apply the resulting mixture for a maximum of 20 minutes, rinse. Before the procedure, you need to prepare your face: remove any remaining makeup, wash your face and steam your skin with steam from hot water.

One of the secrets of timeless beauty is pink clay, a mix of red and white, which are good in themselves, but when mixed they give a unique mineral composition that has a beneficial effect on the skin. Mix pink clay and water in equal quantities, for example, 3 tbsp. l. Add lemon juice to the resulting mass - 2 tsp. Apply the mixture for a maximum of a quarter of an hour, rinse and smile! In addition to whitening, this mask will help your face become smooth and beautiful.
Pour 3 tbsp into a bowl. spoons of red, white or green clay, add chicken or quail yolk, 1 tsp. linseed oil and 1 tbsp. l. water, honey (preferably liquid), lemon juice. Mix very well with a plastic or wooden spoon. The resulting mass should have a creamy consistency. Apply it for 15 minutes, after drying, rinse with warm water.
Self-care is like fitness: you quickly get used to certain patterns and “loads.” Maximalism and overdoing are a common mistake of women who have embarked on the path of loving themselves and their beauty. Masks cannot be used daily! For everyday care, do miracle remedies a couple of times a week - that's the maximum. The skin will receive the necessary care and reciprocate. The second option is a daily course for 2-3 weeks, after which take a break.
Clay is a natural gift for face and body care. Low cost and amazing effect make it a favorite skin care product. A clay face mask can be prepared at home with or without the addition of various ingredients.
Any clay face masks have no contraindications and will only bring benefits. How are they useful?
In addition, this product is easy to apply and wash off.
How to make a mask from clay alone? There are some cooking rules. Check them out:
You need to apply the clay mask correctly, only then you will get the expected result. Therefore, adhere to the following recommendations:
You already know how to properly apply clay masks. It's time to talk about the types of clay that exist in nature. Why does clay come in different colors? The answer is simple: its color is given by the minerals and chemical elements of which it is composed.
Facial clay is a valuable natural component. But it is important to know which clay mask is suitable for your skin type.
Dermis type: oily, sensitive. Problem: enlarged pores, acne. Effect:

Dermis type: dry. Problem: acne, fine wrinkles. Effect:
Dermis type: normal or combined, aging. Problem: pigmentation. Effect:
Black/h3>
Dermis type: oily. Problem: increased fat content, acne. Effect:
Yellow/h3>
Dermis type: fading. Problem: acne. Effect:
Red
Dermis type: dry, sensitive. Problem: iron deficiency, peeling. Effect:
Dermis type: dry, fading. Problem: inflammation, sagging skin. Effect:

Dermis type: sensitive. Problem: irritation, peeling. Effect:
It's time to learn how to make a clay face mask. You are already aware that the consistency of the mask should resemble thick sour cream. The amount of clay powder for preparing the mask is two tablespoons. And water – about 80 ml.
However, masks with facial clay and other ingredients are no less useful. It should be noted that all the rules on how to apply a clay mask also apply to these compositions.
Making face masks at home is not difficult at all. You just need to set aside a little time for yourself, forgetting about everyday problems and affairs, and apply a useful product to your skin.
A clay healing mask will help cope with many facial skin imperfections. The composition should be applied for a very short period of time, so you will not be distracted from family affairs for a long time. But then a beautiful and happy woman will delight her household with a good mood and beautiful appearance.
Hello, dear readers! In the article we discuss clay masks, what they are, their properties and effects on the epidermis. You will learn about the benefits of the product and learn how to use the product correctly.
Clay is a component of natural origin. Quite often used in the cosmetology industry to create masks for the face and hair.
The product has various healing properties. Thanks to which it can be used on any type of dermis.
Cosmetic clay is a sedimentary rock with a viscous structure and tiny particles. This composition has a delicate effect on the epidermis without the risk of scratches.
The main feature of the product is the absence of pronounced acidic and alkaline properties.
Clay masks are good for several reasons:
Below we provide effective recipes for face and hair masks. Using them, you can make your skin silky and radiant, eliminate pigmentation, acne, and improve the condition of your hair.
Main components of the product:
The most common types: white, blue, black, green clay.
Before using the product for the first time, you should pay attention to the properties:
This natural remedy has a rejuvenating effect, its properties are suitable even for sensitive types of epidermis.

The absence of medical contraindications for cosmetic clay makes it possible for everyone to use it. When to avoid using:
In order for the use of a cosmetic product to bring the desired result, you should follow some recommendations:
An important condition is the addition of additional ingredients to the main composition of the product to achieve the best results. For dry type of epidermis - yolk, cream, sour cream. For oily people - sour juice of natural origin.
White clay, also called kaolin, contains the following components:
Indications for use:
Ingredients:
How to cook: Squeeze the juice out of the leaf using a gauze cloth. Add mineral water, add the main component, stir.
How to use: Apply the composition in a thin layer, wait 12 minutes. Then wash your face with water at room temperature. Apply this mask every 6 days.
Result: Eliminates inflammation, impurities, harmful substances, fat, accelerates the process of acne maturation.
Ingredients:
How to cook: Pour a glass of boiling water over the inflorescences and flowers, wait an hour. Add clay.
How to use: Apply the composition for 20 minutes. Wash your face and use moisturizer.
Result: Well-groomed dermis without wrinkles.
White clay is a lifesaver for damaged, dry hair. It cleanses the pores of the scalp, resulting in rapid hair growth. Kaolin strengthens hair follicles and reduces hair loss.
Prevention - it is advisable to use a cosmetic mask no more than 3 times a month. On special occasions - every week.
Ingredients:
How to cook: Dilute kaolin in warm water. For oily scalp, add 1 tsp. lemon juice; if dry, use any oil.
How to use: Distribute the composition over your hair, then wrap it with film and a scarf for half an hour. Rinse it off.
Result: Hair looks silky and easier to comb.
Blue clay is an ideal choice for those with oily, problematic epidermis. It allows you to eliminate almost all external defects in a short period of time. By adding certain components to the product, dry skin can receive the necessary nutrition.
This type of product contains a large number of useful elements, including kaolinite, calcium, copper, iron and others. Constant use of masks leads to hydration of the epidermis, elimination of age-related changes, and cleansing.
Indications:
Ingredients:
How to cook: Dilute the powder with water, add a few drops of oil, stir.
How to use: Apply the resulting mixture in a thin layer, wait 15 minutes. Then wash your face with warm water.
Result: After use, the skin is clean, the number of rashes begins to decrease.
Ingredients:
How to cook: Pour a glass of boiling water over the dried sea buckthorn and let it steep for half an hour. Add clay to the broth. Take gauze, cut a round shape out of it, make slits for the mouth and eyes.
How to use: Soak the gauze in the resulting mixture, apply it to your face for 5-10 minutes, then repeat the procedure several more times. Then wash your face with warm water.
Result: The epidermis is tightened and wrinkles are smoothed out.
Blue clay strengthens hair follicles and prevents hair loss and brittleness. Use for preventive purposes - 4-8 times a month.
Ingredients:
How to cook: Dilute the main component in warm water. Add the remaining ingredients to the composition. Stir.
How to use: Apply the mixture to the hair roots and distribute along the length. Rinse it off.
Result: Hair begins to grow faster.
Black clay has anti-inflammatory and rejuvenating properties. Ideal for all types of epidermis. The product contains calcium and iron.
With constant use, the dermis is moisturized and the pores are cleansed.
Ingredients:
How to cook: Pour a glass of boiling water over the string and wait until the broth has cooled completely. Add clay and citrus juice. Stir.
How to use: Apply the composition in a thin layer, leave for 15 minutes. Wash your face and wipe the dermis with the infusion of the string.
Result: Pores become smaller, pimples dry out, and redness disappears.
Ingredients:
How to cook: Add sour cream and yolk to the main product and mix.
How to use: Apply the composition for a quarter of an hour, then wash with cold water.
Result: Dry skin is nourished and wrinkles disappear.
Green clay eliminates age-related changes, tones, and eliminates toxins. It contains potassium and selenium.

Ingredients:
How to cook: Pass the cucumber through a blender, mix it with the rest of the ingredients to obtain a homogeneous substance.
How to use: Apply on face and leave for 20 minutes. Wash yourself.
Result: Acne and redness disappear.
The addition of essential oils to masks makes it possible to moisturize the dermis, cleanse pores, and eliminate inflammation.
Ingredients:
How to cook: Mix the main component with the yolk, add the remaining ingredients. Stir.
How to use: Apply on your face for a quarter of an hour, wash.
Result: Regular use gives elasticity to the epidermis and eliminates shallow crow's feet.
Ingredients:
How to cook: Mix the ingredients, except the main product, in a container. Pour the mixture into the main component, stir. Try to avoid the presence of undissolved substances.
How to use: Apply the mixture to your face, wait 15 minutes, and wash.
Result: Gradual elimination of acne.
The simultaneous use of clay and honey in cosmetology helps cleanse, moisturize, and rejuvenate the dermis.
Ingredients:
How to cook: Mix all products.
How to use: Apply the prepared mixture onto your face and wait 20 minutes. Rinse it off.
Result: Deep crow's feet disappear after a few treatments.
A care product with activated carbon allows you to thoroughly cleanse the epidermis and eliminate acne without damaging the dermis.
Ingredients:
How to cook: Mix all ingredients, add milk. Heat the mixture until the gelatin becomes liquid.
How to use: Apply to your face, wait a quarter of an hour, and wash.
Result: Even color of the dermis, clean pores.
See you in the next article!
, FEBRUARY 3, 2018
It is known that clay is good at removing harmful impurities from the skin. In addition to unclogging pores, clay can help draw out toxins from the deep layers of the skin. A purifying clay mask can help clear up even serious acne problems like cystic acne.
Clay masks are just one way to revitalize your skin and unclog your pores. This is not to say that every clay mask will suit everyone, in fact you will need to take care of the ingredients that are right for you.
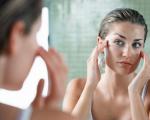
The downside to a clay mask is that it can be quite drying. Not only will you remove impurities from your skin, but you will also remove some of the moisture from your face. Also, the mask will take away the skin oils you need, which will cause skin irritation. All this can happen if you use the mask incorrectly. Today we will discuss how to avoid this and get the maximum benefit from a clay mask. After all, we want the best for our skin. That's why we have prepared this step-by-step guide to know how to make a clay mask at home.

Before you start making your own clay mask, you need to make sure your skin is suitable for it. There is a common misconception that clay masks are for everyone.
However, remember, I wrote about this a little higher, that they dry out the skin. This means that clay masks will be much more irritating for dry skin than for other skin types. Many cosmetologists recommend clay masks only to those with normal, oily or combination skin.
The clay will draw out excess oils and moisture. This will help leave the skin with a normal amount of oil if the skin was oily, and "degrease" it if it was normal. Your skin will then naturally restore essential oils, counteracting the drying effect of the clay.
So if you use clay on dry skin(!), you can get into a cycle of constantly leaving your skin without oil. The body will fight to produce more oil but will not be able to cope. And this will mean that your skin remains dry, inflamed and cracked. You will open the door to a lot of different infections and a lot of acne!
And yet, your skin type does not affect how often you can make clay masks. This is definitely not a procedure that needs to be done every day. Even with very oily skin, daily use of a clay mask will leave the skin brittle and dry. Therefore, you need to use the mask once or twice a week maximum(!). If you feel that your skin has become overly irritated after using this, then reduce the frequency of using the mask to once a week or even every two weeks. You won't gain anything from dry and irritated skin!
Now that you've made up your mind and decided that this is the perfect option for you, it's time to look at ways to make a clay face mask. We'll do this part step by step and then move on to the steps on how to apply and use your mask to cleanse your face and fight acne.
There are different types of clay that you can use on your skin. We're not talking about the clay that's used on a construction site or for laying ceramic tiles! You need special types of clay that help remove dirt and oil from your face. There are several types of clay, but we will talk about three of them.

Bentonite clay- the most popular option. It is affordable and very easy to find in stores. This is a white/gray clay that helps nourish the facial skin with minerals and is good at removing excess oils. Not only is it helpful in fighting acne, but it will also help improve the overall health of your skin. If you have combination skin and have acne, then this is something you can use.
French green clay- also a great option for those with oily skin that is also prone to acne. It's one of the most absorbent clays out there, meaning it goes straight into your pores to remove all the oil, debris, bacteria, and more. This is the best option for deep cleaning.
Australian black clay useful for people with excessively(!) oily skin. This is another type of clay that is hyper-absorbent and penetrates deep into the pores. It's not as good as green clay, but sometimes it's easier to find at your local beauty supply store.

Your clay should be mixed with nourishing oil. Choose the one you like best and which will help remove all the impurities from your skin.
The most common are almond and jojoba oils. They are non-comedogenic, meaning they do not build up or clog pores. Olive oil is another great option.
Avoid using coconut oil as a nourishing oil to mix with clay if you have oily skin. While coconut oil is packed with nutrients, it blocks pores and can make your acne worse.
Then it will be good to add a few drops of your favorite essential oils. Most essential oils will be a very good option for oily skin. If you have combination skin, you can add ones that are not drying. This will depend on how dry your facial skin is.

Tea tree essential oil is generally one of the best options for acne-prone skin. This essential oil is both antiseptic and antibacterial. It gets into the pores and eliminates the causes of acne - destroys the bacteria that causes them. Most essential oils smell good and will leave you feeling more refreshed.
Lavender essential oil is also relatively good for oily skin. It doesn't dry out the skin very much, even though it's an essential oil. It also smells great and is great for relaxing muscles and reducing inflammation in pores.
Lastly, you need warm water. It is necessary to add to the clay a little at a time until a mask-like consistency is formed. Warm water opens the pores better and helps the clay work. Cold water will cause your skin and blood vessels to shrink, causing the mask to not have the desired effect.

Choose filtered water or use mineral water. This will help avoid chemicals in regular tap water!
Clay mixes easily with oils and water. If you want to create an exfoliating clay mask, you need to add something that will help with that. Poppy seeds are a great option. They are small enough to work like microdermabrasion, removing the top layers of skin so you can expose new skin cells to the light.
You can also use baking soda. This can be beneficial, especially for oily skin. It has cleansing properties and works great with clay.
Salt is another option. Choose Epsom salts whenever possible. These are minerals, not salts. They are non-drying and suitable for all skin types. You can also use sea salt, which is also less drying but cleaner than table salt.

Now that you've made your clay mask, it's time to apply it. You can't just slather it on your face and let it work. You will need to do some preliminary work to ensure that your skin is ready to receive the nutrients from the clay and release toxins and harmful impurities.
This is your step-by-step guide to follow every time you use a clay mask.
If you have makeup on, you need to remove it first. The last thing you want is for the clay to leave most of it inside your skin instead of washing away makeup impurities.
Use a good makeup remover to completely remove all traces of your makeup. Be gentle and attentive to the skin around your eyes. Although you won't be applying clay to your eyelids, it's best to get rid of all makeup completely.
Removing your makeup will also help prevent chemicals you don't need from seeping into your skin and clogging your pores. If you have acne and don't remove your makeup, you'll just make the problem worse.
After removing your makeup, use warm water and cleansers to remove any possible chemical residue. You need to leave your face completely clean. Think about the type of cleanser you use to make sure it's suitable for your skin.
Once again, please note that it is best to use warm water. While the cold will close your pores, warmer water will help open them. This makes it easier for the clay to penetrate the skin and speed up the removal of all toxins from the deeper layers.
Apply the clay mask to your face using your fingertips. Apply the mask very carefully around the eyes to avoid stretching or tearing the skin around the area. Do not get too close to the eyes, as the skin there is very sensitive and can easily be damaged during the removal process.
Apply the mask to your hairline, around your chin and on your neck.
If you used an exfoliant in your mixture, make sure you apply it in a circular motion. This will help clear away dead skin cells while you apply the mask.
Leave the mask on until it dries on your skin. You may feel a slight hardening as it dries, but you shouldn't feel it too much. Your mask penetrates into the pores and pulls out all the dangerous toxins. You can tell that the mask has dried simply by running your fingers over it. Once the mask is removed, your skin will breathe health.
If you don't feel comfortable leaving the mask on until it dries completely, leave it on as long as you have the patience to do so. Give it a chance to dry at least slightly before you remove. Removing your mask too early will not do any good.
Don't worry about your skin losing a lot of moisture. No matter what, the clay mask does not dry out the entire skin. It will remove some of the excess oils, but not the essential oils for healthy skin. After this, you can also add some moisture with toner and moisturizers.
To remove the mask, use lukewarm water and use your fingertips to gradually remove the clay from your face using circular motions. These movements also help exfoliate the skin. Even if you have masks without exfoliating additives, you need to remove it using circular movements to better remove dead cells from the surface of the skin.
“Wrap” circles until the entire mask is washed off. Then you need to completely rinse the entire surface of your face and the places where the mask was before you start stroking your skin with a soft, clean towel 😊.
Avoid washing your face with any cleansers afterwards. You've already done a good job of pre-cleansing and then cleansing with the mask itself, so there's no need for any additional cleansing, and in fact, it may negate all your previous efforts.

Now it's time to add some moisture back into the skin. This is especially important for combination skin types, but can also be beneficial for oily skin types. Choose only those toners and moisturizers that are suitable for your skin type to avoid acne problems.
After applying the toner, wait until it dries naturally. You can then apply some moisturizer to help lock in the resulting moisture.
Make sure all your makeup is removed before using clay masks. This will make it easier for the mask to penetrate the skin and remove all toxins.
The mask will not dry out oily skin. Although you can use moisturizers, you may not always need to. This is something that is scary to hear, but when you feel your skin after using a clay mask, you will immediately understand whether additional hydration is needed or not.
Try to avoid putting too much makeup on your face. Choose moisturizers that won't block your pores but help retain natural moisture. Avoid makeup for at least 12 hours, preferably 24 hours if possible. This will help protect your pores from contamination.
If you find that your skin is too sensitive or irritated after using a clay mask, you may want to consider choosing a gentler type of clay for yourself. Otherwise, you may need to look for other types of masks. Irritating the skin will undoubtedly not help improve its appearance, that's for sure 😊.
Of all the skin care products, the best option is a cosmetic clay base. It is a natural remedy that has a high hydrogen content. What is the difference between white clay and green, black, blue, red or pink, how is it useful, how to use/make it at home - we invite you to consider together the answers to the questions posed, as well as see options for effective home recipes.
Each clay option ( red, black, blue, green, pink, white, etc.) has its own unique composition and has a lot of useful properties: remove wrinkles , for aging skin - lift , to narrow pores , put away black dots , even out complexion (even if somewhere is red from acne), remove pigmentation and freckles – this cosmetic product, unique in its composition, created by you at home, can do all this. Its unique medicinal and healing qualities have been known since ancient times.
Because the blue base (the second name is Cambrian) has universal features; on its basis, you can create various variations in the comfort of your home: anti-wrinkle, nourishing, whitening, toning or cleansing effect. You can create the composition yourself or use proven home beauty recipes.
In any case, the main component can be purchased in the form powder (white, red, pink, black, green, black, etc.) for preparing the product at home. White clay (kaolin) is universal, i.e. With its help you can make various variations. Young girls/women/men are often looking for kaolin mask options that are effective against acne spots.
You will need:
Components combine until smooth(the ideal consistency is thick sour cream) and apply to skin(face, neck, etc.). Keep until dry. Procedures can be done one to three times a week. A lasting effect can be achieved after 10-15 procedures.
Black base (second name Moroccan) is used mostly for removing various inflammations and/or as wound healing agent. Otherwise, the salon method is no different from the conditions of use in the home version and is identical to analogues of other variations ( white, red, green, pink, blue, etc.).
Each recipe for this cosmetic product at home has its own peculiarity:
We offer options for traditional healing recipes:
According to reviews from practicing users, procedures should not be done frequently - in 2-3 times a week is enough. To improve the effect, alternation is recommended.
The question of how many times a week you can make a clay face mask, under what conditions and why we have already discussed. We suggest moving on to practical tips and homemade recipes:
You should know that clay procedures do not depend on the number of years, you can start using them at any age and they can also be done at any time, preferably before problems arise.
Please note that how long to keep a clay mask on your face directly depends on the type of skin:
We suggest considering several recipe options for homemade cosmetic products. Will do any clay (white, pink, red, black, green, etc.), it is important to choose a variation taking into account your skin type. For example, for dry type good selection of supplements milk, sour cream, egg white or herbal infusions with a drying effect, For fat – yolk, low-fat kefir, yogurt, etc..
Perfect for a nutritious variation honey And vitamins A and B (ampoules can be bought at any pharmacy). The honey should be liquid (a water bath will do), but not hot.
Manufacturers of cosmetic care products offer ready-made formulations. For example, TM IvRoshe face and hair mask with Moroccan clay reviews can be seen on their official website on the Internet. TM Avon, Clean Line, Oriflame, Grandmother Agafya's Recipes, etc. also delight with a wide range. These compositions can be prepared independently by adding auxiliary components to the clay base:
Mask for the face with clay and gelatin (white, black, green, red, blue, pink, etc.) is perfect for solving this problem. Dissolve first gelatin and leave it to swell, then add clay composition(leave the gelatin in the water until completely dissolved).
We offer several proven home recipes for the face:

Recently, many articles have appeared on the Internet about what it is. What is the difference between basic shoes and any other?...

Even a novice needlewoman can crochet a women's beret. The manufacturing process is very fast and completely...

Today, anyone can purchase anti-cellulite massagers and carry out procedures at home. For...

For a triangular face, a good solution would be hairstyles that create volume in the lower part. These can be different braids...

Contrary to existing stereotypes, a hairstyle with short hair can look very charming and feminine....

The treble clef in its familiar form appeared in the sixteenth century, when instrumental music was born. But...

The placenta is a unique organ that helps the baby grow, develop, receive all the necessary nutrients...
A convenient and simple hairstyle for medium and long hair is a fishtail braid. She got the name...
Modern cosmetologists use many different natural products to care for the face and body. One of them...
A good housewife has everything beautiful in her kitchen. But how often the picture is spoiled by old burnt rags, which...

28 years of marriage is popularly called the nickel wedding. Nickel is a shiny and durable silver-colored metal....

The musical mobile for the crib can be used from the first days of a child’s life. Such hanging toys are not...

Many women have had to face betrayal and betrayal in love. Men you can expect...

A long time ago, on a distant island, Which was hidden from prying eyes, All Feelings lived in a deep mystery...

Even a novice needlewoman can crochet a women's beret. The manufacturing process is very fast and...

Today, anyone can purchase anti-cellulite massagers and carry out procedures at home. For...