Types of bleeding during implantation
Lack of menstruation is the first sign through which a woman learns about her interesting situation. But can they go...
Today we will show you a fairly simple method of sewing a zipper into a knitted garment. What will be used here is not a hook, but a sewing needle. This method seems easier to many. If you've knitted a sweater but can't get to the zipper, you can use this method. Everything should definitely work out for you!
For work we use the following tools and accessories:
Please note that the jacket (or other knitted product) must be completely prepared, as well as steamed and dried.

Step 1. First, string the edges to which we will sew the zipper onto knitting needles. We do this with a certain rhythm, repeating the knitting pattern. Look carefully at the drawing to see how this is done.

Step 2. Pin the first side of the zipper and sew it along the edge with a needle back stitch. We grab one knitting thread at a time, with the same rhythm. As you work, check the quality of the sewing by moving the zipper slider. If it mixes freely and does not pinch the edge, then everything is fine.


Step 3. If everything turned out well, sew the second edge of the zipper with a needle stitch back.

Step 4. Pin the other side of the zipper. Lay out the jacket on the table and check that the zipper is connected to it correctly. The jacket should lie flat on the plane, there should be no slightest distortions.

Step 5. Sew the second side of the zipper in two lines, in exactly the same sequence as the first.
Step 6. Remove all knitting needles, pins and needles when finished. We carefully check the quality of the seams and the work of the zipper.
Step 7. Lightly steam the clasp and dry it.
That's it, the product is completely ready! A cute and comfortable knitted sweater to wear.
/ 05/16/2016 at 23:51
Good day, dear needlewomen!
Recently I had to knit men's sweaters with zippers. I knitted it, but when I had to sew in a zipper, it turned out that it was not entirely easy. It is necessary to sew it in such a way that it does not warp or tighten anywhere, so that it is both straight and neat.
And so, summing up my “experience is the son of difficult mistakes” (for some reason these lines from Pushkin came to mind), I decided to write an article on how to sew a zipper into a knitted product. Moreover, the process of sewing a zipper into a knitted product is somewhat different from the technology by which a zipper is sewn in when sewing.
So, first, we select the appropriate color and size zipper. It is difficult to choose its exact length. I had to take it a little longer and then cut it off at the top.
The zipper is sewn in after the final assembly of the product, that is, when it is completely sewn. And one more thing before sewing in - you need to prepare the edge strips. Here it already depends on the model and the pattern with which it is connected.
In this example, the central part of the front is knitted mainly with stockinette stitch, and as you know, its edges curl. Therefore, it was simply necessary to strengthen them with narrow strips. It was possible, of course, to sew in a zipper by tucking the edges inward, but somehow I didn’t take this moment into account in order to initially cast on more loops for the shelf.
I made the strips to make them tighter, and on needles of a smaller number than those with which I knitted the main fabric. To prevent the elastic from tightening the fabric, proceed as follows:
We lift the first loop, knitting it under both walls of the edge loop.

We knit the second loop only under the front wall of the edge loop.
In the next row (wrong side of the work) I already began to knit a double elastic band (alternate: 1 knit stitch, remove 1 loop unknitted - thread before work). This way I knitted 4 rows.
In the 5th (purl) row, I closed the loops, alternating: 2 loops - in the rhythm of the 1 × 1 elastic band, (that is, when closing the loops, I knitted the front loop with the front loop, and the purl loop removed in the previous row), and knitted the next 4 loops 2 each together using the knit stitch method (remove the knit stitch, then purl the loop removed in the previous row and pull it through the removed knit stitch). If you close the loops on the bar in this way, its edge will not be stretched.

Finished plank
When both strips are ready, carefully lay out the product on a flat surface, straightening and leveling it along all seams and sides. We align the planks exactly in length and at the joint.
Then, so that they do not move apart during the process of sewing in the zipper, we sew them, connecting them with oblique stitches and making sure that the edges remain end-to-end - do not diverge or overlap each other (it somehow sounds funny in relation to the details, but I think you get the idea ).
The seam is hard to see in the photo because the threads are thin. I had to add stitches for clarity:

Now turn the jacket inside out. From the inside, you need to attach the zipper in the closed state, set it very evenly: so that the central axis passing along the teeth falls exactly at the junction of the slats. Additionally, you can secure it in several places with pins.
And now we baste the zipper, starting from the bottom, with oblique stitches (this way, it seems to me, it is fixed better and there is less chance that the zipper will move to the side somewhere). Yes, and it’s better to do it not hanging. You can put some cardboard inside the product so that you don’t inadvertently stitch it right through and also baste the zipper to the back.

Having reached the top, we adjust the required length of the zipper, and, if necessary, cut it.
Here I ran into a problem: if you cut it off, the teeth at the top are not secured by anything, and I’m afraid that the slider might fly off during use.
I tried to sew the edge there with threads, but I don’t think it will help much. Maybe someone can tell me how to solve this issue?
Here they swept the lightning. And now we sew it directly.
I do this manually. I don’t risk sewing on a machine, because I don’t know how a knitted fabric might behave under the foot. It seems to me that it is safer to use your hands.
We also sew along the wrong side of the work, starting from the bottom, with threads that match the zipper and the product. Here you should, if possible, try to lay a beautiful, even seam. Moreover, the “main beauty” is needed on the zipper braid, and on the front side of the work, that is, on the knitted fabric, the stitches need to be made small and unnoticeable.
That’s how I tried to sew: on the wrong side (from the side of the zipper tape) the stitches were wider, and on the side of the face of the product – shorter. It’s a pity, in the photo it’s not very noticeable what I got out of this - the threads merge with the braid, again I had to finish the stitches in red:

Yes, having reached the top, a closed slider can interfere with sewing. You can now undercut the stitching and lower the zipper slider down to safely sew it to the end. So we sew the zipper on both sides.
No, that's not all! If you are making a double collar, as I have here, with a bend in half, you also need to hem the edge of the collar to the neckline, and its side edges to the zipper. And now – EVERYTHING!

2015-10-17 Maria Novikova
How to sew a zipper on a knitted item? Sewing a regular zipper in itself is not a difficult job, but joining it with knitwear requires patience. Sewing a zipper onto a tightly knit sweater is one of the most time-consuming tasks and sometimes intimidating for beginners. To be honest, specialists also do not like to do this work, as it takes a lot of time. But since the lightning has broken down, you still have to do it. How to properly sew a zipper with your own hands so that it turns out beautifully and evenly? You will learn about this further.
You will need:

Before sewing a zipper to a knitted sweater, you need to carefully tear off the old zipper. Be careful not to touch the fabric, otherwise there will be holes that will unravel and become larger.


If, however, this happened:

Take a piece of adhesive fabric and glue it on the wrong side.

When sewing, the machine stitch will secure this area and the fabric will not unravel.
Take a new zipper, if it turns out to be longer than the old one, then put a mark at the top to what level to stitch it along the length.

Pin one side of the zipper to the edge of the sweater's side, pulling the zipper tape slightly and pressing the side down.

The mark at the top of the zipper should coincide with the fold of the stand-up collar, cut off the excess, leaving an allowance for the hem of the zipper.

Baste the zipper to the product using running stitches:

Pay special attention to the stand-up collar area, fold the top zipper allowance to the mark and push it inside the stand-up collar. Secure the zipper using hand stitches.


Fasten the other side of the zipper and mark on it the places of horizontal lines on the jacket. When zipping, they should match on both shelves.


Baste the second part of the zipper, taking into account the control marks on the zipper, and the horizontal lines on the second part of the front.

Before sewing on the zipper, secure the seam connecting the stand to the product. In some cases, when tearing off a zipper, it is necessary to prop it up.

Sew the zipper using a double-sided/single-sided foot and threads in the color of the fabric: the first line is 0.2-0.3 cm from the zipper

The second line is 0.5 - 0.7 cm.

In the places of the horizontal lines where the control points are fixed, do not remove the pins when sewing, this will ensure an exact match of the lines in the finished form. to table of contents
Sew the second side of the zipper, check the coincidence of the horizontal lines, including along the collar. Remove the basting threads, iron the clasp using an iron using an iron (cotton fabric) with moisture.

Use your new knowledge and experience to replace your broken zipper hassle-free. Now you no longer have to seek the help of specialists or look for information on how to sew a zipper. Having tried to sew a zipper on a knitted sweater yourself once, you will forever get rid of the problems associated with sewing a zipper to a knitted product.
P.S. Did you find this article useful?
Leave your comments and subscribe to blog news.
With friendly greetings, Maria Novikova
Stop being a gray mouse, join the ranks of the fashionable and stylish! Don't know how? I will help you!
Right now, place an order for a personal pattern or consultation on sewing and cutting clothes. Including consultation on the choice of fabric, style and personal image.
My . I'm on Twitter. Watch on Youtube.
I would be grateful if you use the buttons:


In general, when knitting a sweater, into which, according to the idea, a lock should be sewn, along the edge (at a distance of about 1.5-2 cm) I knit a path of purl loops on the front side of the product (i.e. in the purl row we knit one knit stitch, and in the front row we always knit the same loop purl). If you already knitted a blouse at the time of viewing this MK, don’t be upset. You can unravel one loop along the length of the entire product and lift it with a crochet hook. If at the bottom of the product there is a 1x1 elastic band like mine, then just the fifth loop from the beginning of the row will be needed (edge, knit, purl, knit, purl, facial, etc...)


What is good about this method (by the way, I came up with it myself and please do not accuse me of plagiarism) is that on the front side (thanks to the recessed purl loop) the cast-on row for the edge is not visible, but on the reverse side a very convenient chain of cast-on stitches

Now we take a circular knitting needle 1-1.5 sizes larger than we knitted the main fabric (in my case, I knitted with a 3-knit, but I cast on 4.5 knitting needles, 80 cm fishing line, ADDI-click). This is done so that the canvas does not tighten and looks neat. Next, we put on the knitting needle the half-loop of the knit chain closest to the edge. Like this:


We attach the thread and knit with front and back rows to the desired height (i.e. when the knitted strip is equal in height to the edge of the product):


Without breaking the thread, we lift the chain from the front side of the product by the outer loops along the entire height of the product and close it in a circle.


We knit another 4-5 circular front rows (about 1-1.5 cm) necessary for sewing in the lock and close the loops with a crochet hook. Use a larger hook to avoid pulling the edge again.


Lack of menstruation is the first sign through which a woman learns about her interesting situation. But can they go...

The 8th week of pregnancy is the 6th embryonic week. If you are used to counting in ordinary months, then this is the end...

Dotwork is a special style and technique of tattooing, which gets its name from the English word dotwork, which...

With our mothers, everything was very strict: it was necessary to choose black shoes for a black bag, and for a brown one...

Polka dots are one of the most common and at the same time the most difficult prints to wear. It’s worth missing out on some detail...

There are good words that we all come from childhood. And this is true, because over the years our past has not...

If previously only the classic three-strand braid was popular among women, now there are varieties...

Have you been married for several years and boredom has begun to creep treacherously into your marriage? You're not so interested now...

There is a very simple and easy way to make a mouse out of paper. Even children 3-4 years old can cope with such work....
Valentine's Day is an excellent occasion to say warm words of love amidst the winter blizzard and cold. A bright gift can...

The emergence of such a craft as weaving takes its roots from ancient times. With minimal stock...

“Gnomes” “Wild and Domestic Animals” Educator: Morgun Galina Vladimirovna “The more the child saw...

Despite the diversity of companies producing children's products, the doll industry has recently become noticeably...

Is the guy annoying you with his jealousy? Do you want to end the relationship and run away from him to the ends of the earth? Find out how...

The 8th week of pregnancy is the 6th embryonic week. If you are used to counting in ordinary months, then...
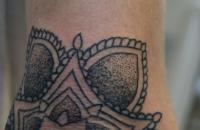
Dotwork is a special style and technique of tattooing, which gets its name from the English word...