The twelfth and thirteenth of January
1st of January. After hairdressing manipulations, your health may worsen. We do not recommend dyeing your hair, the results will not be...
The emergence of such a craft as weaving takes its roots from ancient times. Having a minimal supply of knowledge and materials, ancient people could easily build things and interior items using only one weaving technique. If you are wondering how to weave a three-dimensional figure from small elastic bands yourself on a special machine, then this article is for you!
Weaved from everything that came to hand. They made a variety of crafts that were useful not only in everyday life, but also as clothing. Therefore, there is no need to be surprised by the various variations of weaving techniques and basics.

The ancestor of all the basics of weaving is the macrame technique. It consists of knots and is performed using various types of materials, mainly strong threads. Modern needlewomen make products using this technique quite often. From time immemorial, craftsmen have been performing light and not so simple crafts almost every day. Even for beginners, many weaving techniques may seem simple, because in reality they are.

Today, such a technology of weaving crafts as making them from rubber bands is gaining momentum. According to the famous American entertainment channel, multi-colored rubber bands were recognized as the most popular toy in the world for 2013. It seems that nothing new happened with the birth of such a miracle, but still, the world will no longer be the same without their existence. This article will most likely be useful to parents, first of all. Because children have long been aware of what technologies, what crafts can be done with their help.

An activity such as weaving from rubber bands has a number of undoubted advantages. Thanks to the specific properties of making crafts from them, the child develops attentiveness, perseverance, fine motor skills and memory.
Thanks to this process of weaving crafts, you can reveal the child’s potential; he chooses the color, shape, and pattern of the product when creating his own product.
The slingshot is used as a machine for making crafts. It helps to quickly build the necessary crafts and make the children’s work easier. With this machine you can make animals, fruits, vegetables and cartoon characters. Perhaps the most common are products in the form of animals and fictional characters, but this applies to more complex production.

Even without a large machine, it’s easy to make simple crafts from rubber bands; you can try to make 3D bracelets from this material for beginners. In this master class you will learn how to independently weave a three-dimensional figure from bright elastic bands on a machine special for the job.
There are several types of machines:All of the listed types are perfect for making crafts from rubber bands with your own hands. There is a special set of elastic bands for braiding, called a monster tail, designed for this hobby. But its package does not always include tools for work. Therefore, when choosing sets, you should pay special attention to its contents. On the Internet you can study photos and videos of making various kinds of crafts from rubber bands.
And our master class will teach you how to weave an easy craft on a machine, in the form of a simple bracelet.
So, you will need:Your rubber band craft is ready. Enjoy it!
Weaving with rubber bands is a simple and straightforward task. It's surprising that no one thought of doing this before. According to legend, one father noticed his daughters weaving with rubber bands. He quickly figured out how to adapt this game into life and earned a lot of money, thereby glorifying this craft. The very first chains of them were so simple that it did not suit my father’s imagination at all. He built a loom for girls, teaching the children to weave more complex figures on it.
We will be incredibly happy if this master class helps you in mastering such a craft as elastic weaving. After all, with a little time and desire, you can get crafts of extraordinary beauty.
Children all over the world enjoy weaving various bracelets, toys and original figures from Rainbow loom bands. In order to do this type of needlework, in addition to the rubber bands themselves, you need a hook and a special machine. The pattern of the finished product depends on the type of machine, so in this article we decided to tell you what types of machines are there? for weaving from rubber bands. If you choose the right machine, your children will be able to confidently compete with others in their weaving skills.

How to weave on a slingshot? If you are right-handed, take the slingshot in your left hand. The side with the notches should be facing towards you. With your right hand, put the elastic bands on the posts. In this case, the first elastic band is put on as a figure eight, and the subsequent ones are simply pulled over two columns without twisting. After this, start weaving. Hook the lowest of the three elastic bands and remove it from the post to the center on both sides. After that, put on the next rubber band and take off the bottom one again.

What can you weave on a slingshot? You can easily weave a fishtail bracelet or a French braid on this mini-loom. She can make a beautiful ring with a flower that matches the color of the bracelet.


How to weave a Rainbow Loom monster tail on a loom? The elastic bands need to be put on four columns at once, and then each of them should be wrapped with this elastic band. After this, other elastic bands are put on four columns, but are no longer twisted. You can use all columns at once.
What can you weave on a Monster Tail loom? Most often, quarterfish bracelets are woven on such a loom; you can weave a bauble with butterflies, and if you use only part of the loom, you will get a fish tail. With a little more effort, you can create an original lipstick case or other accessories.

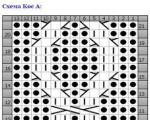
How to weave on a professional loom? First, decide on the type of product. It is not necessary to weave only bracelets on such a machine; you can significantly expand the range of handicrafts from Rainbow loom bands. Rubber bands are put on the posts around the perimeter. The first elastic bands are twisted in a figure eight, and the next ones are simply pulled on top. The principle of weaving is the same - the bottom elastic band is pulled with a hook through the post and removed.
What can you weave on a professional loom? The bracelet will look original, since it, unlike the Fish Tail, is wider. Some needlewomen managed to weave a dress from Rainbow Loom elastic bands.
If you plan to improve in the art of weaving, then buy a professional machine. Finished products made from rubber bands look quite original, and if you do everything correctly with your own hands, the cases and various accessories will be quite durable.
Everyone affected by the “rubber epidemic” knows that you can weave bracelets from rubber bands both on special machines and on any handy object - a slingshot, and even. But the most interesting and unusual bracelets made from rubber bands are made on a small machine, also called “monster tail”. Let's say right away that weaving bracelets from rubber bands on a small machine is somewhat more difficult than using other methods, but the result is worth it.
Let's take a closer look at how to weave bracelets on a monster tail loom. And let’s do this using the example of a weave called “double fishtail”:


In addition to the “Double Fishtail” bracelet discussed above, you can weave many other bracelets, jewelry and three-dimensional figures on the “monster tail” loom. Here are some types of bracelets that can be woven from rubber bands on a small machine:


The Monster Tail rubber band machine is the second most popular set from the American company Rainbow Loom. This is a mini version of the standard braiding device, which is convenient to take with you on the road.
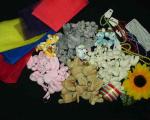
The set includes:
There are many options for weaving products using a Monster Tail machine from rubber bands. In addition to bracelets of various shapes, these can be keychains, toys and various jewelry. Let's consider several options for manufacturing products. It is worth remembering that when twisting the elastic band in a figure eight, the direction should always be the same: away from you or towards you.
For example, let's try to create a small keychain in the form
For the figurine you will need:
The process of creating a keychain begins with the design of the stick:
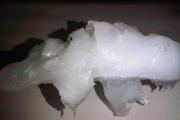
We continue weaving the “Ice Cream” keychain using the “Monster Tail” machine from rubber bands. We begin to make the “creamy layer”.

Weaving the “Ice Cream” keychain from rubber bands on a “Monster Tail” machine is moving into the final stage - creating the main part. We put on rubber bands of the color that we chose for the product.

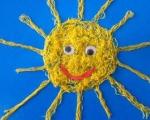
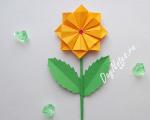
New ways of weaving bracelets on a round Monster Tail loom are constantly emerging. But you can, without using complex techniques, decorate an ordinary “fishtail” or “sea serpent” with flowers made from rubber bands. For one flower you will need rubber bands of three colors, for example, 8 red for the petals, 7 white for the middle and 2 green for the leaf. This master class will not contain information about how to use the Monster Tail machine - only the process of making a bud.

We prepare the necessary tools and materials: rubber bands, a machine and a hook. We will weave on 6 posts in the center.

We continue weaving on the “Monster Tail” machine from flower elastic bands:

Remove the flower from the hook and straighten it, pulling it to the sides. You can use them to decorate rubber band bracelets or a ring woven on a Monster Tail loom.

1st of January. After hairdressing manipulations, your health may worsen. We do not recommend dyeing your hair, the results will not be...
When decorating premises, you need to pay attention to even the smallest details. The fact is that a small decorative item...

The long-awaited baby appeared in the house. Every mother tries to care for him as best as possible, to monitor the slightest...
Vaseline is an odorless and tasteless odorless substance that leaves sticky marks on the body and is difficult to wash off....
. The “spoon” was created from . The base was wide.
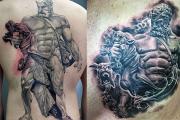
What does a Cerberus tattoo mean?

How to meet people on the Internet: first message You can meet a girl on the Internet

Do you think I like you more than you like me?...
It is impossible to win Dota 2 matches without having a good set of things. You can get these items in 2...
In this master class on creating a bouquet from toys, we will try to make such a bouquet with bunnies: Questions,...

What is a sash? Description, history and examples of use are described in...
If you are thinking about the question of what new and interesting things to do for your little master, then...
look very elegant and fashionable. But when choosing an interesting style for a child, you must take into account the quality...
Hi guys! I continue the topic on March 8, namely, I want to share my finds of beautiful and at the same time not...

When decorating premises, you need to pay attention to even the smallest details. The fact is that a small decorative...

The long-awaited baby appeared in the house. Every mother tries to care for him as best as possible, to monitor...