Jane Fonda aerobics for beginners for every day DIY bags master class
Many famous and beautiful women offered their fans personally developed sets of exercises...
Handmade fans are offered not only traditional techniques, but also completely new materials for realizing their creative fantasies.
For example, foamiran is a soft, synthetic material that is sold in the form of sheets of different thicknesses and formats, and responds to heat treatment. You can make figures from thick foamiran, and from thin foam you can make elegant flowers or an elegant New Year tree, which will surely decorate the holiday table or serve as a souvenir for your loved ones.
Tools and materials:
foamiran 2 shades of green (3-4 A4 sheets for a Christmas tree about 20 cm high)
scissors and ruler
iron
transparent glue or hot-melt gun
foam base or sheet of thick cardboard
beads, songs or any other decor of your choice. 
Foamiran feels like soft paper and can be painted and tinted with ordinary art materials, but it tears easily if you run a pencil over it that is too sharp. Its main feature is the ability to bend under high temperature without melting, emitting any odor or caking. An ordinary iron or curling iron will help you bend, twist or stretch the foamiran so that it forever retains its shape.
Let's start making the Christmas tree. For it, we will need a cone-shaped piece of foam, which can be found in a craft store, or a sheet of cardboard, from which you can easily make a cone yourself from a sheet of thick cardboard using a template. In this case, you can set the desired height of the Christmas tree yourself. 
Tip: you can use foamiran of any color or several different shades to suit your taste, which is especially true if you are choosing holiday decor in a certain color scheme. 
We cut foamiran into strips, which we then cut into approximately equal squares. The blanks do not have to be completely identical, so this can be done by eye. The main thing is that the dimensions of the “spruce paws” correspond to the scale of the Christmas tree itself: for a small tree about 10-15 cm high, small squares with a side of about 2 cm will be enough. 
We cut the finished flats with fringe on both sides to make a kind of diamonds. 
Now we get to the fun part! We carefully apply our workpieces to the hot surface, holding them by the uncut tip. 
Reminder: be extremely careful and attentive when working with hot appliances and ensure the safety of children if they help you with your work!
The fringe will begin to bend and twist in literally half a minute, which means you can move on to the next detail. We bend all the blanks in this way. 
When the “legs” are ready, all that remains is to glue them to the base in dense rows. Blanks of different colors can be alternated in rows or in a chaotic manner. We glue them with the “curly” side up, close to each other, so that there are no gaps and the curls are intertwined. 
The Christmas tree is almost ready, all that remains is to decorate the top and decorate it. A large bead or small plastic one is suitable as a pommel. Christmas ball ik. To decorate, you can glue individual beads and sequins to the tree, or you can wrap the tree with a garland, securing its ends with glue. 
When preparing decorations for the New Year, every time you want to do something new. Use materials that you have not worked with before. Some people always involve children in the creative process, while others start making new accessories long before the holiday. To make your Christmas tree beautiful and unusual, try making toys from foamiran with your own hands.
This could be a toy that hangs on the Christmas tree. But you can attach the snowman to a magnet, and then it will decorate the refrigerator or become a memorable souvenir for friends. The manufacturing basis will still remain the same.
To work you will need:

In the case of a magnetic main one, you will need the magnet itself or a magnetic strip. First you draw a template. This pattern should be transferred to cardboard. Trace and cut out, attention, 2 blanks. Using this blank you need to cut out a foam pad. Its thickness will be about 1.2 cm. And you glue this foam rubber bookmark with instant glue onto a cardboard blank.
Next, you need to cut a square (side 5 cm) from snow-white foamiran; it is needed for the snowman’s head. You need to glue the foam from the “neck” of the workpiece. This will cause the foamiran to stick together in folds with slight tension; the lower part of the head should be very even.
You can glue the foam on the back using either waves or cuts if the toy has a magnetic base. In the case of a hanging toy, everything is glued as neatly as the front side.

The second square is needed for the snowman's tummy. Approximately 7-7.5. In the middle of this square you need to make a neckline, very smooth. And then from the neck you begin to paste over the tummy. The lower abdomen should be evenly covered. Then, using a regular pencil, you make cheeks, eyes, a dot for the nose on the snowman’s face, and draw a line for the cap. Just let the pencil stripes be very thin so that they are not visible later. Cut out the cheeks and glue them with hot glue.
After this, you need to cut out a rectangle of pale yellow foam for the hat and heat it a little on the iron. Knead the material with your fingers. The bottom of the cap should be narrow, but not elongated, but stretch the top edge well. Glue the bottom edge of the cap along the line of the pencil strip.

So it turned out to be a snowman! As you can see, the work involves a lot of variation - a little girl will want more bright decorations for the snowman, while someone will prefer to leave it as white as possible. Appetite comes with eating, so decorating your craft can be an issue resolved in the process.
See how quickly and easily Christmas felt toys are made. The principle is simple applique, but it turns out beautiful and cute. You can work with foamiran in the same way.
From this material for the New Year you can make:

And to give these crafts a real New Year’s look, the finished product can be sprayed with glitter varnish. Regular baby hairspray with glitter will work just fine. All work is done on a cardboard basis. Foam can be cut, heated, and wrapped around the workpiece.
Foamiran is essentially foam rubber. Externally, the material is very similar to suede. When heated, it can change its shape, which is why this material is so often used in needlework. Sometimes the warmth of human hands is enough to change the shape; more complex manipulations require the use of an iron.
The good thing about the material is that it does not fade in the sun and is not affected by fluctuations in humidity. But the foam cannot be stretched too much; its stretch is no higher than 10%. And yet, when slightly crushed, high-quality material should not tear.

PVA glue is not suitable for working with foamiran. Second glue is used frequently. For cutting, scissors or knives are used, but a practical solution would be to purchase a hole punch with special decorative functions.
From foamiran you can make not only beautiful hairpins, jewelry, headbands, and necklaces. This is also good material for copyright Christmas decorations. It will turn out bright, unusual, and it will last for many years.
New Year's decoration made of foamiran: candlestick (master class with photos)
In this master class, I will show and tell you how you can make a wonderful candlestick from a wine glass. This candlestick can be given as a gift New Year to your loved ones and friends or decorate your holiday table.
To make a candlestick I needed the following materials:

Here are the basic materials we will need.

We place the glass on office paper, this will make it easier for us to shake off the glitter and reapply it to the glass. We cover the glass with acrylic varnish, using a stone to make uneven strokes. And sprinkle with dark blue glitter. Shake off the excess. If the glitter is uneven, sprinkle it again.

Then sprinkle with glitter of a different shade.

While the glass itself dries, we also process the stem of the glass. First, apply varnish, sprinkle with one color of glitter, and shake off the excess. Then sprinkle with the second color.

While the glass is drying, take the disk and blue foamiran, cut out 2 circles. One is the size of the disk to seal the disk on the back side. The second one is slightly larger than the hole on the disk with a diameter of 3.5 cm, to seal the hole.

Carefully apply instant glue to the foamiran, spread it all over the circle, let it dry a little and press well.

Glue the small circle onto the hole in the disk using instant glue, just like the large circle.

Then we glue the symbol of the year onto it.

Then we varnish the entire glass here and there and sprinkle it with white sparkles.

Take the button and glue it to the top of the leg in the dimple. But if the button is large, like mine, we cut off a little or bite it off with pliers. A button to ensure that the candle we place on the glass holds tightly.

This is how I glued it into the dimple on the glass.

Then we glue the glass itself. But to make everything feel like New Year’s, we will make pine branches from foamiran and glue them onto a disk around the glass. This is such a wonderful New Year's Eve we had.
We continue to make New Year's. If you are preparing gifts for children, then this version of a New Year's pine branch made of foamiran with a cone, inside of which a surprise is hidden, may be suitable for you. The idea of creating such a gift and the pattern were developed by foamiran master Elena Semanova.

This is a surprise pine branch with a pine cone that I propose to make today at the master class.
Required materials for the twig:
 The workpiece should open. Egg size 10 cm*5 cm.


Accordingly, we cut out two petal circles from brown foamiran with a diameter of 8 and 7 cm.

Cut out strips to form a cone. The first strip is 2.5 cm wide, 19.5 cm long and we cut out 13 scales on it, each 1.5 cm wide. The second strip is 3 cm wide * 80 cm and we cut out 40 scales on it. The width of each scale is 2 cm. The third strip is 3.5 cm wide * 100 cm. It also has 40 scales 2.5 cm wide.

Take white oil pastel and tint the edges of the petal circles.

We also apply tint to the edges of the cut strips. Shade the tint well.

Then we process the petal circles on an iron, heating the silk-wool at a temperature so that the scales rise slightly.

We also process the strips on the iron, applying them to the iron in small parts.

We take the lower part of the workpiece and attach the stem of the cone. If you have a workpiece, like I do, then take a wire, make a loop at the end and insert the workpiece. We glue foamiran on the inside and thicken the stem with paper to save tape.

Let's start forming the cone from the top of the cone. Take a strip with small scales and cut off 6 pieces, each scale separately. And we begin to glue the workpiece to the top, closing it.

Having stepped back a little, we begin to glue a small strip, glue the scales in a checkerboard pattern, and tighten the strip if necessary.

Stepping back a little, glue the next strip. Glue the scales overlapping and in a checkerboard pattern. We cut off the excess.

This is how we glue the rest of the scales.

This is how we glued the top of the blank.

We put on the lower part of the workpiece and glue the scales just above the edge and also overlap. Pull the strip a little.

We glue the subsequent scales, making a little fold since our workpiece has begun to round out. Glue the scales overlapping.

We take the petal circle, thread it through the stem and glue it to the base. Also placing the scales in a checkerboard pattern.

We also glue the second petal circle.

We open the cone and cover each piece separately with acrylic varnish so that our cone does not stick together. Let it dry well.

Take a strip of green foamiran 5 cm wide. The length depends on what branch you will make. I took 2 strips 5*70 cm.

Cut the fringe 1-1.5 mm wide.

We take wire and tape. We make a loop at the tip of the wire and treat it with tape.

We apply the cut fringe along the bias and glue it and begin to twist the fringe around the wire, gluing it from time to time.

I fringed 15 cm of wire, secured a branch with a pine cone, and wrapped the tape with tape.

So I made three branches and secured them together with tape at the point where the cone joined.
 The stem was treated with brown tape and tinted with green oil pastel. This is the branch with the cone we got. You can put any gift in the cone and give it for the New Year. You can decorate a twig with snow or flock powder, as if dusting it with snow.
 New Year's snowflake made of foamiran, photo
If you want to make a snowflake from foamiran, then you will need:

According to the pattern, we cut out blanks from white foamiran.

We cut holes on the workpiece to make the workpiece more beautiful.

We take a blue dry pastel and a damp cloth and tint the end of the workpiece, slightly extending to the edge of the workpiece.

We take six petals and tint the holes on the blank with blue dry pastel, using cotton swabs for this.

We process all the workpieces on an iron, heating them with the iron at a wool-silk temperature. And we wrap six blanks in a little bag.

We heat the rest of the workpieces on the iron and leave it there.

We take half beads and slightly decorate the blanks that were formed into a little bag.

I decorated it like this. You can according to your taste.

Then we glue the bags at the bottom.

And glue 6 blanks together, in the middle.

Then we glue the remaining blanks from below, glue them in a circle, slightly overlapping each other, and begin gluing the second row between the blanks of the first row.

Glue a bead in the middle. You can take a piece of white foamiran, cut out a zigzag circle with a diameter of 3 cm with scissors and also tint the edges with blue dry pastel, iron it and glue it in the center under the bead.

We treat the snowflake with acrylic varnish where we want to decorate it with sparkles. Instead of acrylic, you can use drops of glue.

Our foamiran snowflake is ready. The snowflake can be glued to an elastic band or a hairpin.
Also try making your own symbol of 2018 -
Foamiran is a relatively new material for creativity. It is plastic, easy to model, easy to care for and much more practical than products made from fragile polymer clay. The material is so easy to use that even preschool children can be involved in making crafts from foamiran for the New Year.
Such creative activities bring the family closer together and develop creativity in the child.

Almost anything can be made from foamiran. New Year's craft, but for joint creativity with children, choose simple products that do not require special skills or dangerous processes.
Attention! Do not trust children with heating devices and do not leave them unattended for even a minute. Before starting work, give a brief briefing on safety precautions and how to handle hot and sharp objects.
A Christmas tree is a beautiful, elegant craft made from bright foamiran, which is very easy to make and can be given to friends and relatives for the New Year.
You will need:
Progress:
Would you be interested in making such a craft with your child?
Yes
NoTo make a realistic Christmas tree craft in the form of cones and a pine twig, you will need all the same tools as for a tabletop Christmas tree, you just need to buy brown foamiran, brown floral tape, a piece of thick soft wire and a piece of foam plastic.


Many famous and beautiful women offered their fans personally developed sets of exercises...
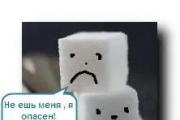
Scientists have concluded that sugar does more harm to the body than good. Consumption of sweets in huge...

Surely each of us, dear readers, has encountered at least once in our lives a situation when it becomes relevant...

What is the PP diet? This is, first of all, an abbreviation for “proper nutrition.” The idea of creating such a diet arose against the background...

Andriana Lima was born in Brazil in the city of Salvador on June 12, 1981. Andriana is one of the most beautiful women on the planet...

Details How to choose hair color: basic rules From time to time, any woman thinks about changing...

In this article we focus specifically on natural sugar substitutes. About synthetic substitutes....

“Learning is light!” – many parents tell their children. However, these words alone are not enough. For a schoolboy...

The use of a mobile phone has become such a widespread phenomenon that it required regulation, so...
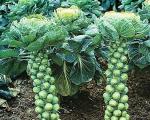
one hundred clothes and all without fasteners (riddle) Alternative descriptions Brussels... - a real storehouse of vitamin...
The mysterious “zealous long-maned horse” Of course, in folklore texts (even in literary adaptation) for...

140 riddles and answers Making and guessing riddles is a favorite pastime for many children. Riddles introduce...

Children's height and weight are rapidly changing values that are a very important indicator of overall development...
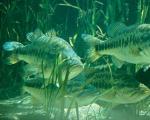
Do you think fish drink? I can already see your smile. After all, as soon as a fish opens its mouth, it is full of water. And along with...

Scientists have concluded that sugar does more harm to the body than good. Consumption of sweets in huge...

Surely each of us, dear readers, has encountered at least once in our lives a situation when...