Congratulations on the anniversary of the kume
The old legend says: When a man is born, a star in the sky will light up, To shine for him forever. So let the star...
Crocheting is a very exciting activity that only at first glance seems complicated. With a simple crochet hook, you can create truly knitting masterpieces! And anyone can learn to crochet.
For those who are just starting to learn to crochet, we offer several lessons on mastering this simple and such a necessary and useful craft.
The first thing you need to master when crocheting is knitting air loops, another name is a chain.
Crochet Air Loops
A chain of air loops is knitted like this:
1) The end of the thread is placed on the index finger. A hook is taken in the right hand so that the hook itself is directed in our direction.
2) The hook is passed under the thread, which is under the index finger of the left hand. The thread is hooked and the hook is turned counterclockwise a full turn. The resulting crosshair of threads is held with the thumb of the left hand.
3) The hook is again passed under the thread located on the index finger of the left hand. The thread is hooked, pulled through the cross hairs and tightened.

After mastering these simple lessons, you will be able to crochet very cute things. diagrams and descriptions.
Half single crochet
After mastering the knitting of air loops, which, as a rule, is not difficult, we move on to mastering the skills of knitting half-columns without a crochet. A single crochet is also the main element in crochet, which is very often used to decorate the edges of products, connect a chain into a circle, or separate parts.
A half-column without a crochet is knitted like this:
1) We already have a chain of air loops. A chain of air loops is placed on the index finger with the front side. The chain is held with the thumb and an air loop is knitted.

2) The hook is inserted into the third loop from the beginning of the row and passed under the thread on the index finger of the left hand. The thread is crocheted and pulled through the loop of the chain.
3) There are two loops on the hook. The loop on the left side of the hook is pulled through the loop on the right side of the hook. It turns out a half-column without a crochet.
Single crochet
1) A single crochet is knitted similarly to a half crochet. The only difference is that as soon as two loops have formed on the hook, the hook is inserted under the thread on the index finger of the left hand and the thread is hooked.
2) The thread is pulled through two loops and a single crochet is obtained.

3) The second single crochet is knitted like this. The hook is inserted into the loop behind the first column and held under the thread on the index finger of the left hand. The thread is caught and pulled through the loop, two loops are obtained on the hook. The hook is again wound under the thread on the left hand, clings and is pulled through two loops. It turns out the second single crochet.
Double crochet
1) There is a chain of air loops. Two air loops are knitted and a crochet is made. To do this, the hook is held under the thread on the left hand and the thread is captured.
2) The hook is inserted into the fourth loop of the chain, the thread is captured and pulled through it. A loop is formed, yarn over and another loop.

3) These two loops are knitted like this: the loop and yarn over are first knitted together (the thread is grabbed by the hook and pulled through them), then the two remaining loops are also knitted.
It turns out a double crochet.
Half double crochet
A half double crochet is knitted in much the same way as a double crochet.

Only when there are three loops on the hook, then all three loops are knitted together at one time. It turns out a half-column with a crochet.
How to tie a half-column (connecting, auxiliary loop)
A half-column can be double crochet and without. Consider how to tie a simple half-column. Another such column is called a connecting or auxiliary loop.
Consider, how to tie a half-column to the starting line.
Half-columns are used in knitting mainly in places where there is an increase in double crochets, to expand the pattern.
1. Insert the hook into the second loop of the chain (Fig. 1).
2. Pull this loop through the loop on the hook (Figure 2). You have a half-column.

Consider how tie a half-column in the next row.
1. Knit one instep air loop. Turn the knit counter-clockwise so you can knit the next row from right to left (left-handed left to right). Insert your hook under both strands of the last stitch of the previous round and pull up a stitch (Figure 3).
2. Draw the stretched loop through the loop on the hook (Fig. 4). You have a half-column without a crochet. Continue knitting to the end of the row, inserting the hook under both strands of the loop. Be sure to knit a half-column in the first edge loop of the previous row.


Consider, how to crochet a half crochet to the starting line.
1. Yarn over and insert your hook into the third st from the hook in the chain (Figure 5).
2. Yarn over and pull up a loop. There are now three loops on the hook (Figure 6).


3. Yarn over again and pull yarn through all three loops on hook (Figure 7).
4. You have knitted a half-column with a crochet (Fig. 8).


5. Continue to work single crochets into a chain of stitches. Count the number of stitches to make sure you knit as many stitches as you intended.

Consider how tie a half-column with a crochet in the next row.
1. Tie two lifting air loops. Turn the knit counter-clockwise so you can knit the next row from right to left (left-handed left to right). Yarn over and insert your hook under both strands of the penultimate st of the previous row (Figure 10).
Crochet is the execution of a variety of elements that together form a beautiful canvas. The column and semi-column are such elements. The ways of knitting them are different.
Beginning knitters are sometimes confused by the names of certain elements. And if everything is more or less clear with a simple (single crochet) column, then the half-column has other names, of which the “connecting column” is most often used. Thus, the half-column and connecting column shown in the diagram should be performed in exactly the same way.
Then why does the same element have different names? It's all about the purpose for which it is used in each individual case. The half-column usually appears as part of the pattern. And if in this way it is necessary to connect something imperceptibly (for example, to close a row or attach a part to a pattern point), then, accordingly, the term “connecting column” is used.
Let's move on to the very essence of the issue and find out what is the difference between a column and a half-column. Consider how a simple column fits in:
Here it would be useful to make some clarification. It concerns the fact that when knitting a single crochet, you can insert the hook not into the loop of the row itself, but into the space under it. This will increase the density of the canvas and slightly change the main pattern.
Now we describe the steps for knitting a half-column:

These descriptions give a complete picture of what is the difference between a column and a semi-column. The latter requires fewer actions and is less voluminous. By the way, if you knit each row exclusively with half-columns, the result will be a very tight knit. Recall also that we were talking about elements without a crochet. If a column or half-column is required to be double crochet, certain steps are added.
How to crochet a column
Crochet is based on stitches. So before making a knitted thing, you need to practice a little in knitting each one, and then knitting will no longer cause such difficulties and difficulties. The fabric will turn out beautiful and even if knitted with your own hands. It is worth remembering the main columns when knitting and designating them on the diagrams:
The half-column is called connecting. Of all, it is the simplest and therefore it is very easy to crochet it. To do this, look at the diagram below:
With half-columns, you can not only tie the canvas, but also apply it in other places:
A half-column or connecting column in diagrams usually looks like a dot or a rounded tick that is lowered down.

Connecting post
You can also crochet a half-column with a crochet, such a column can also be called a strong column. In order to do it you need:
Making a single crochet is very simple and easy, it must be done in two stages:
Double crochets can help to make a product with a pattern, while you only need to use different knitting techniques. Techniques differ in the way the hook is inserted into the previous row of the canvas. Single crochets can also be made according to the following scheme:
If you knit in the round yourself, then a single crochet can be created when you insert your hook into the jumper between the loops of the previous row.
A single crochet is usually drawn as a simple stick or a sign in the form of the letter T, but there are also other designations:

Single crochet
When you make a canvas with double crochets with your own hands, it turns out to be light and openwork. You need to do them like this:
Just like a single crochet, a double crochet can be knitted by capturing 2 walls of the loop in the previous row. By inserting a hook between the posts behind the front or behind the wall, or in two steps, you will get many different patterns. In the figure below you can see an example of knitting a double crochet in two steps:

Double crochets
If you have a desire, then you can make columns with two or more crochets, and not just one. Creating them is a little more difficult, but the product will have beautiful view. Double crochets are most often referred to as a vertical crossed out stick. The number of double crochets is the number of strikethroughs. Let's see how to do a single crochet:

Column with 2 crochets
According to the same pattern, it is necessary to knit columns with a large number of crochets, knitting loops in pairs as in a column with two crochets. The column turns out higher on how many crochets you have. Usually, these schemes are performed when complex openwork patterns are knitted, or when you need to add the number of loops in the canvas.
Embossed columns are made by hand when they usually knit an elastic band, a pigtail pattern, or any other beautiful embossed pattern. According to the execution scheme, there are some differences from a simple double crochet. Relief columns can be divided into two types:
Embossed columns have distinguishing feature, they do not start with a chain of air loops, they are made after at least one row is knitted with double crochets or a simple one.
Below you will see how to knit a concave and convex stitch.
convex column looks beautiful on the front canvas and it is done according to this scheme:

Convex embossed column
concave column looks a bit more difficult to knit on your own. For him, all the actions are exactly the same as for the relief column, only when you pull the thread, the hook is inserted into the second loop of the previous row so that the loop is under the hook. This must be done according to this scheme: insert the hook behind the canvas and wrap the previous loop from left to right. Then pull the working thread into a loop on the wrong side.

Concave embossed column
If you want, then the product can only be made with concave or convex columns, then the canvas will be the same on both sides. And if you alternate the columns, knitting the rows alternately, then the front side of the fabric will be smooth, and the wrong side will be ribbed. Embossed columns must be made with one crochet, but then the column is knitted in two loops in two steps.
The lush posts that you crochet turn out to be very beautiful. At first, you may think that doing them is very difficult, but for real it is not so. You just need to know these steps:

Lush column
With the help of crossed pillars with your own hands, you can make not only a whole product, but also knit them in various complex patterns. Typically, such columns are indicated by an icon - two crossed sticks.
In the diagram below, you can see how to make crossed columns yourself:

Crossed bollards
So when you learn how to do all the above columns, you can easily connect any interesting things for yourself.
Consider connecting post. I want to note right away that this is the same half-column without a crochet. They perform the same, but the purpose is different.
A half single crochet is a pattern element, and a connecting stitch is a way to connect rows. Why is one a column and the other a semi-column? The connecting column is a finished element, and the half-column is, as it were, a column that has not been completely tied to the end. This is the difference.
In theory, it’s naturally difficult to understand, so I suggest moving on to practice! 🙂
Consider an example of connecting two rows using a connecting column. Let's say we have a row that needs to be closed (do not pay attention to the fact that I have a circle connected, this is how all the connecting columns are done):
1. Since the beginning and end of the same row are usually connected, the edge with which we need to connect consists of lifting air loops. We put the hook into the last (upper) air lifting loop.
I draw your attention to the fact that in some cases they knit not counting the lifting air loops per row and then thread the hook into the first loop from the first column of the row


3. Pull the same loop (which we pulled from the instep air loop) through the loop on the hook. You will get such a connection, about the location of which only you now know, and even then, because you just tied it up and the loop on top, like a beacon, indicates the joint 🙂

In the diagrams, the connecting column is displayed as a black filled dot
If during knitting, in a description or a diagram, you come across an unknown animal - a half-column without a crochet, do not be alarmed, now we will bring it "to clean water"! 🙂
Let's say in the description there was a half-column without a crochet:


In the diagram, a half-column without a crochet looks like this:
This is how you and I were convinced of the identical performance of these two basic crochet elements.
To be honest, I most often use the designation of a connecting column in drawing up diagrams, even for half-columns with a crochet, since the diagram is greatly overloaded from the stripes and becomes more difficult to read.
The next lesson, in which we will apply the previously learned skills and the connecting column we just learned:
Don't miss the release of new tutorials!
Be the first to know about new products!

The old legend says: When a man is born, a star in the sky will light up, To shine for him forever. So let the star...

Do you know my gossip, how many years have we been friends with you? Although sometimes life breaks us, beats and spins. But...
Nobody is forgotten, nothing is forgotten. Many decades have passed since the last shot on that one, it seemed ...
Nomination: abstract of the lesson on the topic tools. Abstract of the lesson in the senior group on familiarization with the environment ...
For many kindergarten teachers, the question of how to properly and interestingly hold an open ...

Lunar wedding calendar for July 2019 indicating the days of the new moon, full moon, quarters of the moon, the location of the moon in ...

Lunar calendar of weddings for July 2019 indicating the days of the new moon, full moon, quarters of the moon, location ...

Why should you improve your memory? Ridiculous question, you say. After all, everyone knows what a good memory is.

The patroness and mistress of the year will be the Yellow Earth Dog. This animal is endowed with prudence and ...

Every woman wants to be beautiful, well-groomed, different. In this sense, well-groomed hair is of great importance and ...

ON THE. KRASNOV, school number 48, Krasnoyarsk Words of praise and censure in a pedagogical speech “How terrible they are ...

This thing can become one of the most indispensable in your wardrobe. Recently, this style of dress has become ...

The shirt dress is incredibly relevant this spring and summer. Its distinguishing features are a straight, uncut cut,...
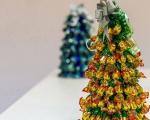
Contents A handmade candy Christmas tree is a good gift for friends and relatives....

23 Dear readers, spring always tells us that it's time to take care of ourselves. Of course, you always want...

Today, a wide selection of curlers of different shapes, sizes and materials is on sale. They are all entitled to...