Early signs of pregnancy with a girl
Is it worth arguing that pregnancy is an amazing time in every sense? So many pleasant discoveries, changes, mysteries...
When decorating premises, you need to pay attention to even the smallest details. The fact is that a small decorative item will make you look at the room completely differently, giving it a certain style intended by the designer. Taking this into account, recently items such as a deer head made of plywood and other similar products made from this material have become particularly popular.

To begin with, it is necessary to say that these designs look quite original on the wall and give it a special appearance. The fact is that a plywood head is not a hunting trophy and does not evoke feelings associated with killing animals.
At the same time, it visually differs from the usual form, creating an interior of a new style without making major changes to the layout. 


Advice!
Before applying primer to the structure, it should be pre-treated with fine sandpaper.
This will straighten the edges and eliminate lint on the surface.

By watching the video in this article, you can get more detailed information on how to make a similar decorative element from plywood according to the drawings. Also, based on the text proposed above, it should be concluded that there is nothing complicated in this work, and even a beginner can cope with it if he has the necessary documentation. However, it is necessary to have the skills to read drawings and understand the design features.
Similar materials


All photos from the article
For a long time, it has been customary to decorate the interior of a room with hunting trophies. After a successful hunt, they made a stuffed animal with their own hands, which was hung on the wall and for a long time testified to the skill, accuracy and luck of the shooter.
Today the situation has changed radically, since many animals are under state protection and their shooting is prohibited. Of course, you can buy a stuffed animal of one or another part of a killed animal, but the price of such a trophy will be high.

In this article, we offer an alternative to buying expensive stuffed animals, because a deer head made of plywood will look much more original and modern than a stuffed animal stuffed with straw. In addition, you can be proud that no animals were harmed when decorating the interior of your living room.

Many readers of this article had to attend labor classes or handicraft clubs or something during their school years. If you have experience in such activities, then you can easily cope with the work that we will discuss below.
If you have no experience working with a jigsaw, let us explain that a manual jigsaw is a tool designed for delicate cutting of thin lumber. Structurally, it consists of a metal frame with a handle, and a narrow, fine-toothed blade is clamped between the ends of the frame.
The advantage of a narrow blade is the ability to cut lumber both starting from the edge of the sheet and indented from the edge. In this case, a through hole is drilled in the sheet, into which the canvas is inserted. As a result, it is possible to make complex figures, for example, a deer’s head with an eye, to which there is no cut from the edge of the sculpture.

If you have a jigsaw and drawings of a rhinoceros head made of plywood, you can easily turn your design idea into reality with your own hands
Below we will bring to your attention several instructions from which you can choose the craft that will fit into the interior of your living room.

Perhaps, let's start with the most common hunting trophy and look at the drawings of a deer head made of plywood. Making a deer, as well as other animals, is creating a kind of 3D puzzle. That is, a certain number of parts are made from lumber, which are assembled into a single structure.
Today, not many people have a stuffed deer head hanging on their wall. It’s much more humane and cheaper to make it yourself, especially since such jewelry is in fashion now. They can be completely different, from color to material. Although it is not easy, if you are attentive and diligent, then everything will certainly work out.
It is important to pay special attention to the sizes. The deer head on the wall should correspond to the size of the room in which it will be located. If you make it too large, it will look extremely out of place and interfere with the overall design. And a sculpture that is too small will not look as impressive as it could.
If there are men's hands ready to help you, then the deer's head can be made of plywood, since you will have to work with a jigsaw there. If this option does not work, then you can get by with regular cardboard. These are the most optimal materials for this purpose.
But if it is possible to make it from plywood, then it is better to opt for it. After the structure is ready, it can be treated with impregnation, painted, and the decoration will look very beautiful. In addition, the final appearance of the product largely depends on the paint. If you decide to use several colors, it will look even better.

The advantage of plywood is that it is flexible, easy to saw with a jigsaw and glued together. Craftsmen recommend using bakelite-based plywood for crafts. Its important property is its resistance to moisture, that is, in the future the finished product can be easily washed. But, unfortunately, this is an expensive material, and not everyone will decide to spend such a lot of money.
The finished product will certainly collect a lot of dust, so wet cleaning will be mandatory. This once again confirms that treating the plywood with impregnation and painting will be a mandatory step.

It will take about 10 hours to make this decoration. Material - ordinary cardboard.
In order for everything to turn out neatly and efficiently, it is better not to rush. Take breaks during the process if you feel tired, especially if you need to work on small parts, as painstaking work can be very tiring. Also, be extremely careful when working with cutting objects; carry out all such actions in the direction away from you.

In fact, the deer head is a common decorative element today. Precisely not real or even made with your own hands. Even the most ardent animal advocates can hang such a thing in their home. Moreover, such a decorative element can fit perfectly into any interior, since there are now many different variations made from a variety of materials.
This design will look much friendlier than a scary stuffed animal. Such decoration will allow you to express all your creativity, possibly adding some new elements. Here you can fully realize your dreams and complement the design of the room with such an original decoration that you will definitely not see anywhere else.
Try cutting down a bull like this. The craft is not complicated. To cut this craft you will need:
Confrontation between Bulls and Bears, a symbolic gift to a trader.
Bull head dimensions:
51 cm x 45 cm x 56 cm.
Material: 6 mm plywood, preferably without defects. Cutting out the craft is not difficult, which means it will take little time to make it.
Since the model is quite voluminous and the lines of the drawing are quite smooth, many elements can be cut out with an electric jigsaw - this will reduce the time costs several times. It will take about 8 hours to make the bull's head.
You will also need a wooden ruler, copy paper, hard pencils, thin files for a hand jigsaw, sandpaper, needle files, a jigsaw key, and a drill.
The drawing must be translated accurately and accurately. The drawing in A4 format is ready to be transferred to plywood; to do this, simply print it out and use an iron to transfer it to the plywood. You can read about how to do this in the following article: .
When making the drawing, the bull's head first had to be made of cardboard in order to identify all the shortcomings and give it a more presentable appearance. It was decided to turn the bull's horns at a slight upward angle. 
When cutting, do not forget about the position of the jigsaw in your hand. Watch your posture. If you want the craft to look beautiful, take your time. After cutting, clean each part first with “Medium” sandpaper and then with “Fine” sandpaper; some parts should be cleaned with needle files.

The photo shows that assembly is not very difficult. Assemble the craft according to the rule: part number 1 must be attached to another part number 1, part number 2 to 2 parts, and so on. First, assemble the craft on the table, then if all the parts fit well into the required grooves, start gluing. You need to glue it using PVA glue. Be careful and do not allow any leaks, because... at the final stages of processing, for example with stain, areas with glue smudges will remain whitish and will not absorb the dye. 
To make the craft beautiful, you can coat it with spray paint of any color, or coat it with wood varnish. The ends of the parts can be coated with paint of a different color to reveal the contrast of the edges.
There are a wide variety of finishing options, it all depends on your imagination.
How to make a deer head from cardboard for free without registration and SMS February 19th, 2015

There are a lot of interesting ideas on the Internet regarding models of animal heads, they come up often, and I really want such a thing for myself.
So I started looking for ideas, besides, I haven’t done layout work for a long time and I wanted to cut it out.
In the process, I came across a site with scans available for free download.
http://www.instructables.com/id/Create-faceted-paper-..
I printed them out on 14 A4 sheets, bought 3 sheets of thick cardboard size 50x70 for gouache and away we go.
I didn’t transfer the printouts themselves onto cardboard in any way, I simply applied the sheets of printouts to the cardboard one by one, fixed them, pressed them tightly with my hand so that they wouldn’t move, and cut out the stationery right on top. with a knife, making more slits for folds.

The first 10 sheets are the head, the last 4 are the horns.

For gluing, I printed out the scans again, so that there would be where to look for the part and understand what to glue to what.
Gluing is not as difficult as I thought, you apply number to number and glue it, at first it is more difficult to find 2 identical numbers, but in the end it naturally goes without numbers, the main thing is to constantly check the printouts. I got confused a couple of times and had to unstick it.
To be fair, it is worth noting that the work can be significantly simplified by printing the scans directly on top of the cardboard and cutting them out without translating anything. The disadvantage of this approach is that these numbers and lines will remain on the head itself, but I wanted a clean layout in the color of cardboard.
Everyone will find their own cutting method)
You can turn on your imagination and then paint the head with acrylic, you can cut out details from multi-colored sheets randomly, you can do everything in one color, or like me: the horns are one color, the head is another, or even cover it with gold leaf or wrap it with wire, the result depends only on your imagination .

P.S. - It took me 2 months to cut and glue. Leisurely evenings, 2-3 times a week for a couple of hours.
In principle, it’s quite possible to do it in a week if you sit with concentration every evening.

Is it worth arguing that pregnancy is an amazing time in every sense? So many pleasant discoveries, changes, mysteries...

June 27, 2013 On June 27, 2013, the official opening of the first stage of the complex with an area of 20,000 sq.m. took place...
We are so accustomed to caring hygiene products that we can no longer do without them. These funds make our lives...
Stage 1. Goal setting Project participants: Group teacher, children 1 ml. groups. Goal: to develop children's speech activity...
This is my first review, so if I mess up anything with the design, before I show off my bragging on this site...
Silver is a simple chemical element of the first group and the fifth period. Silver is designated by the symbol - Ag (from the Latin...
Unlike women's, men's wardrobe is much more conservative and less influenced by fashion...

Activation of amulets and talismans After cleansing, the amulet must be activated and awakened to work. Most...
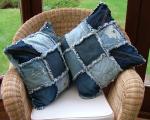
Did you know that you can make a lot of useful things from old jeans for your home, children, gifts for friends, etc...

From January 1, 2018, citizens of Moscow who have given birth to or adopted a child will be given a box for newborns....

Original description To put it simply, the gist is this: Standard head circumference sizes (as I understand it, this is...

Mikhailova Ilona In order to solve various trichological problems, folk cosmetology offers...
Lessons (master classes) of weaving from rubber bands for beginners: how to make a flower - a simple figure on a pencil or...

Both of them have a small but relatively constant income with the right approach. Those who set their sights on...

June 27, 2013 On June 27, 2013, the official opening of the first stage of the complex with an area of 20,000...
We are so accustomed to caring hygiene products that we can no longer do without them. These funds make our...